How to Get the Windows 7 Fully Updated ISO for a Smooth Experience
In this guide, we’ll walk you through the process of downloading and using the Windows 7 fully updated ISO, giving you everything you need to keep your PC secure and efficient.
Let’s get right to it.
How to get Windows 7 fully updated ISO
Download the Required Windows 7 Updates
- Download Windows Updates Downloader (version 2.50) and install the program.
- Download the following update list to match your 32-bit or 64-bit Windows 7 install media. The below update lists have been created by Raymond.cc and include required patches and hotfixes from Microsoft to the stated date.
Download Windows 7 Updates ULZ File 32-bit (updated January 16th 2020)
Download Windows 7 Updates ULZ File 64-bit (updated January 16th 2020)
Note that these update lists will be the final version as they include the last patches released by Microsoft before the end of support (any bugs or errors will be fixed). Optional update KB4493132 might be offered for download during an update check. This is the Windows 7 end of support popup nag which is not required. Just ignore or hide the update.
These lists do not contain all available Microsoft patches but those that will bring a standard system up to date in accordance with Windows Update. One exception is the definitions for Windows Defender. Double click the downloaded ULZ file to import the list to the WUD program.
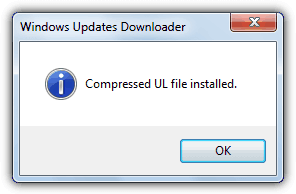
Note: If you don’t get a popup saying the ULZ file has been imported, for some reason your system has not been correctly configured to recognize the .ULZ filetype. The .ULZ is actually a renamed ZIP file containing a .UL file which is an XML file. To manually import the update list, extract the .ULZ file with an archiver such as 7-Zip and copy the .UL file to the following location:
C:\Users\[username]\AppData\Local\Supremus Corporation\Windows Updates Downloader
When WUD is run the list should now be present in the drop down.
- Open the WUD program, click Change to choose the download folder for the updates and make sure the Update List in the drop down is for Windows 7 SP1 x86 or x64. To get your Windows 7 up to date with patches and hotfixes download everything in all sections apart from Optional Software.
- Click Check all and uncheck Optional Updates if you don’t want anything from that section. The total download is around 1.7GB for 64-bit and 1GB for 32-bit.
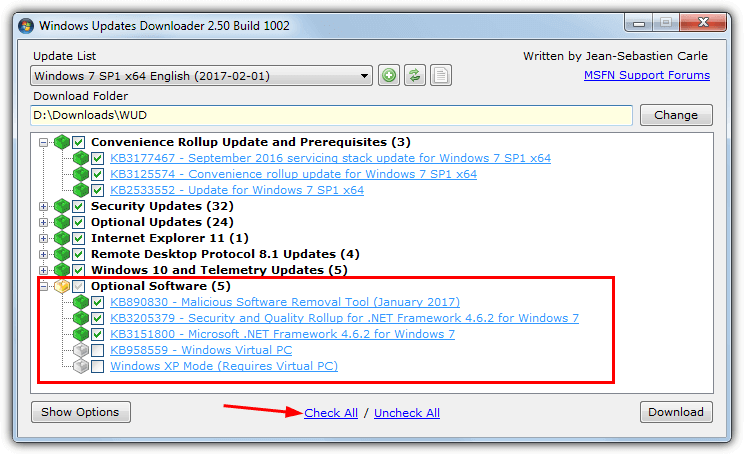
Optional Software contains the Malicious Software Removal Tool and the latest .NET Framework with hotfixes. Expand the section to check what you want. They are not essential but fulfill the requirement inside Windows Update. Silverlight and Virtual PC are entirely optional and will not be required by most people. Click Download when you’ve selected the required files.
The list is split into a few categories so you can choose not to install patches containing telemetry or Remote Desktop etc.
They can be manually hidden from inside Windows Update after checking for updates.
Integrate The Updates Into The Windows 7 Media
Now you have the updates ready, they can be integrated into the media. The developer of nLite and vLite has another tool called NTLite that does a similar thing but works on windows 7, 8.1 and 10.
NTLite has a shareware version so not all options are available in the free version, but the needed integration functions can be used.
- First and foremost you need a Windows 7 Service Pack 1 DVD or ISO image to hand. If you don’t have one you can download an official Windows 7 SP1 ISO which can be burned to DVD or written to USB later.
- Copy the contents of the DVD to a folder on your hard drive. An ISO can be extracted with an archiver such as 7-Zip or mounted as a virtual drive and then everything copied to a folder.
- Download NTLite and install it (a portable mode is available during install). On the first launch select the free license and press OK
- In the NTLite window click the Add button and browse to the folder you extracted/copied in step 2, click Select Folder. Windows 7 will then show in the Source list.
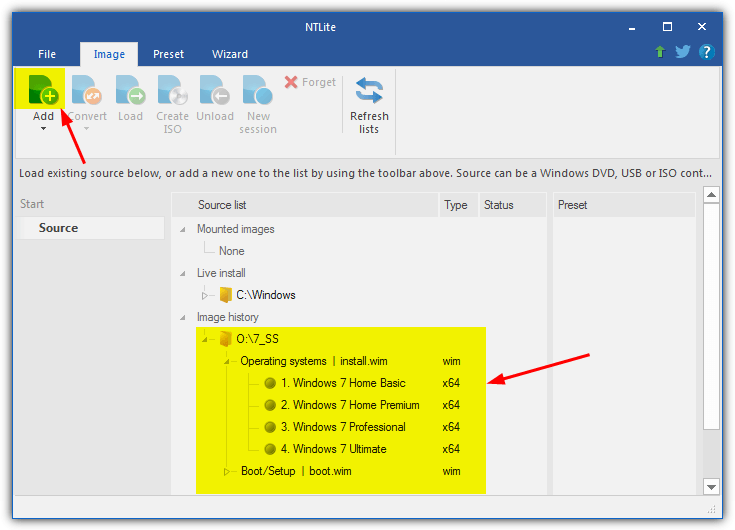
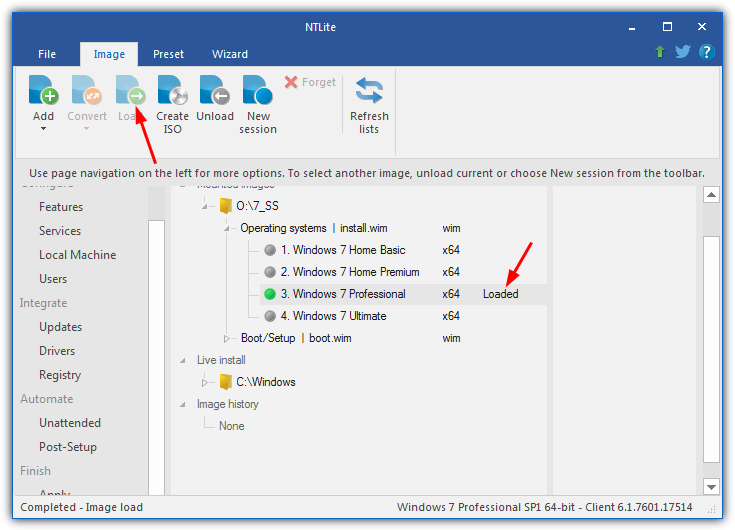
- Select the operating system in the list you want to integrate the updates into and press Load. The program will extract the Install.WIM to the NTLite Temp folder. The operating system will show as Loaded with a green icon and a number of options will be available down the left side of the window.
- Click Updates in the Integrate section.
- Click the arrow below the Add button and choose Folders and subfolders found packages, then browse to the folder you saved the downloaded updates to earlier and click Select Folder.
- After a few seconds, the list will be populated with all the updates to integrate. If you also downloaded some optional software an “Unreadable or unsupported file” error will pop up, just ignore it.
Alternatively, you can drag and drop individual folders onto the window or select them via the Add button. Don’t add the Optional software folder to avoid being shown the error. No matter how you add the updates, NTLite is smart enough to reorganize everything into the correct order for integration.
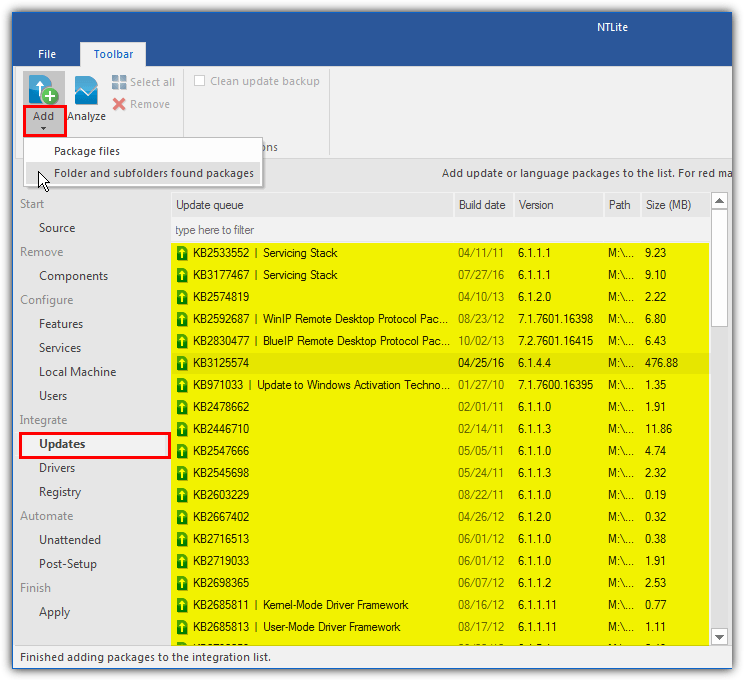
Note that if a couple of updates (KB3125574 and the current security rollup near the bottom) show in red, ignore it. This appears to be a small issue with NTLite as it asks for Service Pack 1 to be in the update list even though it’s already present on the install DVD (assuming you have an SP1 DVD/ISO).
If you don’t want to install the optional software of the Malicious Software Removal Tool, .NET Framework and Virtual XP etc, you can now begin the task of starting the integration process. If you do want to add them, go to the section on page 2 about adding optional extras. Then return here and continue with step
- You can also integrate the updates first and add the extras later.
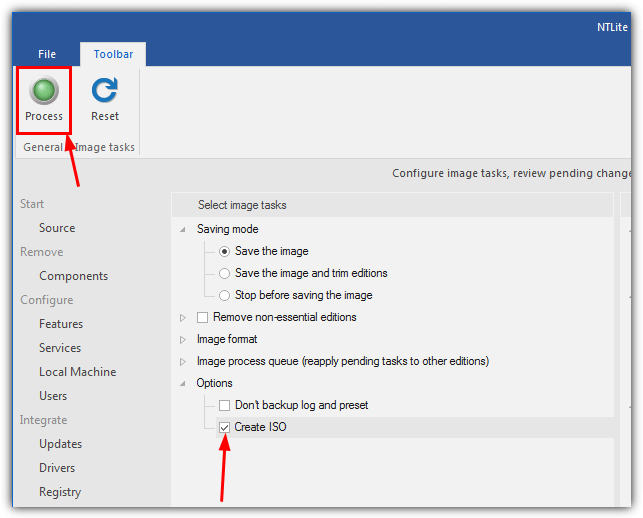
- Click the Apply button, check the Create ISO box and choose the save location and file name for the ISO image file. Press the green Process button and wait for the integration to finish.
How long the whole thing takes depends a great deal on the speed of your system’s drives. A fast system with an SSD could finish in under an hour, a low spec desktop or laptop will take several hours longer.
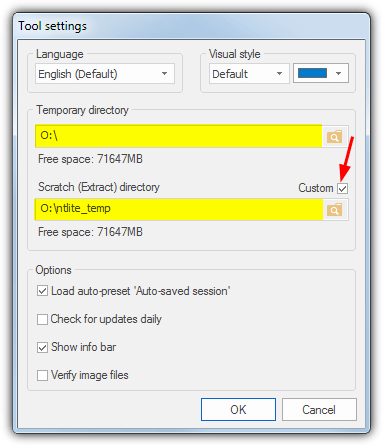
Tip: The whole integration process can be sped up massively by using an SSD or even a RAM disk if you have 16GB+ of memory. NTLite defaults to the Windows Temp folder to store its files which is usually on the C drive. If not already, it would be a good idea to go to File > Settings and change the “Temporary directory” and especially the “Scratch directory” to a folder on an SSD or RAM disk. Put these folders on the fastest drive your system has with at least 10GB of free space.
- Once completed, you will have an ISO image which can then be burned to DVD, written to USB flash drive or loaded into virtual machine software such as VirtualBox or VMware Player for testing.
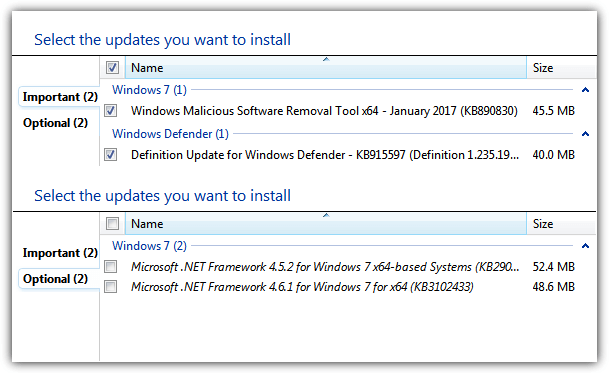
With a check of Windows Update, you can see we only have a few updates left, Some of them can be removed by adding optional updates like .NET and the MSRT.
That would leave us with only Windows Defender definitions. Do be aware that you still might have hardware drivers and any other updates that are region or language-specific to download, but the vast majority are now already installed.
Special Note About the Final Windows Rollup Update
With the final January 2020 Rollup update (KB4534310), Microsoft has seen fit to show a nag screen on all consumer Windows 7 machines. This informs you about the end of support and recommends upgrading to Windows 10. You have to interact with this screen before continuing by pressing “Don’t remind me again”. That should stop the nag appearing anymore but as it’s Microsoft, you can never be sure.
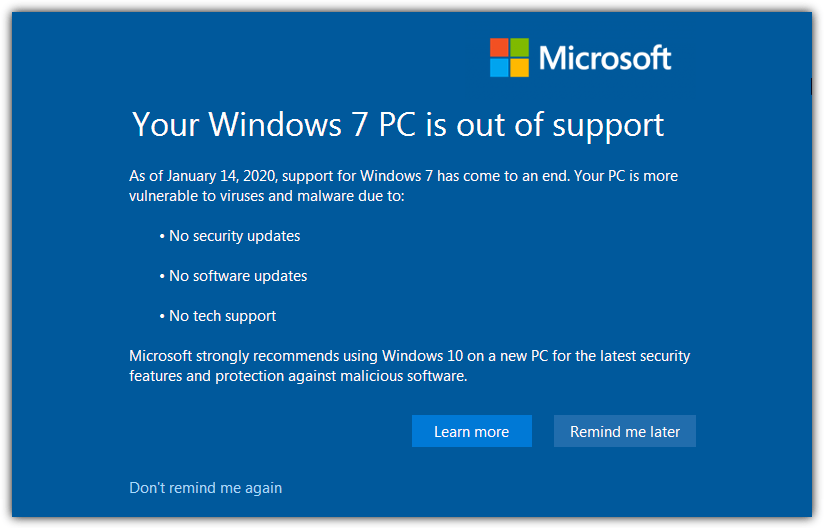
Although it’s only a mouse click, if you don’t want to see this window after installing from an integrated install media, a few extra steps are required.
1. Download our EOSNotify_Del.bat file. During the Windows final setup phase, it will rename the EOSNotify.exe that installs to System32 and remove the two scheduled tasks that run the executable at certain trigger points.
2. After step 6 in the NTLite integration guide above, go to the Post-Setup window. Drag and drop the BAT file onto the window.
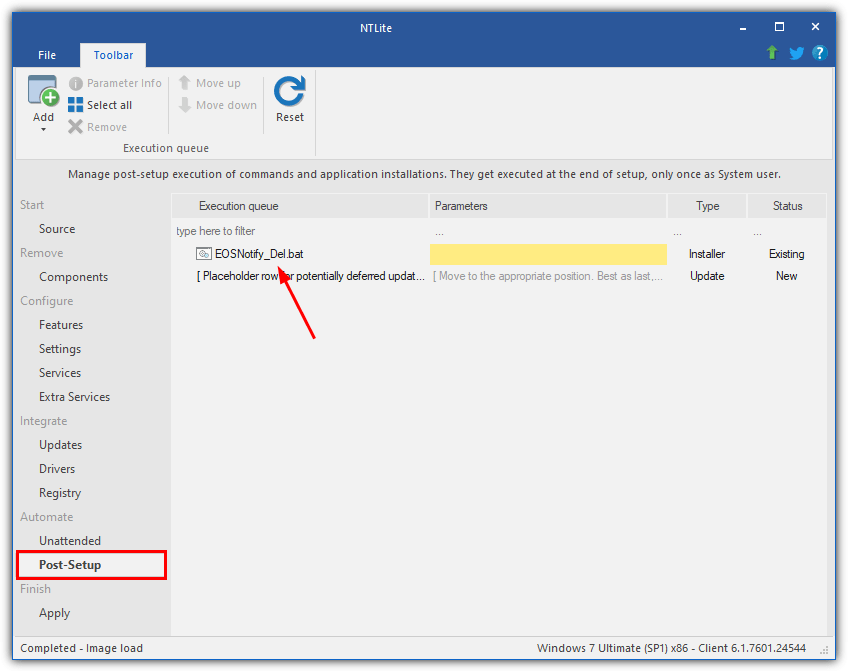
3. Continue with the integration process by moving onto step 7. The End of Support Notification executable is controlled with a registry value and the two tasks, the method we have chosen to use will remove the chance of the executable running, either by mistake or by design.
Read how to add the optional updates, how to update all Windows 7 editions in the image, hiding updates and fitting the media onto DVD on page 2.
Adding Windows Update Optional Extras
Even though you might have all the hotfixes, security patches and Internet Explorer 11 integrated, there are still other components offered by Windows Update. They include the .NET Framework and the Malicious Software Removal Tool. These are executable installers and not Microsoft Update (MSU) files so can’t be integrated. Instead, they need to be installed silently during first logon. Here’s how to add them.
1. Making sure you have downloaded the needed installers and completed step 6 of the main guide on page 1, press Post-Setup on the left of the NTLite window.
2. Click the Add button and browse to the Optional Software folder. Choose a file from the Optional Software folder. Alternatively, drag and drop the folder or individual files onto the window.
3. The setup installer will appear in the list, simply enter /q into its parameter box so the install will be silent and automatic.

Note: If you’re adding .NET Framework and its hotfixes, make sure to put the main installer first and then each update in turn from lowest KB to highest to help avoid issues. Use the Move up/down buttons to reorganize the files in the list, the install order is top to bottom. Make sure to put these updates BELOW the “Placeholder row for potentially deferred updates” to avoid unnecessary updates appearing in Windows Update.
4. Once you have added what you want, proceed to step 7 of the integrate guide on page 1 and continue with the process (Apply, enable create ISO and then Start).
Tip: You can also include third party software installers in this section such as CCleaner, Paint .NET, Skype, VLC and etc. We won’t expand on that too much as this article’s focus is on Windows updates. All you really need to know is the command line switch to make the install automatic, Something like /q, /s or /quiet works in a lot of cases.

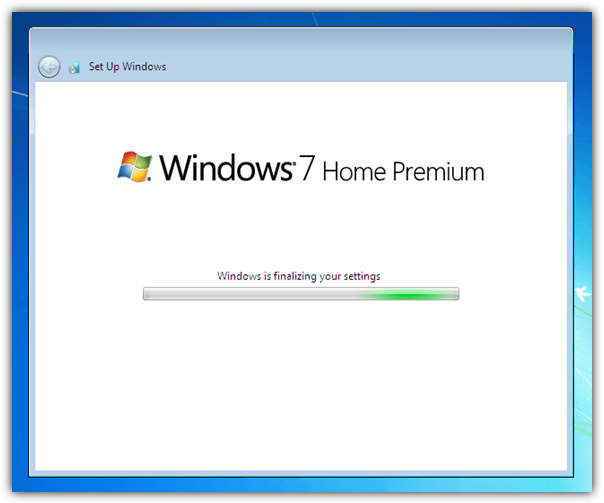
During the Windows setup process, the entries in the Post-Setup list will be installed at the “Windows is finalizing your settings” screen, The computer could stay on this screen for several minutes depending on the number of programs and updates to install, so don’t panic.
Note: A few times while testing we encountered a problem after integration and installation that Internet Explorer keeps displaying the “meet your new Browser” welcome page and loads the tab every time you open the browser. To stop this happening you can add a command in the Post-Setup window. Click Add > Add Command and enter Reg in the left Item box, enter the following in the parameters box:
add “HKLM\Software\Policies\Microsoft\Internet Explorer\Main”
/v DisableFirstRunCustomize /t REG_DWORD /d 1 /f
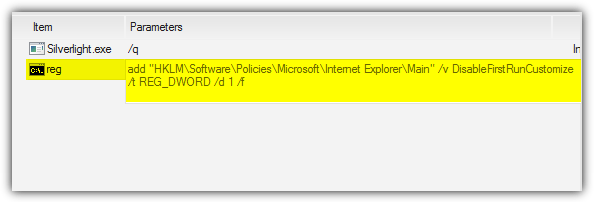
Alternatively, download the small batch file below and either add it to the Post-Setup window as a file or execute it after the installation of Windows (run as admin) if you find you have the problem.
Download Disable IE welcome Batch File
Fitting The Integrated Windows Onto A 4GB DVD
If you integrate all updates into Windows 7, including the optional software, you are left with roughly a 4.9GB ISO image for the 64-bit version. This is too large to fit onto a single layer DVD so you have to make the ISO smaller to get it to fit. There are a few things you can do.
a) The obvious thing to do is not include optional software. As none of it is integrated into the Windows image but installed separately afterward, it makes no real difference if the software is stored on another medium. This will save around 200MB so other reduction options will still be needed.
b) Another option is removing the versions of windows from the ISO you have no use for. If you only want Home Premium or Professional for example, remove all the others which could free up a few hundred Megabytes of space.
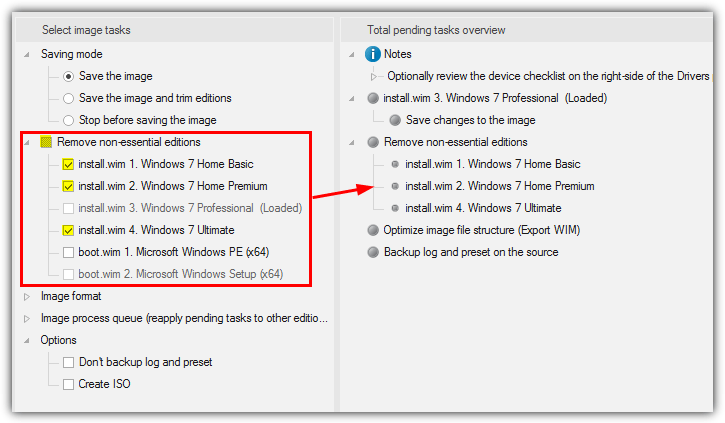
This can be achieved by checking the “Remove non-essential editions” box on the image tasks screen before pressing the Process button. All other Windows 7 editions apart from the one you are working on will be removed.
Alternatively, open the section and selectively check what you want to have removed.
c) Removing components from the Windows image via NTLite is another option although most of the components are not available for removal in the free version. However, you can remove a few things like unused languages, DVD Maker or TIFF IFilter to free up some space.
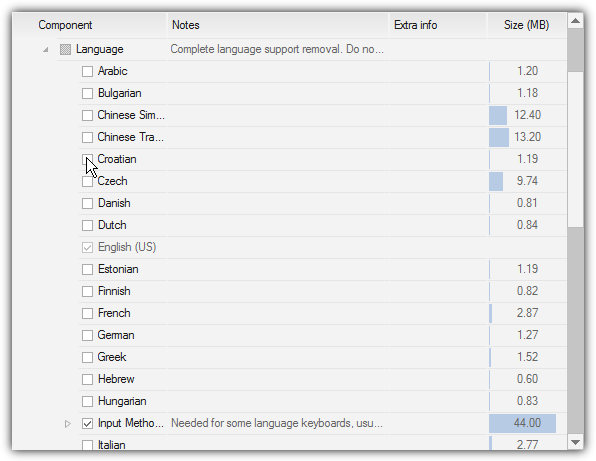
The problem with removing components is it could cause problems with the updates you are installing. Therefore, this option is always quite risky and could cause instability or crashes.
You also need to apply the same settings to all Windows 7 versions inside the image or it won’t work as intended.
d) A final option to reduce the size of your ISO is removing a few of the files found on the DVD. Once you have extracted or copied the contents of the Windows disc to a folder, delete the contents of the Support and Upgrade folders to free up around 70MB.
Luckily for Windows 7 32-bit, a fully integrated install DVD is under 3.5GB so you won’t have this problem. There’s still plenty of room for other applications.
Integration With a Multiple Version Windows 7 ISO or DVD
Many users will know that an official Windows 7 DVD or ISO image only allows installation of a single version of Windows.
If you have a Home Premium disc, you can’t install Professional or Ultimate with it. There is an easy way around this by deleting the ei.cfg file from the Sources folder to unlock all versions on the same disc.
When you perform an integration it is effective on the Windows version you have chosen only. To update everything on a single disc the integration has to be run on each version in turn. The major downside is this increases the time taken to create a fully updated install media by up to five times.
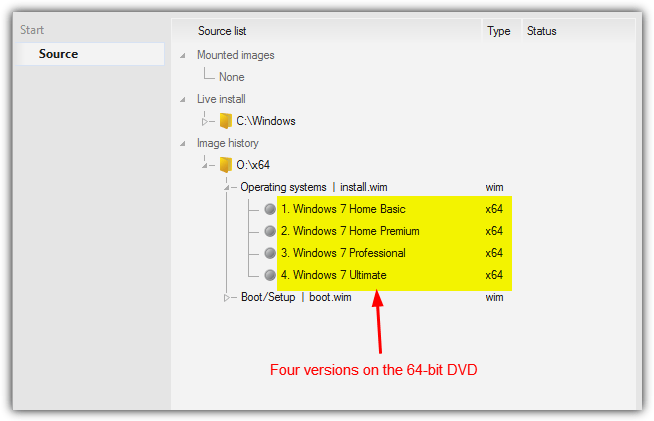
1. After browsing for the copied/extracted Windows 7 files in NTLite, all the versions available will show up in the source list. Choose which one you want to work on first and go through steps 5 and 6 from the main integration guide to add the updates.
2. Instead of following step 7, click the Apply button then expand the “Image process queue (reapply pending tasks to other editions)” tree in the Select image tasks window. Also, expand “Integrate – Updates” and check the relevant boxes for other editions you want to integrate the updates into.
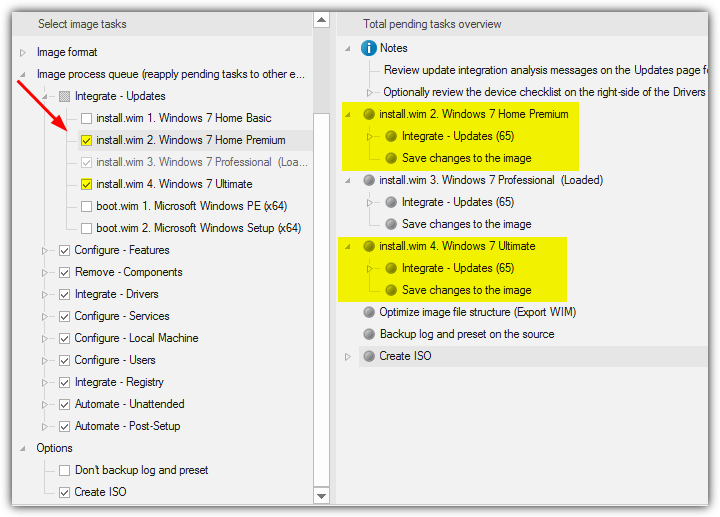
3. As you add a task to the list the right pane will show that the same actions will be applied to each edition. Make sure to enable Create ISO at the bottom before pressing Process.
All selected versions will be updated and saved to the image one by one before the final ISO is created. The optional software and post setup updates are added just once so will only appear in the first integration.
Note it is not possible to leave this process completely unattended as the free version of NTLite pops up an OK to continue box after each integration process is complete. The next integration won’t start until you press the button.
During the installation process, you will still be given the choice to install any of the Windows 7 versions available on the media, the ones you have edited through NTLite will be fully up to date once installed.
This method should also work if you have created an All-in-one install media with both 32-bit and 64-bit versions of Windows 7, although you have to be extremely careful about not integrating the wrong architecture updates, i.e. not using 32-bit updates on a 64-bit version, and vice versa.
Adding Your Own updates to the Integration Process
If you find there are any updates for Windows missing and they haven’t been included in the download lists, you can add them manually if you know the KB number of the update.
1. Visit the Microsoft Update Catalog and type the KB******* into the search box.
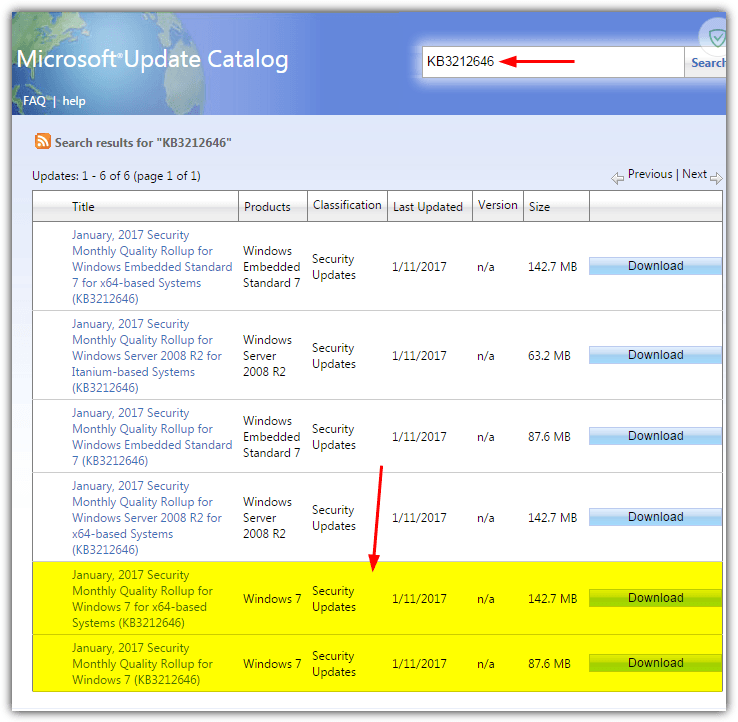
2. Check the details on the results page for the correct version and press the blue Download button to download the update file.
3. Move the downloaded file to the Windows Updates Downloader folder. If it’s a Microsoft Update file (.MSU) or a CAB file it can be integrated from the Updates window in NTLite. A setup executable (.EXE) can be added in the Post Setup window of NTLite.
Hiding Hotfixes In Windows Update
If you don’t want to install every single Windows 7 patch to satisfy Windows Update, specific updates can be hidden. You won’t be asked to install the update in future and it won’t be listed as pending for download or install. The Windows 10 and telemetry updates are a prime example of something you might want to hide and not install.
The process is very easy. Open Windows update, click on “xx important/optional updates are available” and find the update you want to hide. Make sure it is not ticked, right click on the entry and select Hide update. The update will then be grayed out, right click and select Restore update to bring it back again.
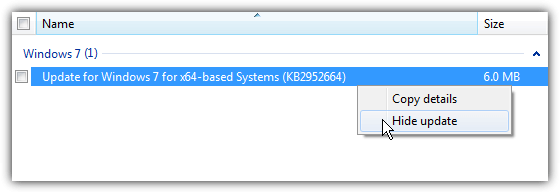
To restore a previously hidden update, click on Restore hidden updates on the left in the main updates window. Check the required box and click Restore at the bottom.
You will have needed to select manually check or download and choose updates during the install process or the missing updates will try to install automatically. To alter the setting to manual click the Change settings button on the left in the main updates window. Then choose the suitable option in the drop down menu and click OK.
Final Note: Users who have previously been involved with slipstreaming will know there are many other functions you can perform while integrating. You can also perform unattended installs which don’t ask for interaction during install, adjust settings such as Windows Service states, integrate drivers and remove other Windows features. The full removal feature set is only available in the paid version of NTLite which starts at $45 including 1 year’s worth of updates.
Troubleshooting Tips for Common Errors
Even the best-laid plans can hit a snag. Here’s how to handle common issues when integrating or installing Windows 7.
Common Issues and Fixes
- NTLite Error: “Unable to apply updates”
- Fix: Run NTLite as Administrator and recheck the updates integration steps.
- Fix: Ensure your ISO file isn’t corrupted. Redownload if necessary.
- Missing Updates after Installation
- If updates don’t appear post-installation, use Windows Update Downloader to manually download and install them.
- Driver Installation Failures
- Check the Device Manager to see if the drivers were successfully integrated. If not, try reinstalling drivers manually from the manufacturer’s site.
Conclusion
Windows 7 users simply do not want to upgrade because the operating system is stable and does everything they want.
Despite its popularity, the last Windows 7 Service Pack 1 install DVD was released way back in 2011. If you install Windows from one of those discs, there are dozens of patches and hotfixes found when you check for updates.
Remember that using NTLite to remove any features and components from Windows could break the integration and cause any number of issues because you might be adding updates and the components or required files have been removed.


User forum
456 messages