Block Ping Requests in 4 Easy Ways
Ping is a very useful standard utility that is used to test the connection between computers. It can be found built into Windows as early as Windows 95 and up to the current Windows 8.1 and even on other operating systems such as Linux and Mac OS. Normally when there is a connection problem for a computer, the first thing an administrator or technician would do is run a ping test between the computers and see if there is a reply. If there is a ping reply, it rules out that the problem is related to the network connection.
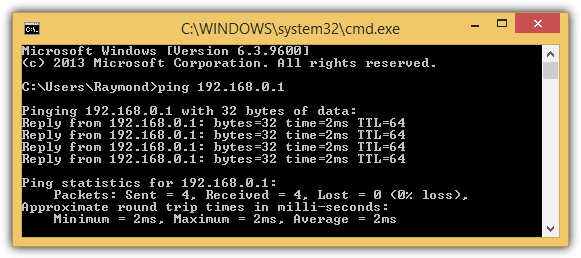
As useful as it is, hackers can also use ping to scan a network subnet to find potential online computers that are easy to break into due to misconfiguration on the security settings or download your files from folders that are openly shared without authentication. That is why there are situations when there is no need to reply to ping requests such as when you’re connected to a public Wi-Fi. Even the newer Windows operating systems are smart enough to block ping requests if you’ve selected your network location as public network.
If you want to disable or enable ping requests, here we’ll show you some common places to check.
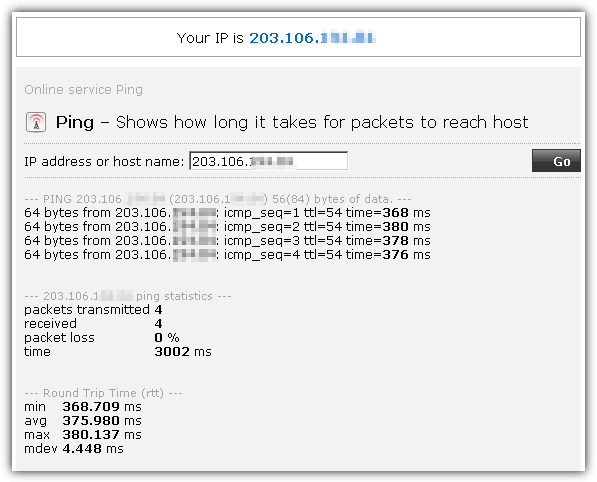
First of all, you need to determine if you want to enable or disable ping reply on an internal or external network. For external ping request, you’ll need to configure your router instead of your computer. To see if an external source can ping your IP address, visit ping.eu, click on your IP address that is shown on the webpage and click the Go button. If you see a 100% packet loss that means your router/network is already safe from external ping. However, if ping.eu shows result like the screenshot below, that means your router/network is responding to ping requests.
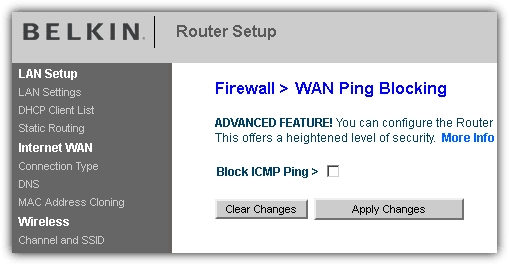
You may want to refer to your router’s manual on how to access your router’s configuration and check the firewall settings. Below is a screenshot of a Belkin ADSL router’s settings that can be configured to block ICMP ping. Some routers have very straight forward setting on how to block WAN ping while some can be quite difficult to configure for a novice user.
To enable or disable ping replies for your computer or laptop on an internal network (an example is when you’re connected to a public Wi-Fi), this can be achieved either through the Windows settings or a third party firewall software.
1. ZoneAlarm Free Firewall
For ZoneAlarm Free Firewall, there are only two zones in the software which is Public and Trusted. Zones in ZoneAlarm is automatically selected based on the network location profile in Windows. For example, if you’ve selected Home network as the network location for a Wi-Fi connection, then ZoneAlarm automatically sets the zone as Trusted and vice versa.
If your computer is responding to ping queries, then disabling ping response is as easy as changing the zone from Trusted to Public ZoneAlarm. Launch ZoneAlarm, go to FIREWALL tab, and click on View Zones for Basic Firewall.
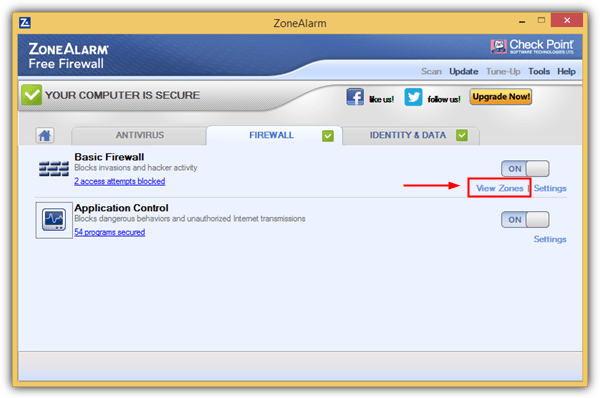
At the View Zones tab, select the network that you’re connected to and click the Edit button. Click the dropdown menu for zone and select Public.
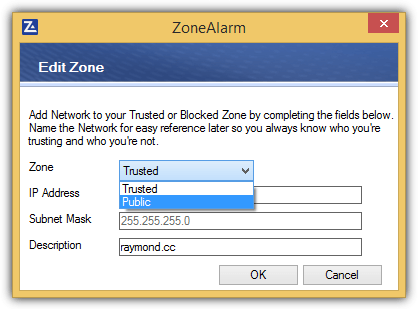
If you want to re-enable ping reply, set the network zone back to Trusted.
Download ZoneAlarm Free Firewall
2. Emsisoft Online Armor Free
Emsisoft Online Armor Free will automatically disable ping reply and there is no way to configure the firewall rules to re-enable ping. Unlike the paid version where you can switch to advanced mode to configure the ICMP rules, the free version doesn’t allow you to switch to advanced mode but only allows standard mode. So if you are using the free edition of Online Armor, what you can do is temporarily disable the Firewall protection by right clicking on the Online Armor tray icon and click on Firewall to deselect the checkbox.
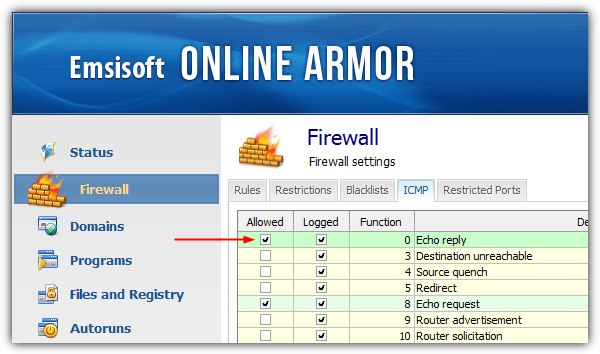
If you are using the paid version, run Online Armor, go to Options > General tab > switch to Advanced Mode. Click on Firewall at the left sidebar of the program, go to ICMP tab > select the allowed checkbox for function 0 which is the Echo reply.
Download Emsisoft Online Armor
3. Comodo Free Firewall
Comodo automatically decides if ping should be allowed or blocked based on the network zone that you’ve selected for a connected network.
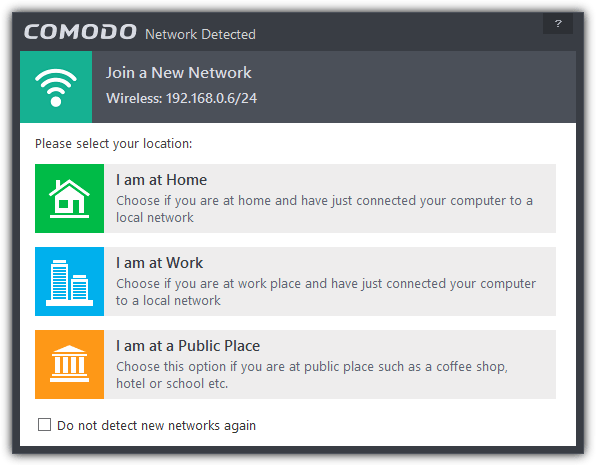
If you’ve selected either Home or Work, then ping is allowed. However the Public Place network zone blocks ping requests. If you’ve selected Public Place and want to enable ping requests, you can manually configure the global rules to allow ping instead of block.
Right click on the Comodo Firewall tray icon located at the notification area and select Advanced View. Right click on the Comodo Firewall tray icon again, go to Firewall and select Settings. Expand Security Settings > Firewall and select Global Rules. Double click on the rule that says “Block ICMPv4 In From MAC Any To MAC Any Where ICMP Message Is ECHO REQUEST” and change the action from Block to Allow. Click OK to close the firewall rule window and OK again to save the changes.
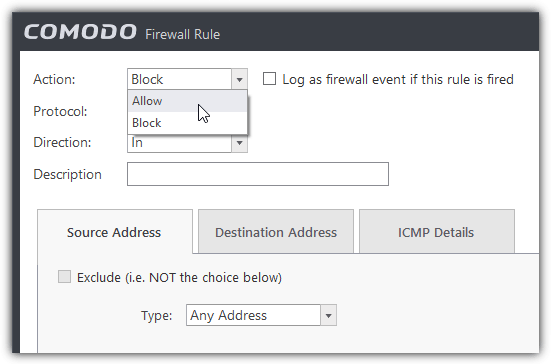
Alternatively, you can also temporarily disable the firewall from the tray icon to allow Ping replies. Don’t exit or terminate the program because the firewall will still be active even though the tray icon is not shown at the notification area.
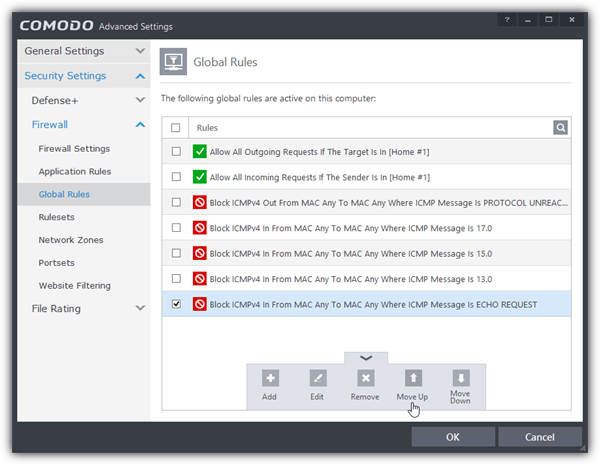
On the other hand, if you’re on a Home or Work network zone that allows ping requests and you want to disable ping replies, you just need to move the firewall rule located at the bottom that blocks all ICMP echo request all the way to the top so that it overrides the first two rules that allows all incoming and outgoing requests if target/sender is in home/work zone.
4. Windows Firewall
It is actually not necessary to rely on third party firewall software to enable or disable ping replies as Windows Firewall can be configured to do that.
4a. Press the WIN key, type WINDOWS FIREWALL and run it.
4b. Click on Advanced settings located at the left hand sidebar.
4c. Click on Inbound Rules at the left pane.
4d. Click Action from the menu bar and select New Rule.
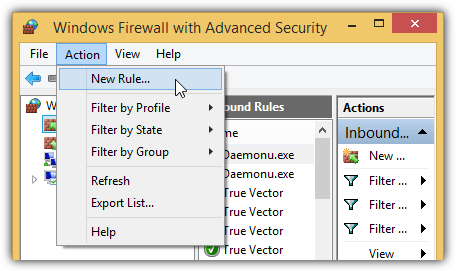
4e. Click on Custom and click Next.
4f. Make sure the All programs option is selected and click Next.
4g. Click on the Protocol type drop down menu, select ICMPv4 and click Next.
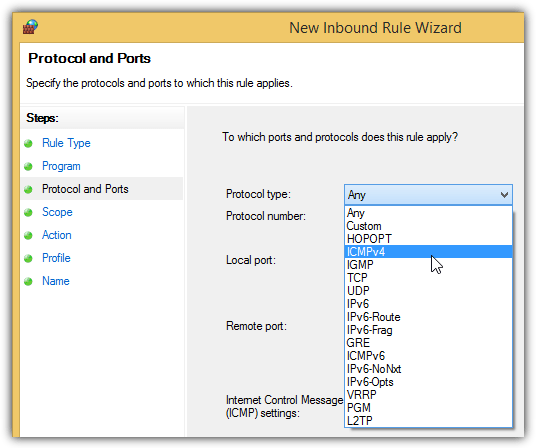
4h. Make sure both “Any IP address” is selected and click Next.
4i. If you want to enable ping when you are connected to a public network, select “Allow the connection”. If you want to block ping even when you are connected to home network, select “Block the connection” option and click Next.
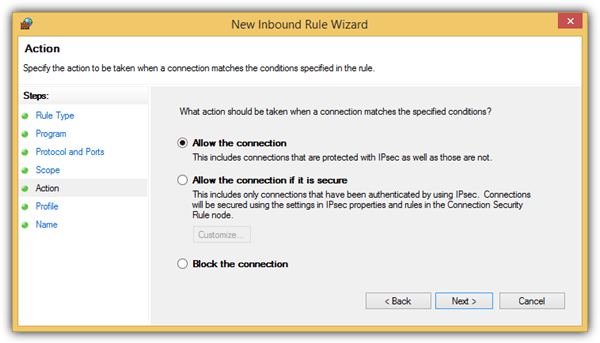
4j. You can leave all the checkboxes ticked for the profiles and click Next.
4k. Give this new rule any name you like, for example block ping or allow ping and click Finish. The newly created firewall rule will take effect instantly without requiring a reboot.
Additional Note: In the Windows operating system, selecting your network location as Home or Work will allow ping while the Public network profile will block ping. The above Windows Firewall rule will override the network location rule.


User forum
13 messages