Download and Install AdGuard DNS for Fast, Secure, and Ad-Free Internet [All Platforms]
If you ever felt like ads are following you everywhere or that your internet isn’t as private as it should be, you should consider downloading and installing AdGuard DNS.
It helps block ads, trackers, and malicious websites and works on all popular platforms. Whether you’re on a phone, laptop, or even a smart TV, setting it up takes just a few minutes.
Here’s how to download AdGuard DNS and start browsing with fewer distractions.
System Requirements
AdGuard DNS is a cloud-based service that works on any device allowing manual DNS configuration. Here’s what you need:
- Operating Systems: Android, iOS, Windows, macOS, Linux
- Network Compatibility: Works on devices with custom DNS settings (smartphones, tablets, PCs, routers)
- DNS Addresses: Primary – 94.140.14.14, Secondary – 94.140.15.15
- Extra Features: Family protection and custom filtering via adguard dns hostname
If you’re interested in testing DNS changes efficiently, check out Test and Change DNS Servers Quickly with DNS Jumper.
How to Download and Install AdGuard DNS
1. Visit AdGuard DNS’ Official download page
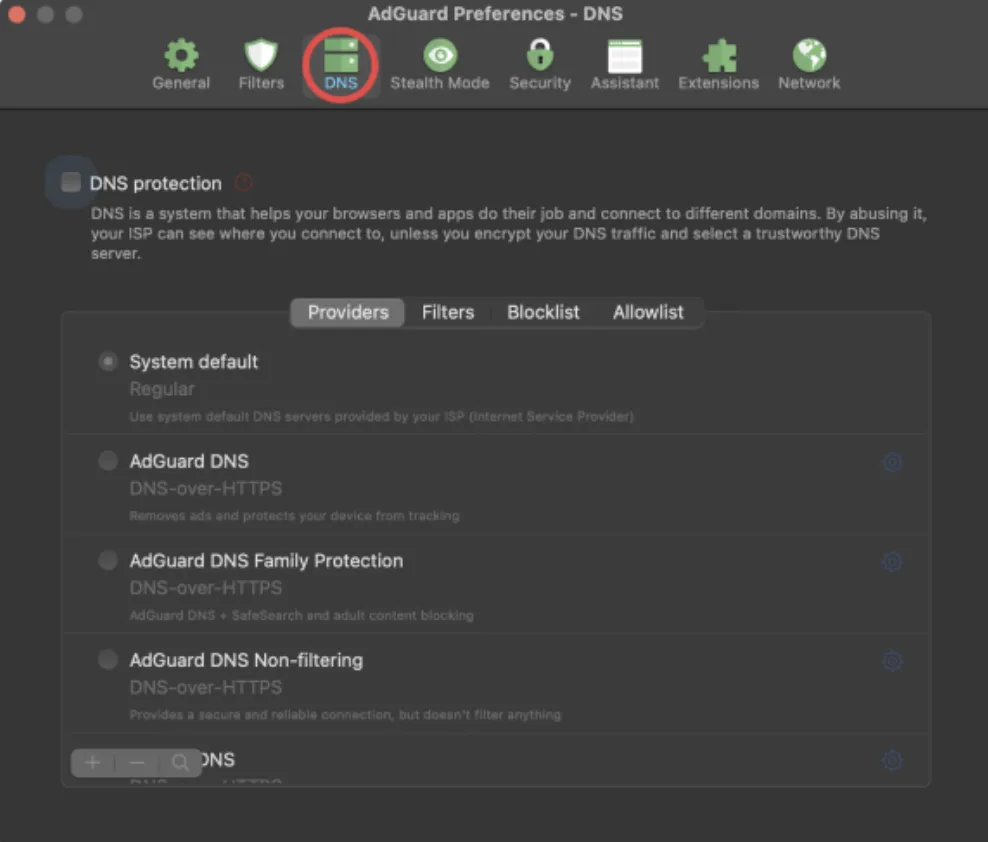
AdGuard DNS not only blocks ads and trackers but—when set up as Private DNS—offers enhanced features such as traffic encryption, customizable domain blocklists, detailed DNS statistics, and parental controls. These options are all managed through a user-friendly dashboard, giving you complete control over your network filtering.
Part 1: DNS-Level Setup
1. Download and Prepare
- Visit the Download Page:
Head over to the AdGuard Download Page to review setup instructions and get the necessary files. (For routers, no app download is needed—just the DNS addresses.)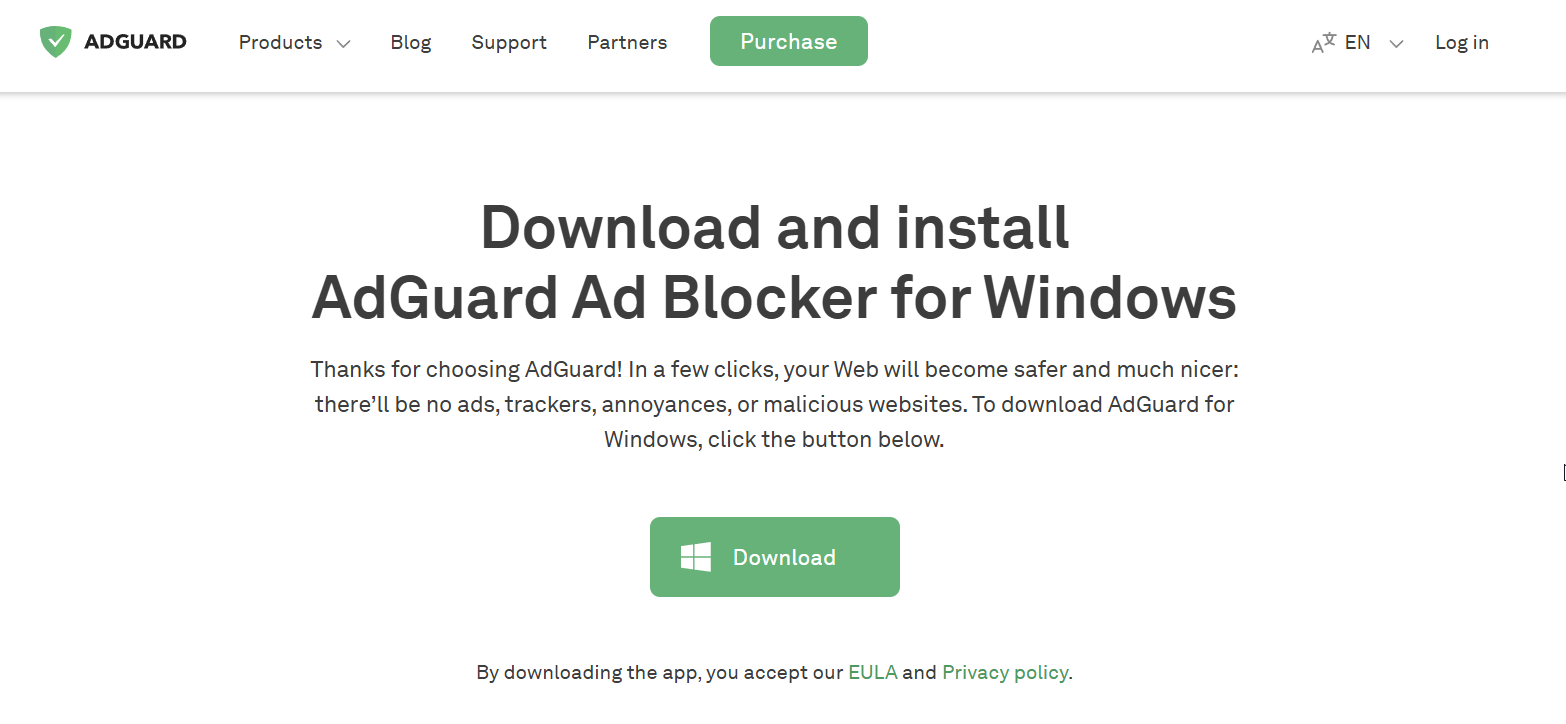
2. Configure DNS Settings
- Mobile Devices:
- Android:
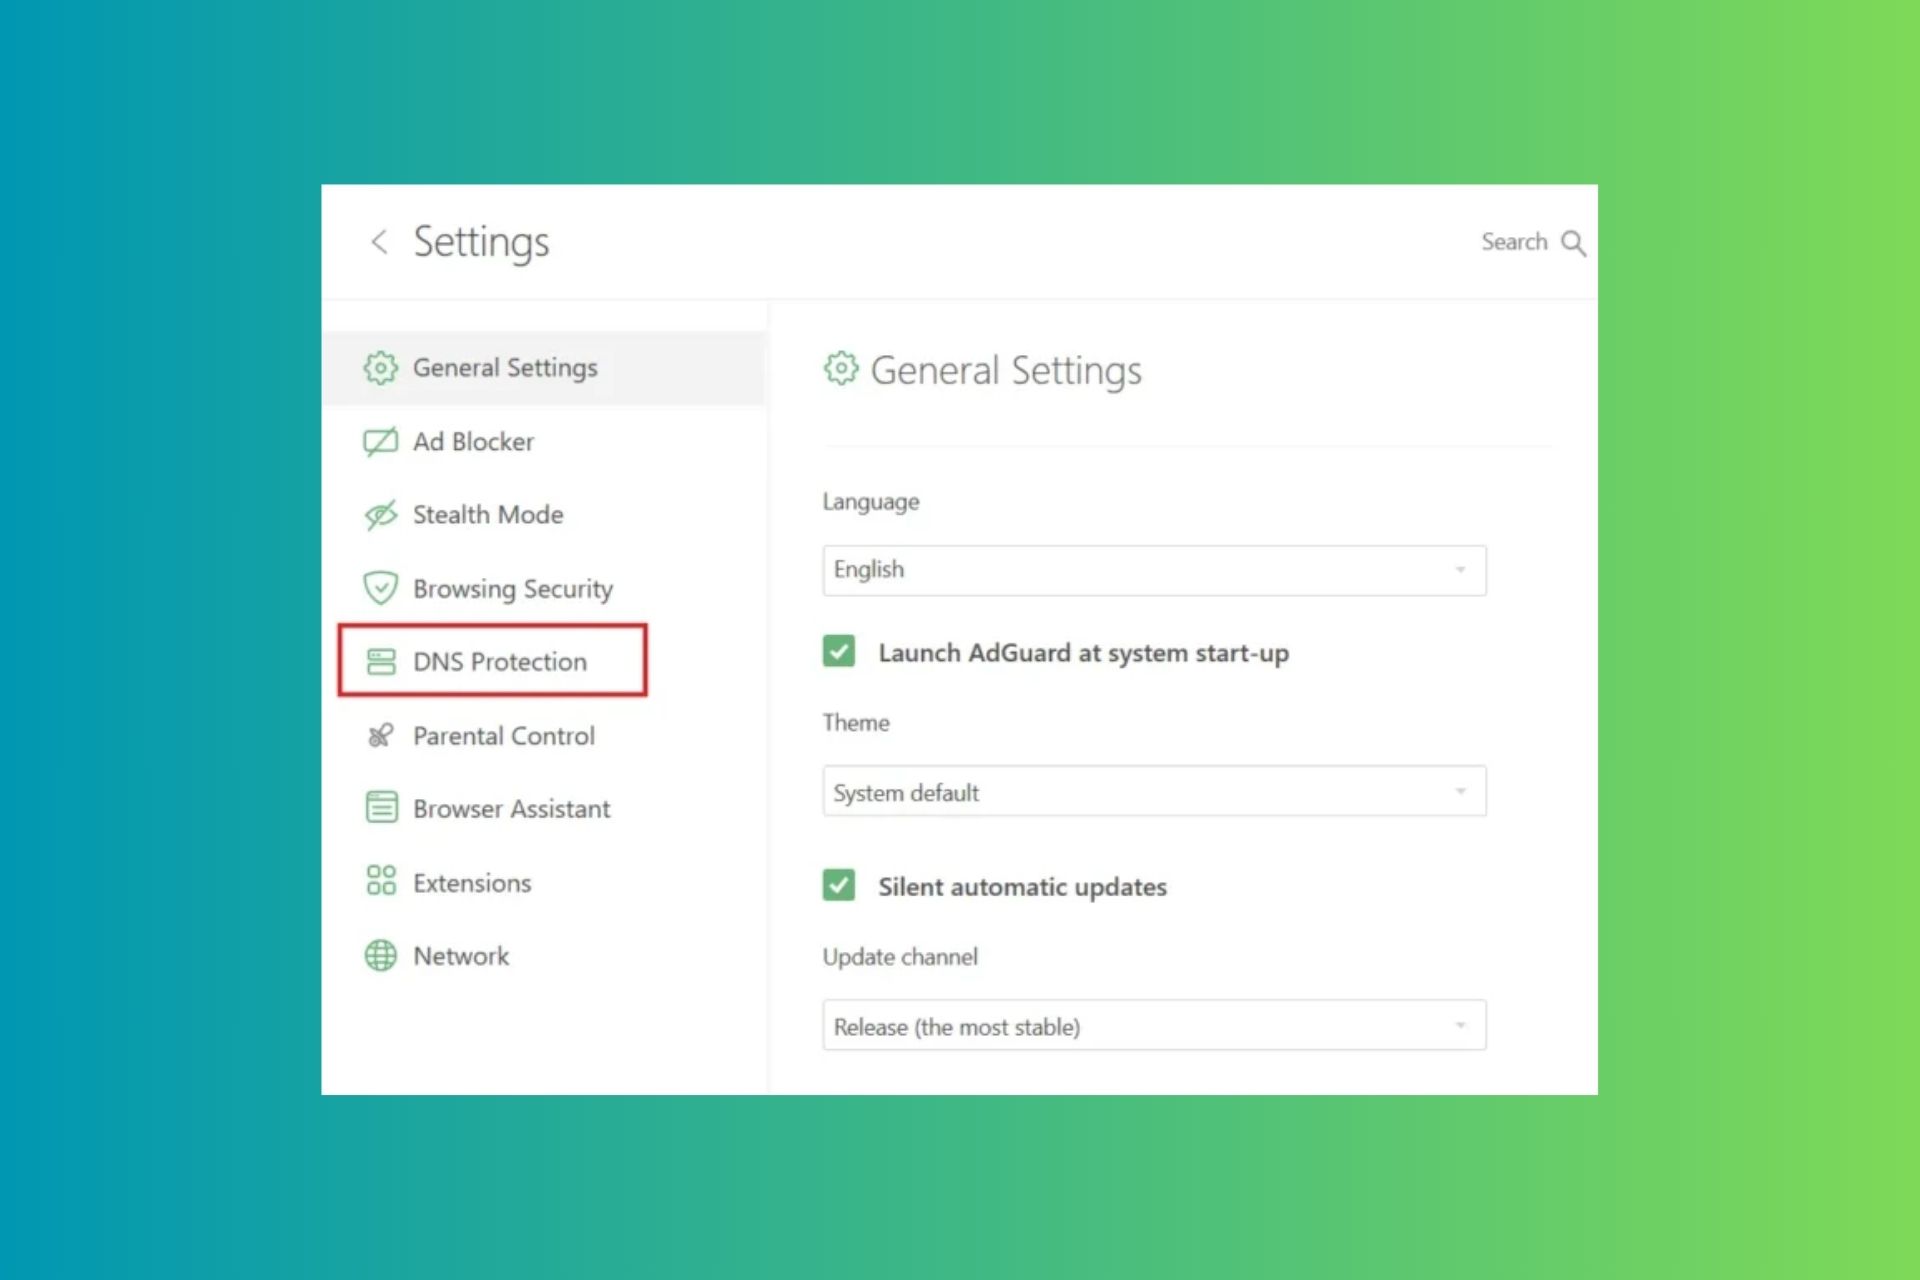
- Open Settings > Network & Internet > Private DNS.
- Select “Private DNS provider hostname” and enter:
dns.adguard.com (or your custom AdGuard DNS server address).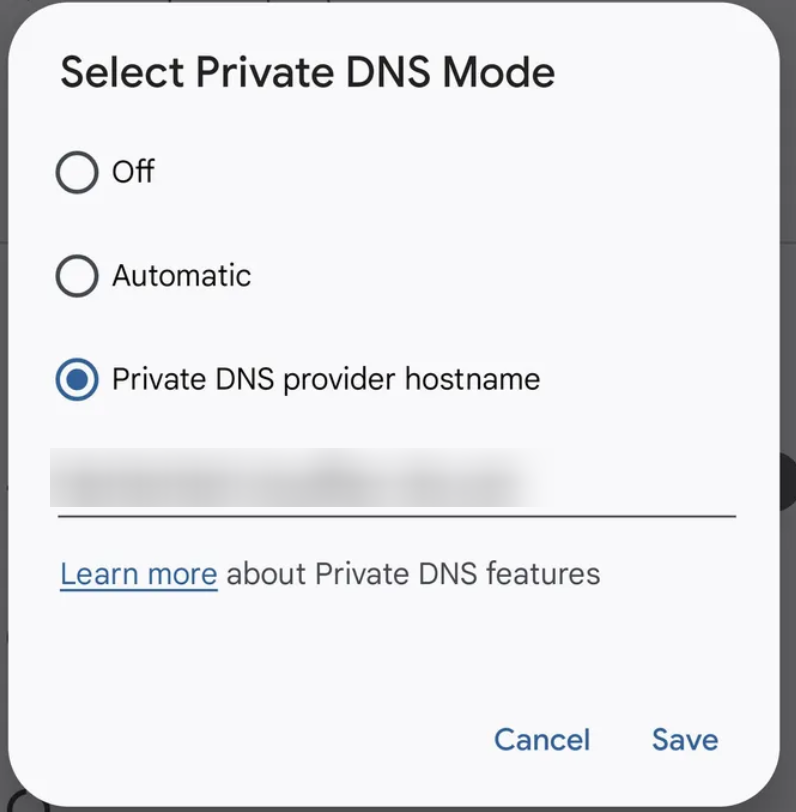
- iOS:
- Go to Settings > Wi-Fi, tap the information icon (i) next to your connected network, then tap Configure DNS.
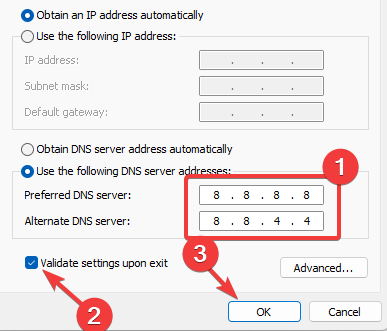
- Switch to Manual and add the AdGuard DNS addresses (e.g., Primary: 94.140.14.14 and Secondary:
94.140.15.15).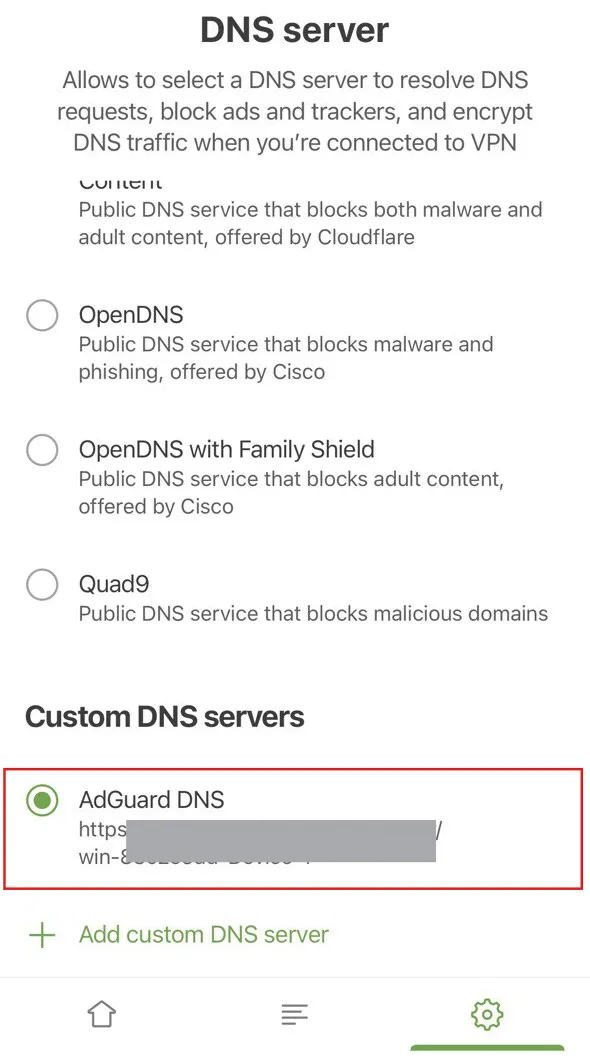
- Android:
- Desktop (Windows/macOS/Linux):
- Windows:
- Open Control Panel > Network & Internet > Network Connections.
- Right-click your active connection, select Properties, choose Internet Protocol Version 4 (TCP/IPv4), then click Properties.
- Enter the AdGuard DNS addresses (e.g., Primary: 94.140.14.14, Secondary: 94.140.15.15).
- macOS:
- Go to System Preferences > Network, select your network connection, click Advanced, then navigate to the DNS tab.
- Add the AdGuard DNS addresses and click OK, then Apply.
- Windows:
- Routers:
- Log in to your router’s administration panel by entering its IP address into your web browser.
- Locate the DNS settings (usually under Network, WAN, or Internet settings) and replace existing entries with AdGuard’s DNS servers (e.g.,
94.140.14.14and94.140.15.15). - Save your changes and reboot your router if needed.
Part 2: Configuring the AdGuard App
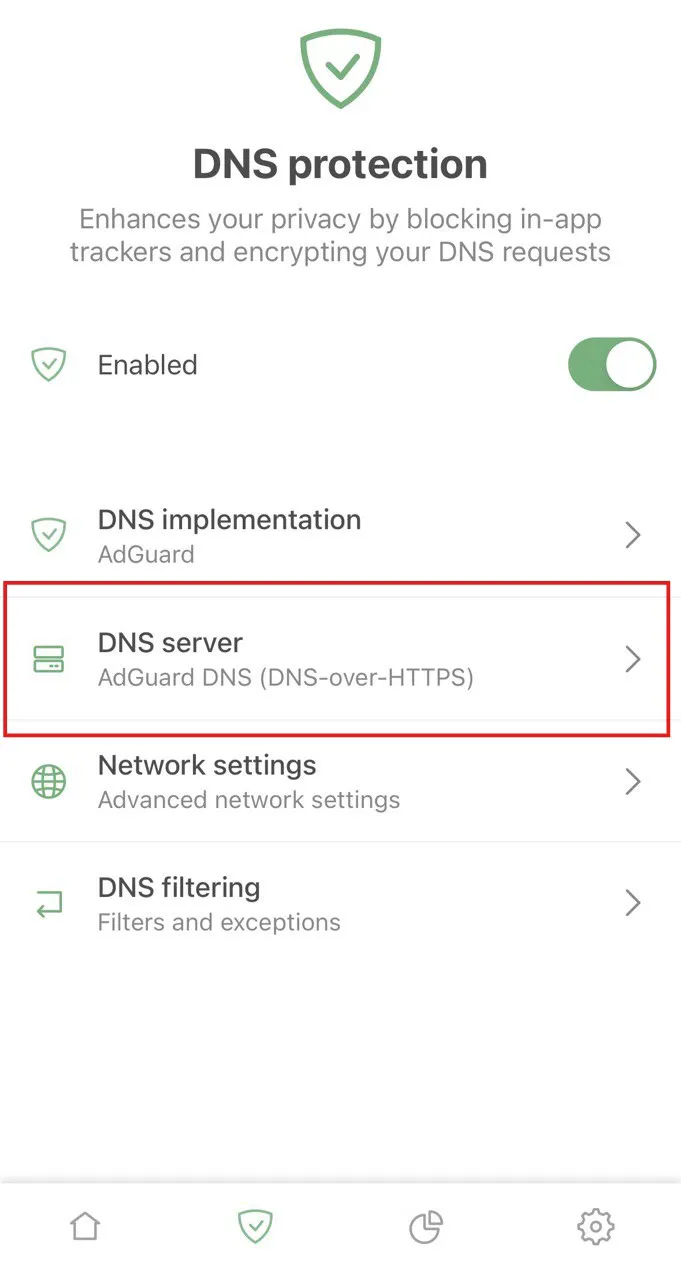
If you prefer a more hands-on approach with advanced features (like real-time monitoring, custom filters, and detailed logs), consider using the AdGuard app. Here’s how to set it up on various devices:
Mobile Devices
- Android:
- Download and Install:
- Visit the AdGuard Download Page to download the AdGuard app. You can also find it in the Google Play Store.
- Configure the App:
- Launch the app and follow the on-screen instructions to grant necessary permissions.
- The app will likely set up a local VPN to filter traffic.
- Within the settings, enable ad blocking and customize filters (e.g., choosing blocklists or whitelisting specific sites).
- Launch the app and follow the on-screen instructions to grant necessary permissions.
- Download and Install:
- iOS:
- Download and Install:
- Download the AdGuard app from the App Store.
- Configure the App:
- Open the app and follow the setup wizard to enable content blocking.
- Adjust filter settings and activate the Safari content blocker if prompted.
- Open the app and follow the setup wizard to enable content blocking.
- Download and Install:
Desktop Devices
- Windows:
- Download and Install:
- Download the AdGuard application from the AdGuard Download Page.
- Run the installer and follow the setup prompts.
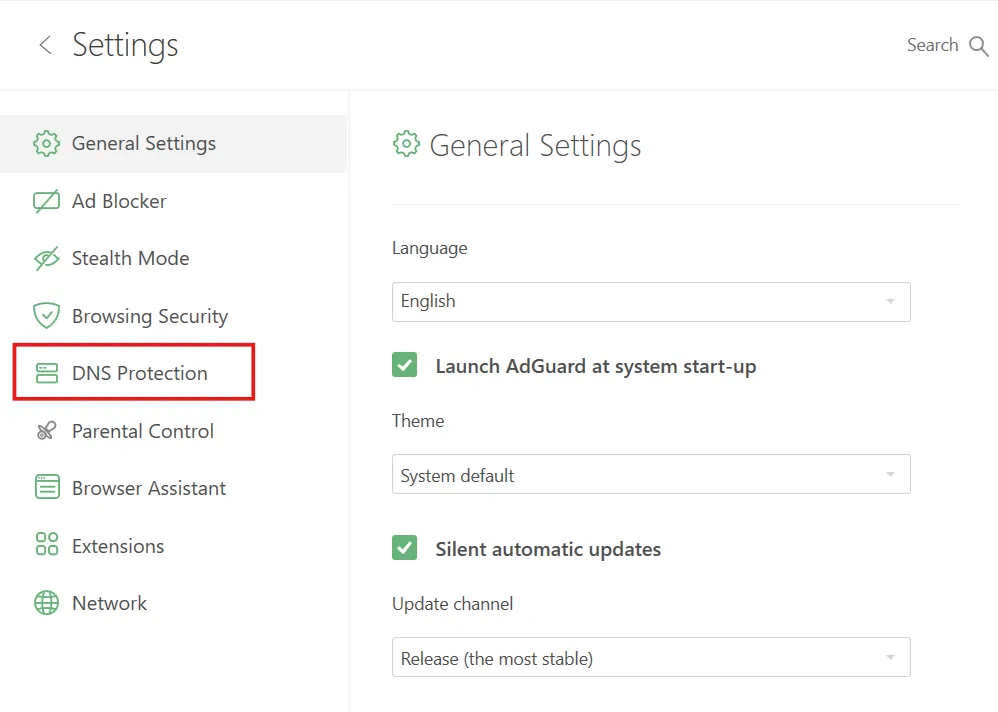
- Configure the App:
- Launch AdGuard from the Start Menu or desktop shortcut.
- From the main dashboard, enable ad blocking, review advanced settings, customize filters, and manage whitelists.
- Monitor activity and view logs to see how the app is filtering traffic.
- Download and Install:
- macOS:
- Download and Install:
- Download the macOS version from the official website and drag the app into your Applications folder.
- Configure the App:
- Open AdGuard and complete the initial setup.
- Use the settings menu to adjust ad blocking rules, select custom filters, and fine-tune privacy options.
- Download and Install:
Step 3: Customize Your DNS Settings via the Dashboard
- Enable Traffic Encryption: Ensure your DNS requests are secure.
- Customize Domain Blocklists: Tailor which domains are blocked with flexible filtering rules.
- View Detailed Statistics and Query Logs: Monitor DNS activity to see which requests are filtered and where they’re coming from.
- Set Up Parental Controls: Manage and restrict content for family devices.
These customization options help you fine-tune your network’s filtering rules, providing a more personalized and secure browsing experience.
Step 4: Save Your Settings and Restart Your Connection
After configuring your device or router:
- Save your updated DNS settings.
- Restart your device or router to apply the changes.
- Test your configuration by visiting an AdGuard test page to confirm that ad blocking and tracking protection are active.
If you manage multiple network profiles, you might also find Manage Multiple Network Connections with TCP/IP Manager useful.
Troubleshooting Tips
- AdGuard DNS Not Resolving: Double-check the DNS addresses entered. Restart your router if necessary.
- Ads Still Showing: Clear your DNS cache:
- Windows: Open Command Prompt and type
ipconfig /flushdns. - Mac: Run
sudo killall -HUP mDNSResponderin Terminal.
- Windows: Open Command Prompt and type
- Slower Connection After Setup: Try alternative AdGuard DNS servers:
94.140.14.15and94.140.15.16. - Conflict with VPNs: Some VPNs override custom DNS settings. Check your VPN configuration and allow custom DNS.
For fixing general network issues, see Repair XP and Vista Internet Connection Problems with ICR.
Wrapping up
Setting up AdGuard DNS is a quick way to stop ads and also block porn sites and other potentially unsafe websites and services. I
Whether on mobile, desktop, or router, you can configure it in minutes for a smoother, more secure browsing experience. If you’re concerned about online security, check out Reporting Hacked/Rooted Servers, Booters & Datacenters.
Let us know how the setup went for you and don’t hesitate to ask us if you have any questions. Use the comment section below.
FAQ
Yes, AdGuard DNS offers free and premium options. The free version includes ad and tracker blocking.
Yes, AdGuard DNS enhances security by blocking malicious websites. For comparisons with other blocking methods, check out How Effective Is Blocking Websites Using Hosts File.
The standard servers (94.140.14.14 and 94.140.15.15) work well, but Family Protection and non-filtering options are also available based on your needs. Learn more about blocking solutions in 10 Ad Blocking Extensions Tested for Best Performance.
AdGuard Ad Blocker is a browser extension or app that blocks ads, trackers, and malicious websites directly within your browser or device. AdGuard DNS, on the other hand, is a cloud-based service that blocks ads and trackers at the network level by changing your device’s DNS settings, providing ad-blocking across all apps and services.

Improve this guide

User forum
0 messages