How to Create a System Image Backup in Windows 7

One thing that was introduced into Windows Vista and and became more available in Windows 7 is the built-in capability of creating a full backup image of your system so that it can be restored back when Windows becomes corrupt or not bootable. One good thing about using the Windows built-in system image backup is you don’t need to install any third party software such as Acronis TrueImage or Macrium Reflect and all Windows 7 users have it immediately to hand.
If you’re unsure what system imaging actually does and how it could help you, a system image is an exact copy of your system drive that gets backed up and saved into a file. If your system develops problems later on that can’t easily be fixed, you can use this backup to restore the computer back to that earlier point in time. If you’ve ever use the System Restore option, System Imaging is like that but restores the whole drive not just certain files.
Although the Windows Backup and Restore tool is pretty basic in terms of features, and the speed is not as fast as third party drive imaging software, it is good enough for most normal situations and the backing up or restoring can be achieved in several different ways.
Here are a few points to note when using the System Image function:
- Try not to change the partition structure of the backed up volumes or the restore could fail. Although system imaging is supposed to be able to reformat to the previous layout, this is a common cause of a restore failing.
- System Image will backup and restore ALL files on the system and you cannot at any point select individual files or folders. You will however, have the option to backup any files before a restore if using the Control Panel.
- Backup to network is not available in Windows 7 Home Premium or Home Basic.
- Only NTFS formatted partitions can be backed up. Make sure if you’re saving to USB sticks or portable hard drives they are NTFS formatted.
- Imaging is available in Vista Business, Enterprise and Ultimate but not in Home Premium or Basic. Go to Control Panel -> Backup and Restore Center -> Back up computer. You cannot backup to network in Vista.
- Windows 8 still has this feature in Control Panel -> Windows 7 File Recovery.
- Don’t mix 32-bit and 64-bit discs on your operating system. For example, if you have a 32-bit Windows installed you will need a 32-bit repair disc or 32-bit Windows install DVD to perform a restore.
Creating a Windows System Image
Here we’ll show you how to create Windows 7 backup system image, the steps for Vista and Win 8 compatible versions are broadly the same. You can only do this from within Windows itself. There are a few ways of running the Windows Backup and Restore Tool which will also allow you to create a repair disc or backup files and folders, choose 1 from any of the following:
Use a third-party imaging software
1. Acronis
Acronis is a third-party imaging software that allows users to create an image backup of their system files and software. This backup tool also integrates an anti-ransome software technology to add an extra layer of protection when backing up system files. One great feature of this software is that users can back up their entire system as a single file, making it easy for them to recover their data on any device.
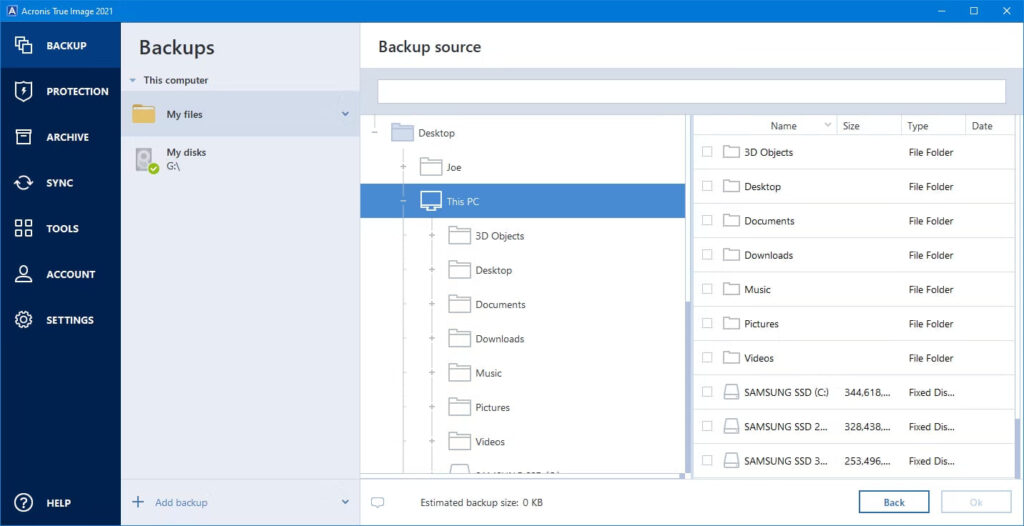
To create a system image, first download and install the software. Open the application and select the Backup option on the menu pane. You can create custom backup plans by either backing up the entire system, certain disks and partitions, or specific files and folders.
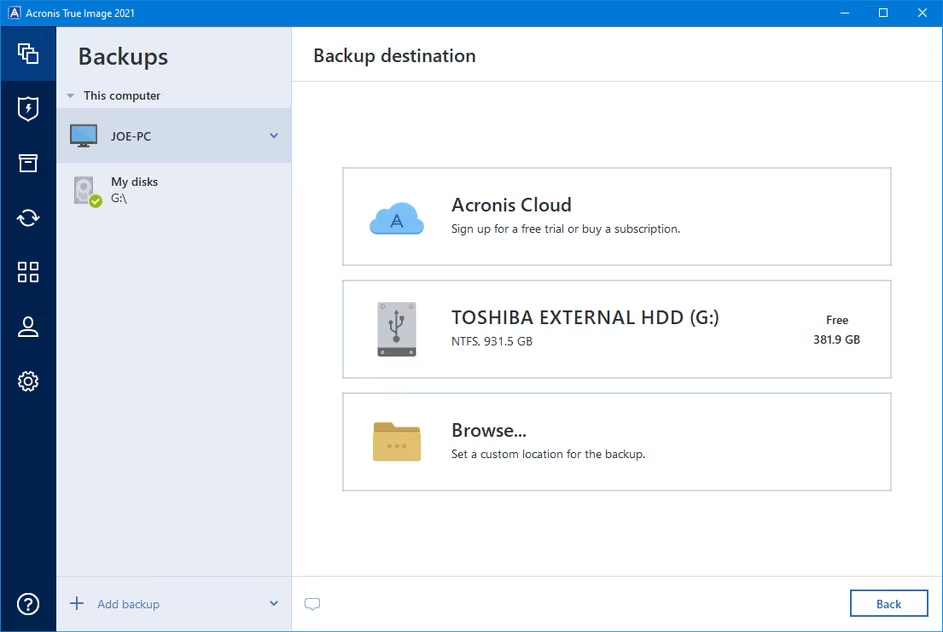
Click the “Add backup” option and select your preferred storage site. Furthermore, you can choose a mobile device or a cloud service to store your information. After selecting your storage, click “Options” to choose your preferred backup method.
2. Aomei
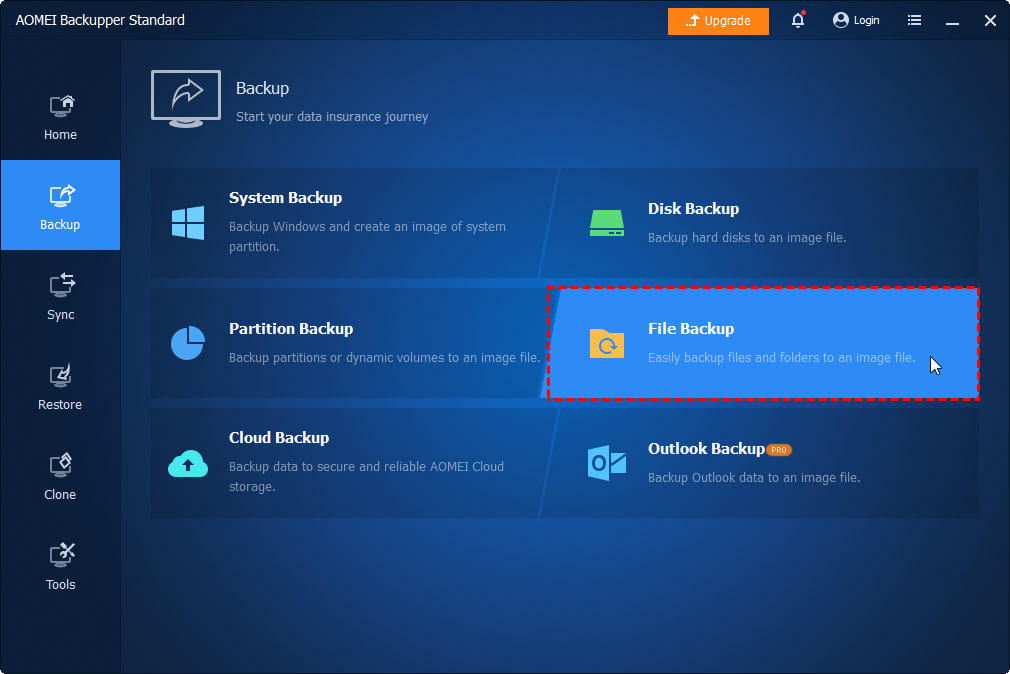
Another popular Windows 7 imaging tool is the Amoei Backupper. This utility tool has a backup feature that transfer’s the system’s image file into a convenient storage. After installation, select the “Backup” option of the left pane and choose “File Backup”. Additionally, users can customize the backup session with a Task Name to help them keep track of all backup processes.
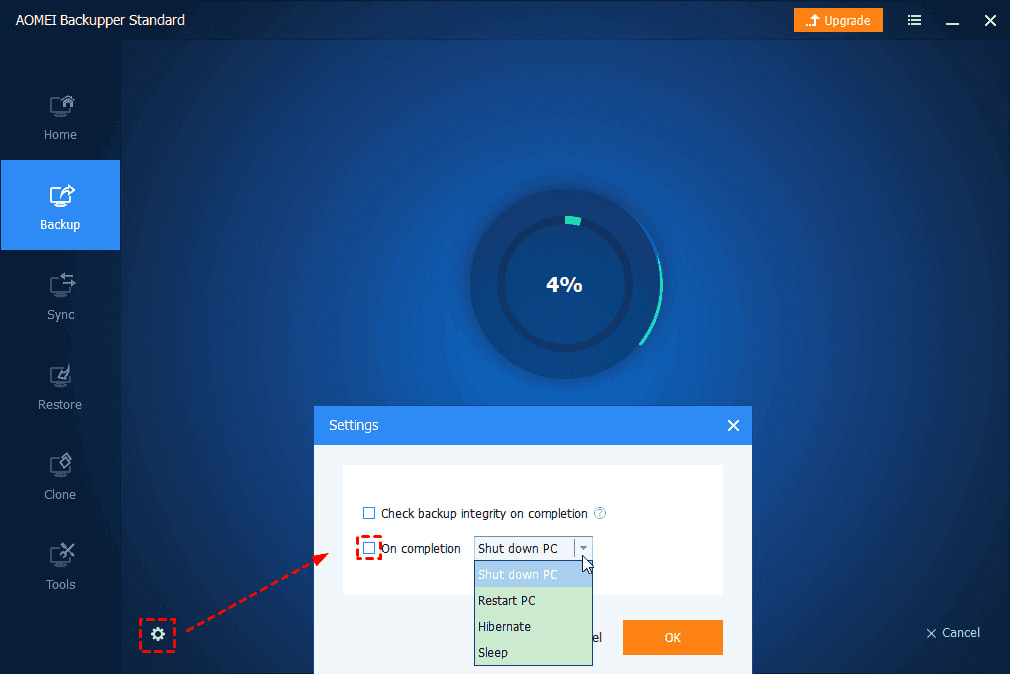
Next, choose the “Add Folder/ Add File” option to choose which data you’d like to back up. You can easily drag and drop files into the application’s interface. For additional control over the backup process, users can choose the “Filter settings” to add source folders. Once all these are sorted, click “Ok” to select the destination path and click “Start Backup” for the process to begin.
3. IDrive
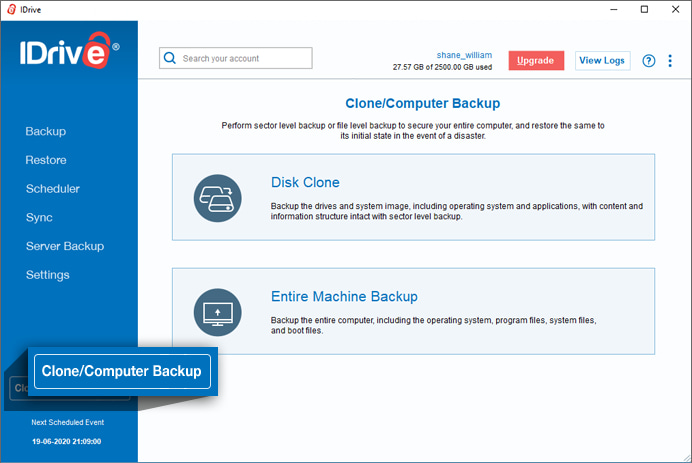
This light imaging tool can back up entire systems, including the operating system, programs, and boot files. Users can also use the tool to back up their data securely in the IDrive cloud, making the entire process quick as it does not require additional space to create a local copy. To use the software, users have to sign in to access the cloud account.
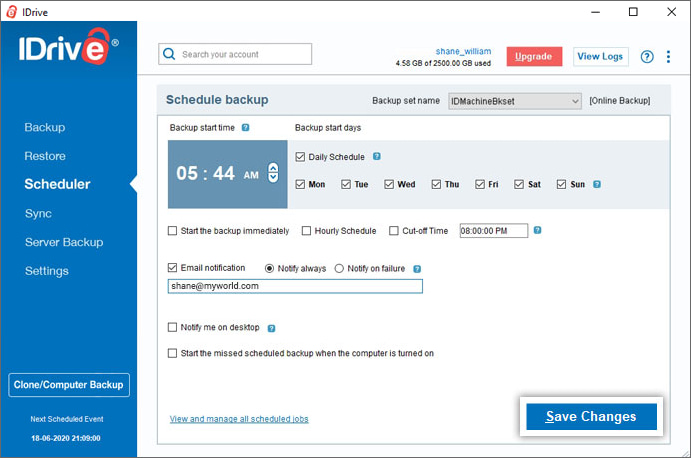
Next, click the “Clone/Computer backup” button to begin the imaging process for your Windows 7. Choose “Entire Machine Backup” to back up the entire system and select “Cloud backup” to save all data to the cloud or ”Encrypted local backup” button to choose a target backup drive. Next, choose a schedule by clicking the “Schedule Backup” button and then save the changes. To create a physical backup, click the “Encrypted Local Backup” button. Select your preferred storage and click “Schedule Now”.
- Click the Start orb and type backup into Search. You should see Backup and Restore appear in Programs, press Enter.
- Click the Start orb -> All Programs -> Maintenance -> Backup and Restore.
- Go to Control Panel and select Backup and Restore from an icon view, or System and Security -> Back up your computer in Category view.
Now in the Backup and Restore tool, click Create a system image in the left pane.
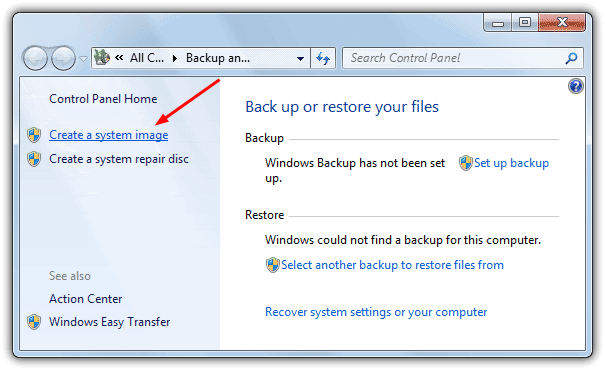
This will open up the Create a system image window. Alternatively, you can get directly to this window from the desktop by using Win Key+R and typing the following into the Run dialog box:
sdclt.exe /BLBBACKUPWIZARD
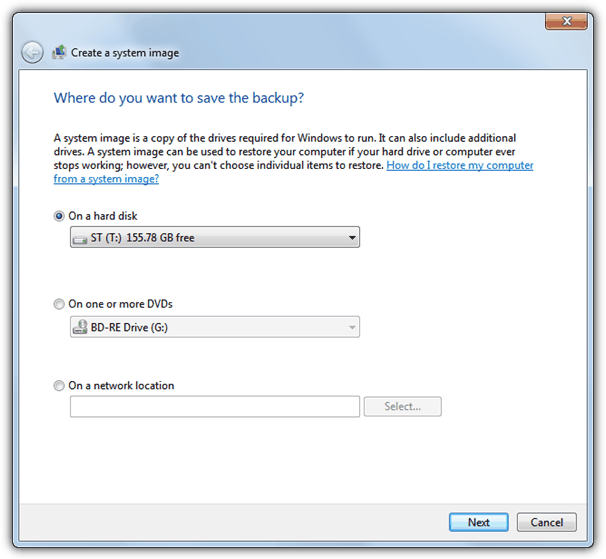
Now select where you’re going to backup the system image to, which can either be to hard drive, multiple DVD discs or a network location if your Windows version supports it. Removable USB devices such as flash drives will show under hard disks. If you try to select another partition on the same physical hard disk you’re backing up from, there will be a warning about it because that hard drive failing will result in both operating system and the backup being lost. If you place ANY value in your backups at all, it’s strongly recommended to use a different physical device to save them to.

The next screen will offer to backup any other volumes you might want to include in the process, the main system partition and the small 100MB boot partition if present will be automatically selected and cannot be touched.
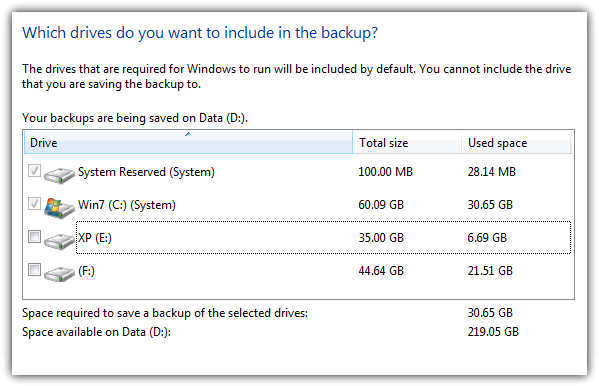
Note: Sometimes in a multiboot system, one of your other operating system partitions will be auto selected and grayed out so you can’t turn it off. This is usually the case when you install Windows 7 after another operating system and the bootloader system files are located on that partition and not Windows 7’s. Apart from some tricky methods of manually moving all the boot files onto the windows 7 partition and making it an Active / System volume, it is recommended to either accept the included volume or use another backup software.
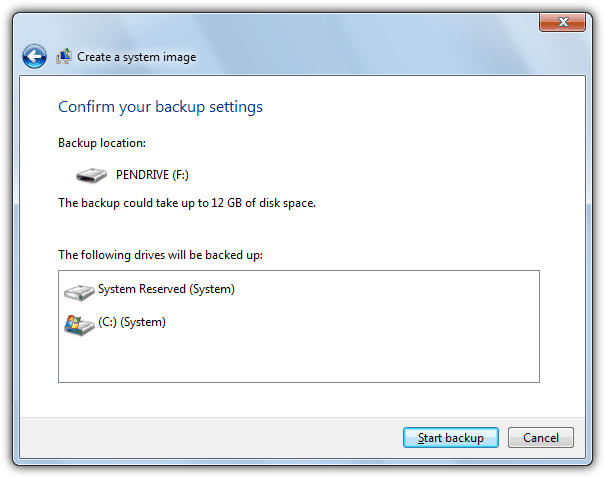
At the final confirmation window, the Backup and Restore tool will tell you how much space it could take to create the backup and clicking the Start backup button will start the process. Depending on the amount of data to backup and the speed of the hardware, this could obviously take from a few minutes to an hour or more. If you receive an error at this point, you might like to read our article on a possible cause for a system image backup failure.
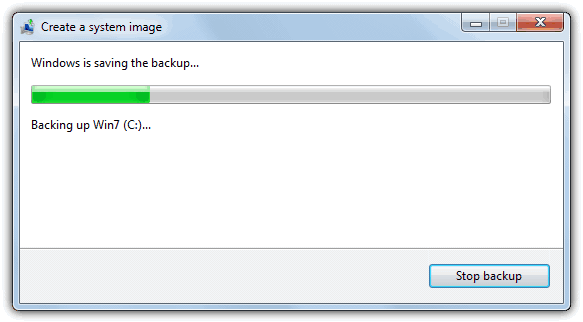
After the backup process completes, you will be asked if you want to create a system repair disc. This is highly recommended if you don’t have a full Windows install DVD to hand and can also be created later on from the Backup and Restore tool main window. If you would like to create a repair CD on a USB stick, please follow the repair disc to USB instructions in our post detailing how to do it.
On page 2 we’ll show you the various ways you can restore your system image.
You may also want to read:
Restoring a Windows System Image
If your system has become unstable or won’t boot, it may be time to restore a previously created system image. Like the Backup process, there are a few ways to restore back your computer using the backup image that you created.
Method #1
From one of the icon views in Control Panel, select Recovery. Click Advanced Recovery methods and select the first option that says “Use a system image you created earlier to recover your computer”.
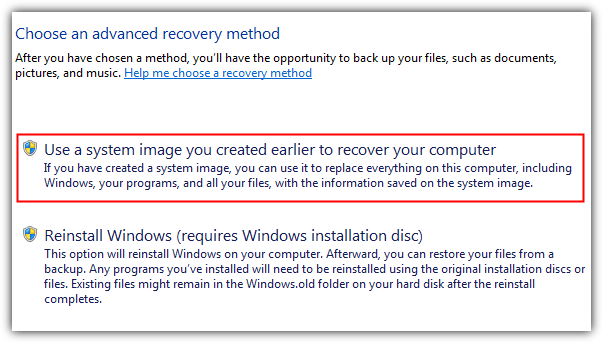
Because the system image restore will delete ALL files currently on the system, you will be given the chance to backup any files that weren’t in the original system image. If you have files to backup, then click Back up now and do so, otherwise click Skip. Click the Restart button which will reboot your computer. Then simply enter your keyboard language.
Method #2
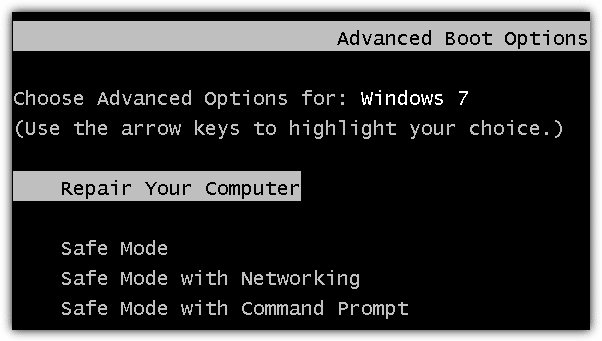
This is the next best option if Windows cannot start up. Turn on your computer and start tapping F8 key to get to the Advanced Boot options screen, then select Repair your computer. Not all systems will have this option, so if you don’t and method 1 isn’t working you will need to go to method 3.
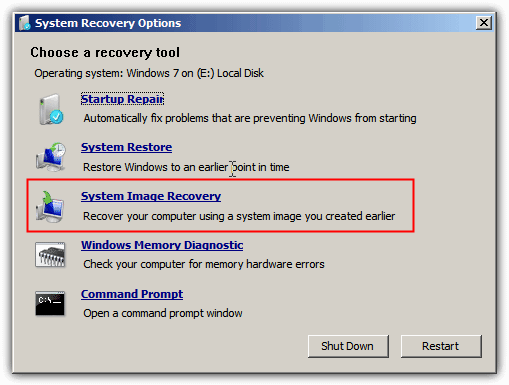
Wait for the recovery mode to load, then select a keyboard layout and choose a username with a user’s password if there is one. Finally, on the System Recovery Options menu, click on System Image Recovery.
Method #3
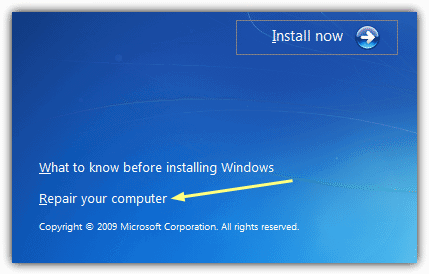
It is also possible that the hard drive’s boot sector or master boot record has become corrupted and you can’t even get to the F8 Advanced Boot Options menu. In this case you will need to start the computer with a Windows 7 system repair disc created from within Windows or a Windows install DVD which you may already have or can download and burn the ISO image. After pressing any key to boot, choose your language and keyboard layout, click Next and then click Repair your computer at the bottom.
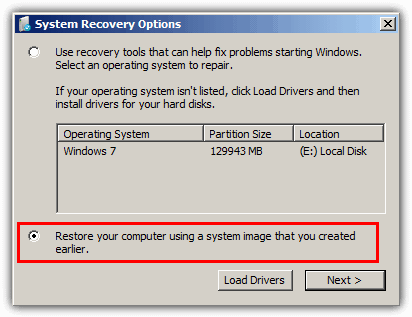
After the Windows install is searched for and detected (it doesn’t matter if it isn’t found), click on “Restore your computer using a system image that you created earlier”, then Next.
Whichever method above was used, you will finally end up at the Select a system image backup screen. If you saved the image to another hard drive, it will be automatically selected for restore and you can simply click Next to begin. Use the Select a system image option and follow the instructions to look for a DVD backup or a network location if needed.
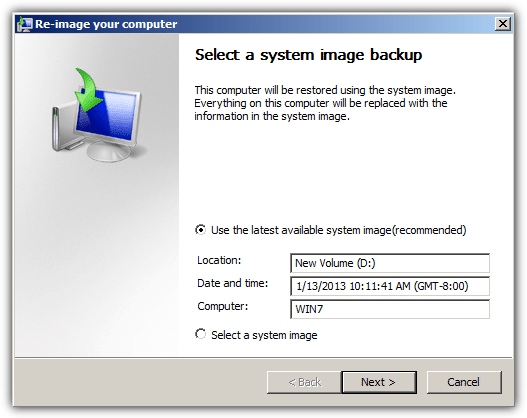
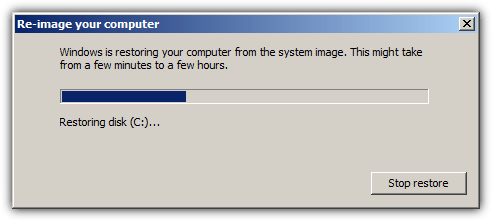
If you’ve changed the partition structure on the drives since the backup, you won’t be able to use methods 1 or 2 and need to use method 3. This will give the option to reformat the drives to match the layout in the backup image. Obviously an option to use with care. After a few confirmation screens the process will begin and will eventually auto reboot the computer where you should be back into a working Windows.
Tip: When saving a backup to another hard drive, the System Imaging tool will always try to overwrite any previous backup and can’t by itself perform another one leaving the previous backup in place. There is a simple trick to get around this which is to rename the folder of the current backup from WindowsImageBackup to another name such as WindowsImageBackup_2013_Jan. A renamed folder WILL have to be renamed back though for the System Image tool to recognize it for a restore.



User forum
40 messages