3 Network Bootdisk for Microsoft Network in Floppy and Boot CD
Floppy boot disks used to be one of the most important tools for any computer technicians because they can be used to start up a computer in DOS mode when Windows cannot be booted. While in DOS, the technician is able to investigate the cause of the problem and even possibly fix it.
In a Windows network environment, a custom floppy boot disk containing the compatible network adapter can be included which can be used to boot up the computer in DOS with networking support. This is very useful because you can map a shared drive to backup files by copying to them to the server and then restore the computer using a backup image created with Norton Ghost.
Creating a network floppy boot disk from scratch may not be an easy task especially for beginners. Thankfully there are already 3 different ready made floppy boot disk that include drivers for most of the popular network adapters. Although it may sound impossible to use them today due to most modern computers coming without a floppy drive or because it might be difficult to purchase floppy disks from computer shops, there are workarounds to get them to work.
1. NetBootDisk
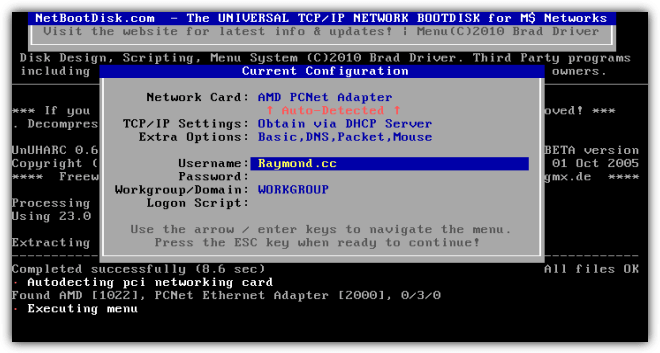
NetBootDisk is also known as the universal TCP/IP network bootdisk. It was last updated in 2010 and contains 98 different network card drivers. It is actually able to support more than 98 different network adapters due to the generic drivers being used that can support the whole series of cards. To install NetBootDisk, you’ll need a floppy drive. If not, you can use a software to emulate a virtual floppy drive.
1. Download Virtual Floppy Drive.
2. Extract the ZIP file and run vfdwin.exe as administrator.
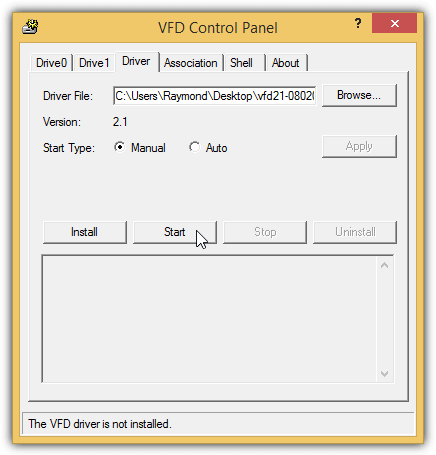
3. At the Driver tab, click on the Start button. You should see that the VFD driver is installed and started at the status window located below the buttons.
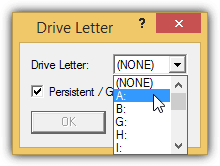
4. Go to Drive0 tab, click the Change button and select A: for the Drive Letter in the drop down menu and click OK.
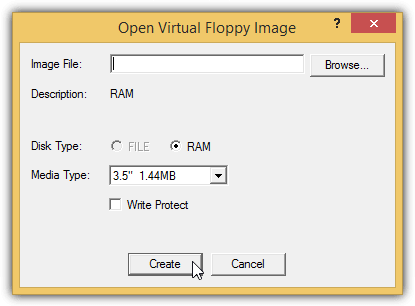
5. Click the Open/Create button, and click Create.
6. Open Windows Explorer by pressing WIN+E and you’ll see Floppy Disk Drive which is (A:).
7. Right click at the Drive A: and select Format.
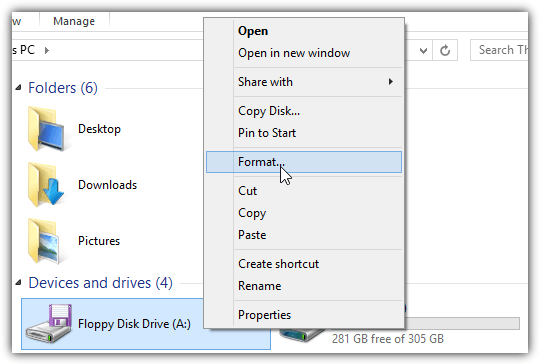
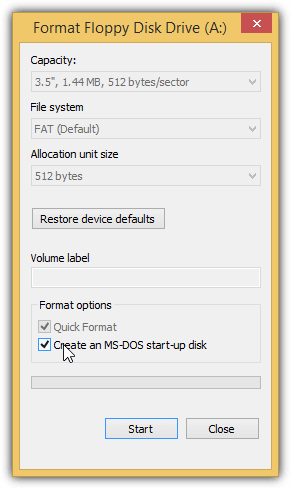
8. Tick the “Create an MS-DOS start-up disk” checkbox and click Start.
10. Extract the NetBootDisk ZIP file and run MakeDisk.bat file.
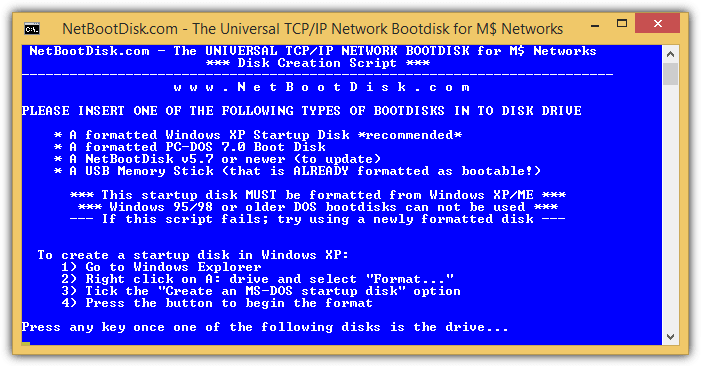
11. Press any key to continue.
12. Press enter when you’re asked to enter disk drive letter.
13. Press enter again because you want to install NetBootDisk to the virtual floppy drive. A bunch of files will be copied to the virtual floppy drive with your default web browser automatically open. You can ignore the 404 Not Found message on the webpage and close the browser.
14. Although the setup of NetBootDisk has been completed, you need to transfer the boot image and files from the virtual floppy to a CD.
15. Download ImgBurn and install. Pay attention during installation to avoid installing unnecessary adware. If you have 7-Zip installed, you can extract the installer file and run ImgBurn.exe to avoid accidental installation of adware.
16. Click “Write files/folders to disc“.
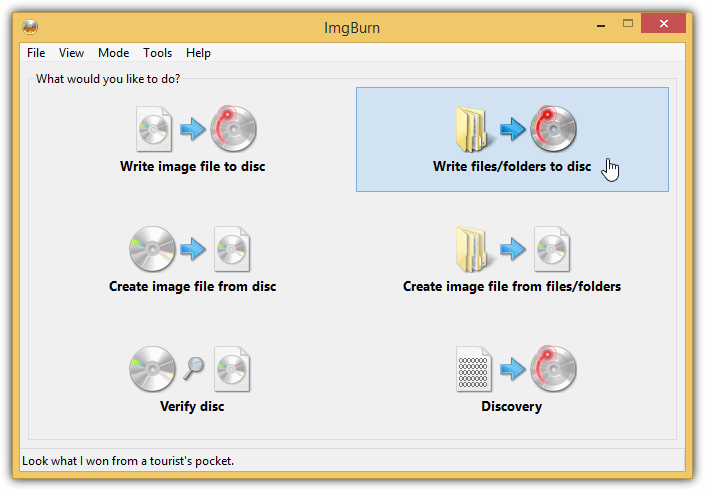
17. In the Source, type A:\ and press Enter.
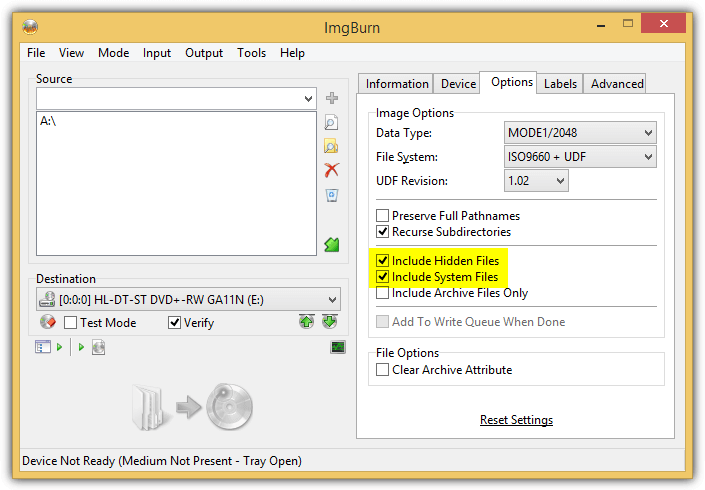
18. Go to Options tab and tick “Include Hidden Files” and “Include System Files”.
19. Go to Advanced tab > Bootable Disc and tick “Make Image Bootable”.
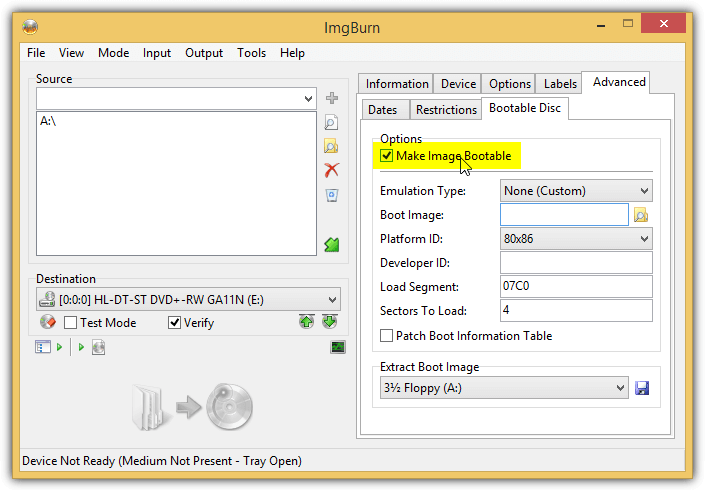
20. Click the diskette icon to extract boot image. Save it to anywhere on the hard drive such as Desktop. Do not save it in A:\ drive. Click OK when you get the popup message “operation successfully completed”.
21. Click “Yes” when ImgBurn asks you if you’d like to use the boot image file in your current project.
22. Insert a blank disc and click the Build button located at the bottom left. Once the writing process has been completed, you can boot up a computer with the CD.
2. Bart’s Network Boot Disk
The creator of Bart’s Network Boot Disk is more well known for their Bart’s Preinstalled Environment (BartPE). The reason why Bart stopped developing or updating the DOS based floppy boot disk in 2002 is because he saw many advantages in Windows PE, hence he put all his effort in developing BartPE. Nevertheless his Network Boot Disk has always been around. The creation of Bart’s Network Boot Disk is very easy and all it takes is just a command line and a few confirmation screens.
1. Follow steps 1-5 from NetBootDisk to create a virtual floppy drive.
2. Download BFD and extract the ZIP file.
3. Open command prompt and change to the extracted BFD folder. Type bfd msnet and hit Enter.
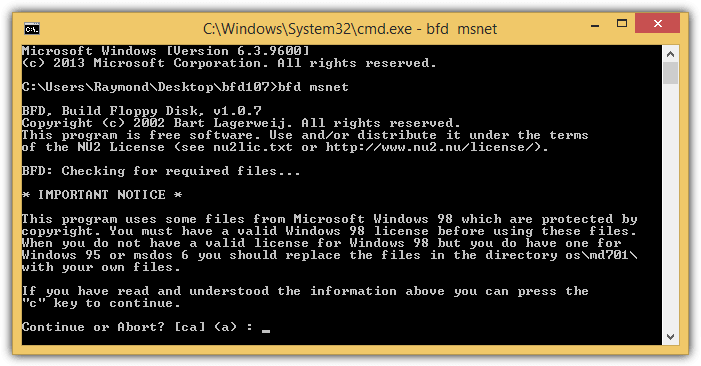
4 Press the “C” key to continue.
5. Press “C” key again to continue. You can close the command prompt when you see the message “Operation successful” on the screen.
6. Do note that only 11 network adapter drivers are included by default. Other available network adapter plug-ins can be downloaded from the official BFD’s website. You will need to put them in A:\lib\ndis folder.
6. The creation of Bart’s Network Boot Disk is now complete. You can convert the floppy boot disk to CD by following the NetBootDisk’s instructions from step 15 onwards.
3. Snapshot DOS Bootdisk
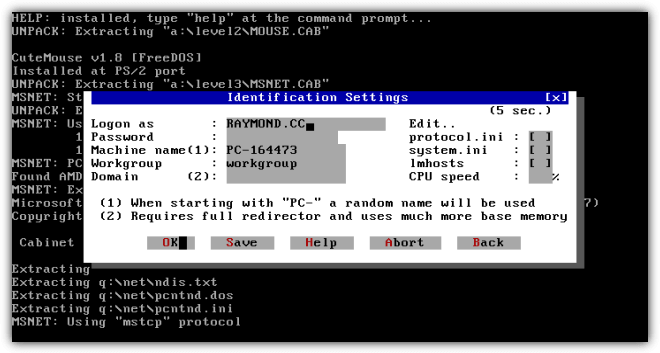
Snapshot is actually a shareware disk imaging program that can be used to create full backups of your computer’s hard drive. Similarly to Norton Ghost, it can be run independently in DOS mode which is why they have a reason to maintain a working floppy boot disk with networking support.
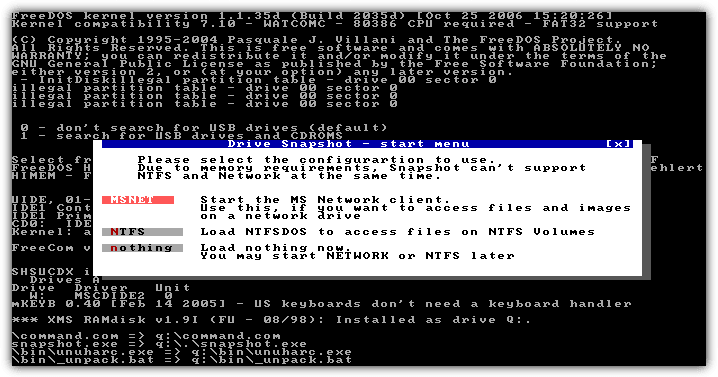
Their floppy boot disk is based on Bart’s Network Boot Disk and has a few improvements such as using FreeDOS instead of Microsoft DOS, using UHARC instead of CAB for better compression for drivers, and the support for NTFS and UDMA in DOS. 21 network drivers are included and more can be downloaded from Snapshot’s website. Make sure to download the .uha file instead of the .cab and save them to A:\LIB\NDIS.
1. Follow steps 1-5 from NetBootDisk to create a virtual floppy drive.
2. Download Snapshot setup and install.
3. Run “Create Disaster Recovery Diskette” shortcut from Start Menu.
4. Click OK to start creating the bootdisk.
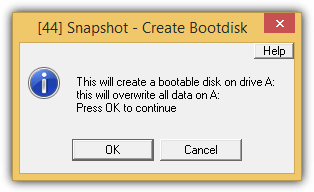
5. When you see that the program says “networkbootdiskette.sna successfully restored to \\.\a:”, click OK to close the program.
6. Follow steps 15-22 from NetBootDisk to convert Snapshot’s DOS floppy bootdisk to CD.
Additional Notes: Although there are third party tools that claim to convert bootable floppy disk to bootable USB drive, we’ve tried every tool that we can find and the converted bootable USB drive doesn’t work the way it should. It either ends up not working at all, or booted up with continuous errors at best. It is most stable when the bootable floppy disk is converted into a bootable CD.



User forum
8 messages