How To Install and Configure FTP Server in Windows
You may have heard of FTP before which is the reason why you are currently reading this article. FTP is short for File Transfer Protocol and is used to transfer files between computers. Most of the time when you have a website hosted on a server, you are given a FTP information containing the FTP address, username, password and port number that commonly uses 21. This information is for you to connect to your web server using a FTP client software so you can manage the files on your server by downloading or uploading through a directory tree view.
Other than commonly using FTP for web servers, it can also be used to backup files from a unbootable machine. All you need to do is set up a FTP server on a working Windows computer and then boot up the dead PC with a live rescue CD such as UBCD4Win that comes with a FileZilla FTP client software. You can then establish a connection to the FTP server and start transferring the files.
There are quite a number of free FTP server software and after testing all of them, we will only show you how to setup your FTP server using FileZilla Server because of the popularity and Xlight FTP Server because it comes with UPnP support that your router will automatically forward the port. Another really easy to configure Core FTP mini SFTP server will also be included.
Finally, we will also show you how to connect to your FTP server from your local network.
Install FileZilla Server
1. Download FileZilla Server and run the setup file to start installation.
2. Click I Agree button, make sure Standard type of installation is selected and click Next.
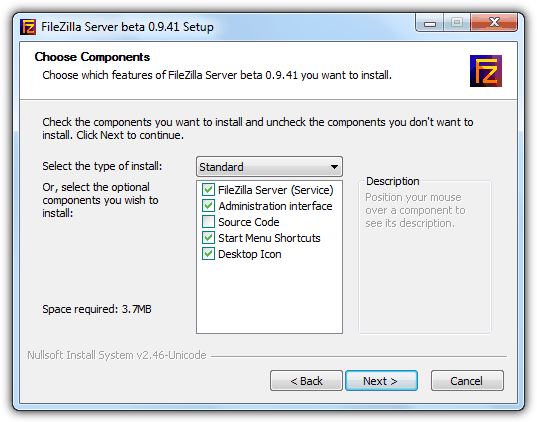
3. Click Next to accept the install location.
4. By default FileZilla Server will install as service and started automatically. There is also an option to install as service but not automatically started or as a normal startup method. You can also leave the port untouched unless there is another application that is using the same port.
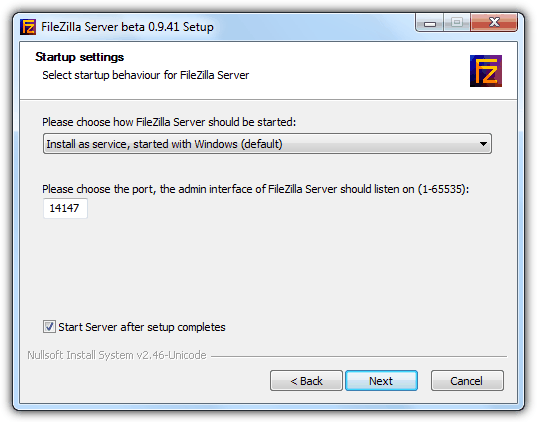
5. Choose the startup behavior and click the Install button.
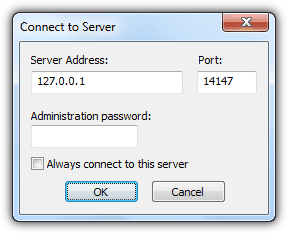
6. After installation, FileZilla Server will automatically run and prompts you to connect to server. Click the OK button to login.
Create User Account in FileZilla Server
7. Although the FTP service is already running, but no one can connect it because you will first need to create a user account and then assign the folders with proper permissions to the user. Click on Edit menubar and select Users.
8. At the General page, click the Add button at the center right and enter the name of the user account. Click OK.
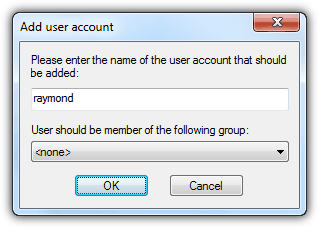
9. Back at the Users window, make sure the enable account option is ticked. It is also advisable to set a password for the user account by checking the password checkbox and enter a password.
Assign folders to User Account in FileZilla Server
10. Click the Shared folders page, then click the Add button for Shared folders and select the folder that you want the user account to have access to via FTP.
11. The default permission for a shared folder is only read for file and list for directories. You can tick on the checkbox to assign write and delete access.
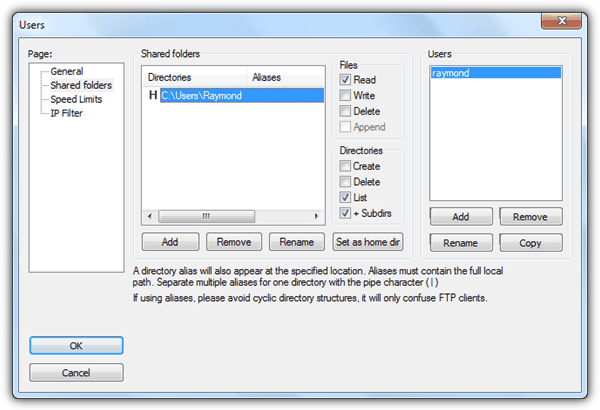
12. Click the OK button at the bottom left.
The basic setup of FileZilla Server is done. You can now scroll down and read on how can another computer connect to your new FTP server. Please feel free to explore other features in FileZilla Server such as user limit, SSL, speed limit, IP filter, groups, logging, MODE Z, autoban and etc.
Install Xlight FTP Server
1. Download Xlight FTP Server and run setup.exe to start the installation and follow the on-screen instructions (Click Next, I accept the agreement and Next, Next, Next, Next, Install, Finish)
Create Virtual Server in Xlight FTP Server
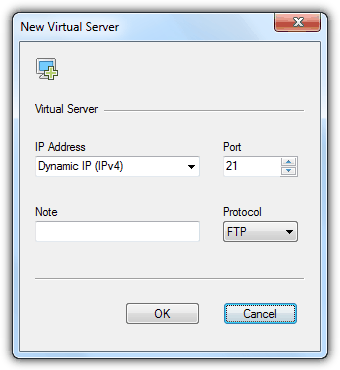
2. Click the first icon with a plus and computer at the top right to create a new virtual server.
3. Leave all selected options in New Virtual Server window as default and click OK.
Create User Account in Xlight FTP Server
4. Click the User List icon and click the Add icon located at the top right.
5. Enter the username, password and browse the directory that you want the user to have access to. There is an icon located next to the Browse button that allows you to set the permission. The default selected permissions are list read and list which is the same as FileZilla Server.
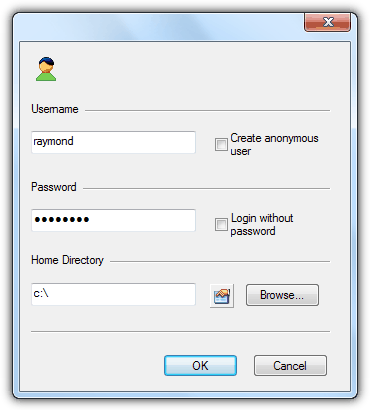
6. Click OK button to create the user and close the User List window.
Start the virtual server in Xlight FTP Server
7. Click on the virtual server that you have created to highlight it and click the play icon to start the server. You will see that the status of the server will change from Stopped to Running.
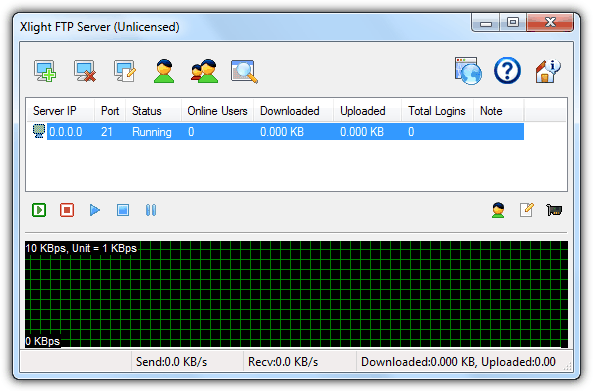
As you can see, the setting up of FTP server using Xlight is so much simpler compared to FileZilla. You can check out the global options and also the additional settings for the virtual servers. Do note that some features are disabled in the free version of Xlight after 30 days usage. The biggest drawback in the free version of Xlight is the 5 online users limitation but shouldn’t be a problem if you are using it privately on your home network.
Setting up Core FTP mini SFTP Server
If you are looking for the easiest and fastest way to run a temporary FTP server, Core FTP mini SFTP Server would be your perfect choice. It is portable (settings are stored as clear text in registry), no dependencies, free, secure because it uses SFTP protocol, and very easy to configure.
1. Download Core FTP mini SFTP Server
2. Run the downloaded msftpsrvr.exe file.
3. Enter a username, password and set the path to share.
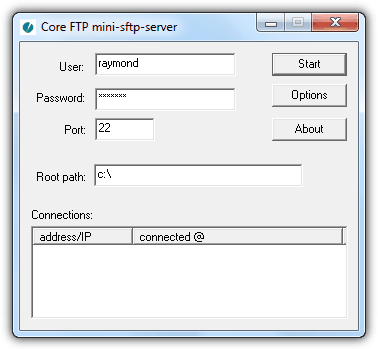
4. Click the Start button to start the SFTP service.
Optionally you can enable the zlib from the Options which is actually the MODE Z where it will compress the files on the fly before transferring to save time and bandwidth. The only drawback in using Core FTP mini is the SFTP protocol. Although it is more secure but you cannot connect and manage the files/folders from Windows Explorer. You will need to use a third party FTP client software that supports SSH File Transfer Protocol such as WinSCP or FileZilla Client.
Connecting to your FTP server from another computer on your local network is easy as there are a couple of ways to do that.
From Windows Explorer
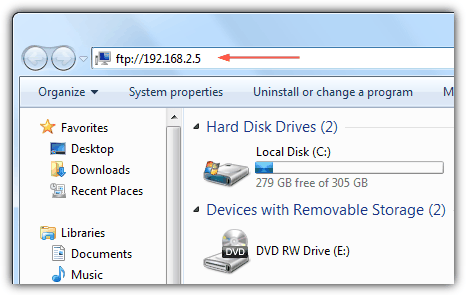
1. Open My Computer shortcut from Start Menu or from any folder, type the address as ftp://computername or ftp://local.IP.address. Replace the computername with the name of your computer or you can use the local IP address instead. The advantage of accessing your FTP server from Windows Explorer is you get to manage the files/folders if your account has proper permission to do that.
From Web Browser
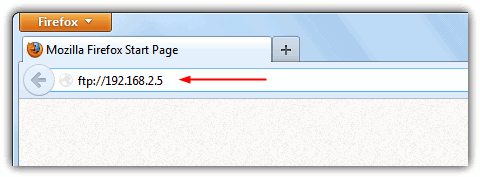
1. On any web browser such as Firefox, Chrome, Opera, Internet Explorer or Safari, type ftp://computername or ftp://local.IP.address on the address bar. You can only view and download the files but cannot modify/delete/create new files.
From FTP Client (FileZilla)
1. Download FileZilla Client and install.
2. Run FileZilla Client and press Ctrl+S to open Site Manager.
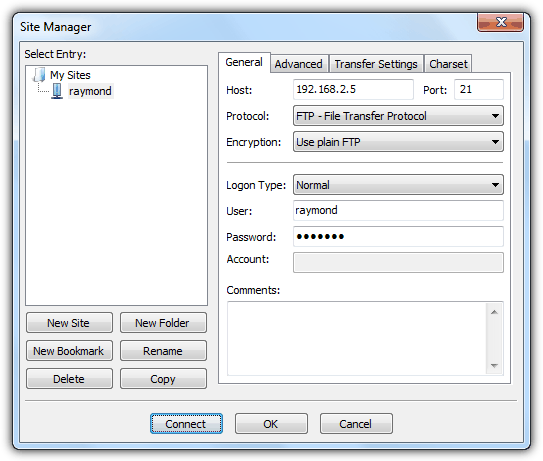
3a. Click New Site button and give it a name for your FTP server. Enter the IP address or name of the computer at the Host and the Port as 21. As for Logon Type, click on menubar and select Normal. Fill up the user and password that you have created on the FTP server. Finally click the Connect button.
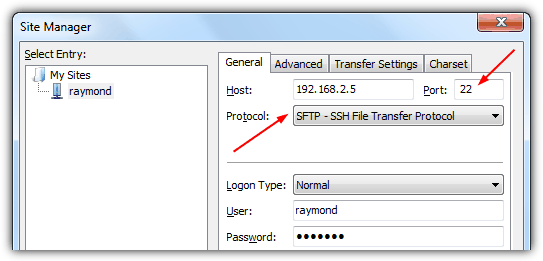
3b. To connect to Core FTP Mini SFTP Server, you will need to select SFTP – SSH File Transfer Protocol for Protocol and set the port as 22.
Editor’s Note: Although FileZilla Server is the most popular FTP Server software, we do feel that it is overrated because it doesn’t have UPnP support, old GUI design, no multiple virtual server, saves the admin password in clear text, and occasionally fails with some erroneous error messages when it works fine in Xlight FTP Server on the same scenario. The Core FTP Mini provides a quick way to run a FTP server without all the hassle and painful configuration. FTP protocol is not secure because they are transferred in clear text and the files uploaded/downloaded can actually be sniffed and reassembled.



User forum
16 messages