Windows Vista Repair Tool for Disk & How to Use

Back in 2006 when Windows Vista was introduced, it came with a brand new feature that is able to burn what’s called a “System repair disc” onto a blank CD. While it isn’t a disc full of utilities that can help you fix a huge number of issues such as the great Hiren’s Boot CD is able to do, there are number of functions built in that can do the basic tasks. These include helping a system with startup issues to boot, enabling you to run an offline system restore, a command prompt where you can use tools such as Diskpart, run the Windows memory diagnostic and restore a full system image backup if your installation is beyond repair.
What’s good about this tool is it’s available in all versions of Windows Vista, Windows 7 and also Windows 8. These same functions are also found on the Windows Install DVD that is used to install the operating system, so you don’t necessarily need to have a repair CD if the install DVD is to hand. The problem with this though is if you own a branded computer or laptop such as Acer, Dell or HP, the chances are they only provided you with a recovery partition or a recovery DVD without the proper Windows DVD. In other words, you need to make your own system repair disc through Windows.
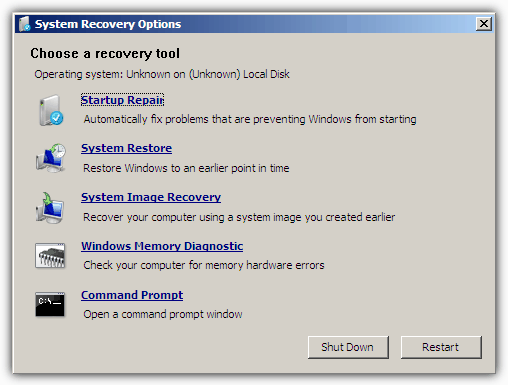
A simple scenario where a repair disc would be useful is if you decide for whatever reason that you want to install Windows XP as well as your current Windows. It’s easy to install Windows XP on a system with Windows 7 or Vista installed, but XP would overwrite the current bootloader making only the XP installation bootable. The system repair disc would be able to reinstall the correct bootloader to make all operating systems bootable.
A few years back the people who make EasyBCD, Neosmart, used to host the Windows bootable repair CD’s although they now charge a fee for their own version of a repair disc. Most other repair discs made by Windows and uploaded to websites have just about all been taken down from the internet by Microsoft actively seeking their removal, for some reason. Here’s how to create your own from within Windows.
Creating a Windows Vista Repair Boot CD
Although not immediately obvious in Windows Vista, it does come with the ability to create the repair CD which you can use to repair things like the boot sector, boot failure issues or various other problems. The odd thing about Vista is it appears the function to create the disc was removed in Service Pack 1 onwards. Although the program to create the CD is there, it’s unusable. What you need to do if you have Service Pack 1 or 2 installed is to use the original Recdisc.exe from the RTM version of Vista and replace the current file. Here’s how to do it:
1. As noted above, you need the original Windows Vista RTM Recdisc.exe file to be able to use it with SP1 or SP2. You can download the correct version for your operating system architecture below:
Recdisc for Vista 32-bit | Recdisc for Vista 64-bit
Extract the downloaded zip file to your folder of choice.
2. Download Windows Se7en Files Replacer and extract the 7-Zip file to a folder.
3. If you have Windows UAC (User Account Control) turned off, simply run the Se7en Files Replacer.exe and drop the Recdisc.exe you downloaded from step #1 onto the window. This will replace the file in \Windows\System32, there’s no need to reboot.
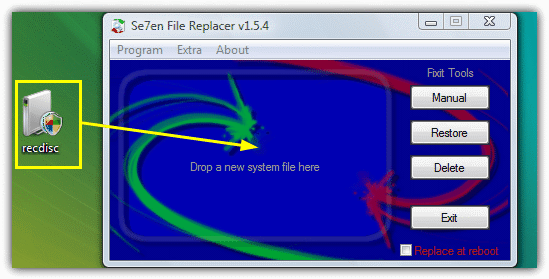
If you have UAC on, run the tool and click the Manual button to the right. Then locate the executable from step #1, and locate the original in C:\Windows\System32 from the next file dialog, although it should already be pointing to the correct folder. The reason you can’t simply copy and paste the file is because Recdisc.exe has advanced permissions which prohibits it being replaced under normal circumstances.
4. If done correctly, you should now be able to run the repair disc creator. Go to Start or press the Win key and type recdisc. This will open the dialog where the CD/DVD drive can be selected, simply insert a blank disc and press the Create button.
Creating a Windows 7 Repair Boot CD
Thankfully, with Windows 7 it’s far easier to create the repair CD because you don’t have to worry about replacing the Recdisc.exe file like is needed for Vista.
1. All you have to do is press Win or go to Start and type recdisc, then follow the prompts by selecting the optical drive with a blank CD and pressing the button.
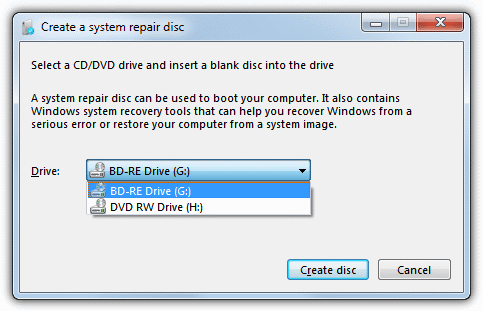
If you’re one of those users that doesn’t have a working CD/DVD-RW drive in your computer, it’s normally not possible to create the repair disc because Recdisc requires an optical drive to write to. We have discovered how you can create the ISO file and write a perfectly working repair disc onto USB without using a ROM drive. You can read all about that in our Installing Windows 7 System Recovery Disc onto USB Flash Drive article.
Creating a Windows 8 Repair Disc
Unfortunately, with Windows 8 Microsoft has gone back to playing around with the recovery disc feature like they did in Windows Vista. As it stands, Recdisc is available in Windows 8 but NOT in Windows 8.1. All is not lost though because you still get the new to Windows 8 feature of writing the repair disc directly to USB flash drive.
Using Recdisc in Windows 8
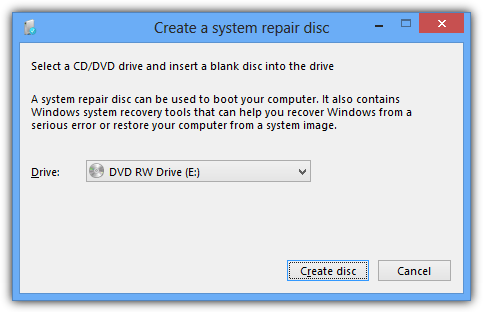
1. The procedure for Recdisc in Windows 8 is the same as Windows 7 and Vista, Press Win key+R to bring up the Run dialog and type recdisc.
Using the USB Recovery Creator in Windows 8/8.1
As mentioned, only this function is available in Windows 8.1 and not Recdisc above. To use it:
1. Either press Win key+R and type recoverydrive or go to Control Panel -> Recovery -> “Create a recovery drive”.
2. At the first window, make sure the tick is not in the “Copy the recovery partition from the PC to the recovery drive” box. Then make sure the flash drive is inserted and press Next.
3. In this window MAKE SURE your USB device has been detected and is the selected drive to write onto. If your flash drive doesn’t show up, it could default to the C: drive as the device to overwrite so special attention is needed here.
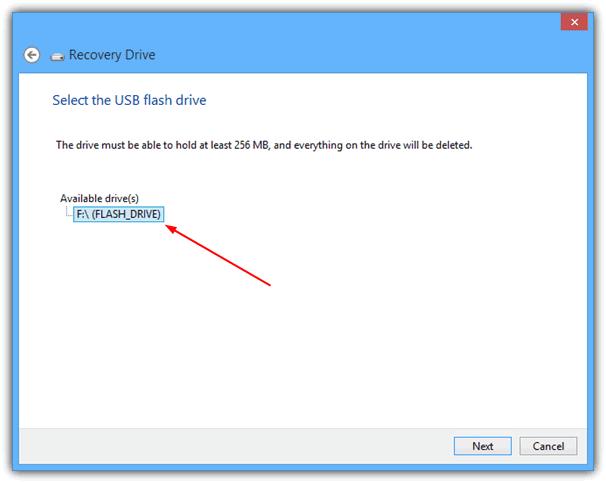
4. Press Next when you’re satisfied, then read the final warning and click Create. After a short while the USB recovery drive will be created.
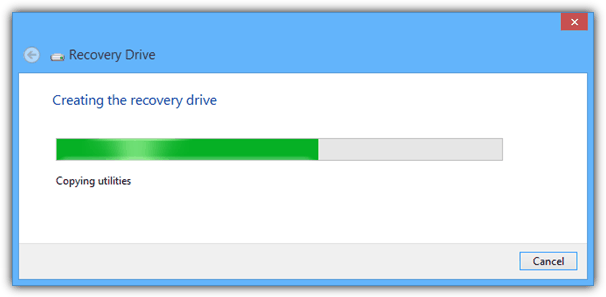
The Windows 8 recovery image is now 200MB+ compared to around 160MB for the Windows image that gets written to CD, but still easily fits on even small flash drives.


User forum
16 messages