How to Install SATA Drivers on Windows XP ISO [2 Ways]

Here are 2 ways to integrate the SATA drivers into your Windows XP CD, allowing installation without the need for a floppy drive.
A major issue with Windows XP is its inability to install on newer hardware without extra steps. Despite the existence of SATA, AHCI, and RAID controllers, the XP install CD can’t recognize them, requiring a floppy disk with drivers for setup.
If you don’t use a driver floppy, you will get the dreaded “Setup did not find any hard disk drives installed in your computer error.
To fix this, download the SATA/RAID driver, extract it to a floppy, and press F6 during XP setup. Alternatively, integrate the driver into the XP CD for a floppy-free installation.
1: Integrate SATA drivers using nLite
This first method uses the update and driver integrating tool nLite to add the drivers to the Windows XP CD. Just about everyone looking to customize their Windows XP install CD has heard of this tool.
- Download and install nLite.
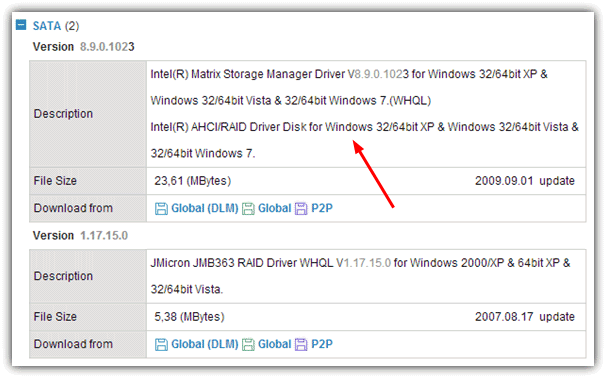
- Download the SATA driver from the motherboard or laptop manufacturer’s website.
- Extract it to a new folder. Alternatively, you might be able to download a newer driver from the SATA or RAID chipset manufacturer, such as the drivers from the Intel website for their chipsets.
- Make sure to get a standalone floppy driver if available or a driver package that includes a floppy driver.
- Run nLite and select the language to use.
- Next you need to specify where the Windows XP installation files are. If you already have a folder on you hard drive with the XP CD contents, point to that.
- If not, insert your XP CD and browse to your disc’s drive letter, select a folder location for it to save to and then wait for it to copy.
- Click Next once done, and Next again to skip the Presets screen.

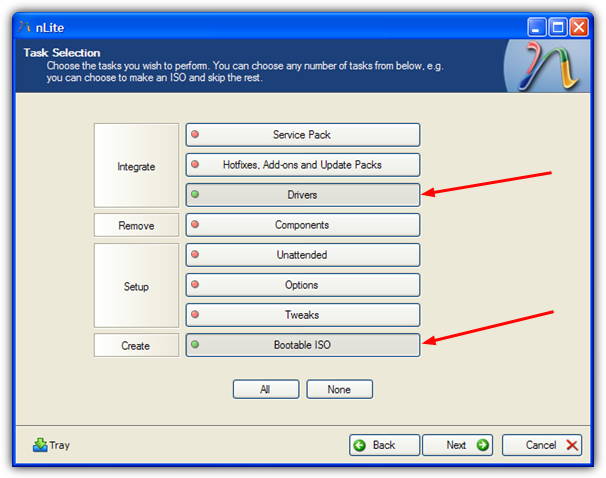
- At Task Selection, click Drivers and Bootable ISO. Click Next.
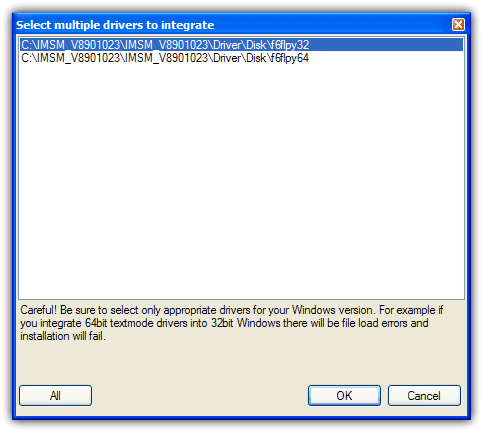
- Now click the Insert button at the bottom and select “Multiple driver folder”, choose the folder where the extracted drivers are and click OK.
- If there are multiple choices, select the correct drivers to integrate. For example, do not select 64 bit drivers on a 32 bit Windows XP. Click OK when done selecting the drivers. Click Next.
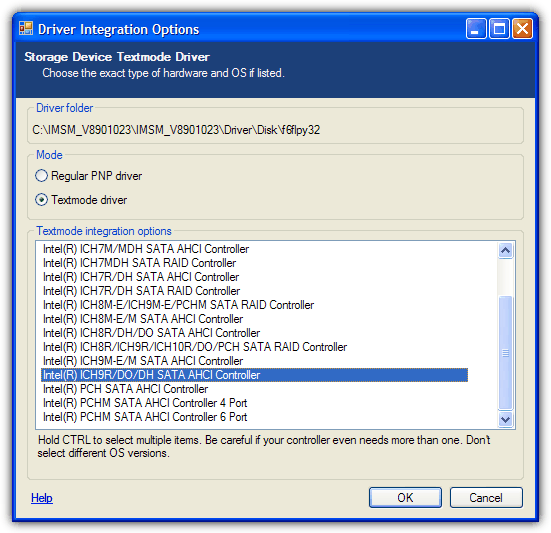
- If this next screen doesn’t appear, you don’t have the correct driver. The driver needs to be of a Textmode type and not a PNP type to be included in the XP setup.
- Make sure Textmode driver is the selected mode and to choose the exact type of hardware chipset in your system.
- If you’re not sure, check the documentation or the manufacturers website. For our hardware below we want the Intel ICH9R chipset. Select the drivers you require and click OK and then click Next, and finally OK to start the process.
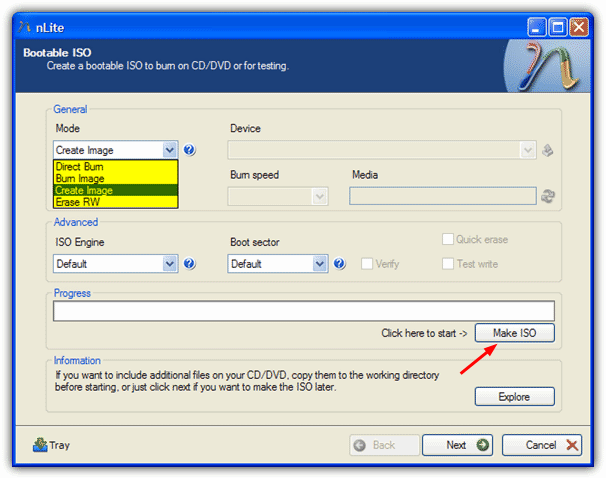
- Once the integration has completed, click Next to be taken to the ISO creation and burning screen. You can create a bootable ISO to burn to CD later on, or even burn to CD directly using Direct Burn option.
- To create and save an ISO simply click the Create Image mode option and then Make ISO. With the help of an ISO file, you could then install Windows XP from a USB flash drive.
The next integration method on page 2 is far easier to get working if you can’t find the right floppy SATA/RAID driver because it makes a universal SATA Windows CD.
2: Integrate SATA/RAID Drivers using DriverPacks
DriverPacks is a well known solution for allowing the integration of a number of drivers onto your XP install CD or Vista / 7 DVD.
Although it can include other drivers such as sound, video and network, for the purposes of this article we’re only interested in the Mass Storage drivers and getting them installed so you don’t need a floppy drive during XP’s setup.
The big advantage here is this method doesn’t need you to find the exact driver for your storage controller, just about all the major brands are already included in the driverpack file you download.
You WILL need a folder on your hard drive with the contents of your XP CD copied into it for the drivers to be integrated.
- Visit DriverPacks.net and download the latest DriverPacks BASE program. Run the SFX archive and extract it to the folder of your choice, then run the DPs_BASE.exe file.
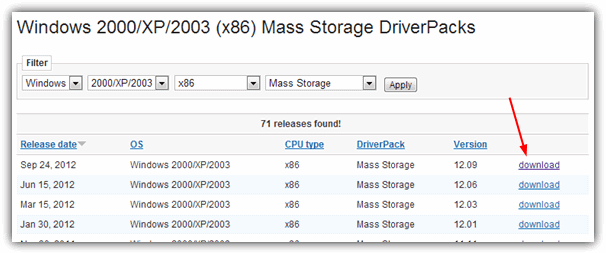
- DriverPacks uses Bittorrent these days to distribute its driver archives and the updating function from within the program doesn’t work. Visit the Mass Storage XP drivers download page and download the torrent file. Then either add it in and download the file from your favorite torrent client, or use one of the methods such as BitLet from our article about downloading torrents without installing software. The file to download is around 8MB.
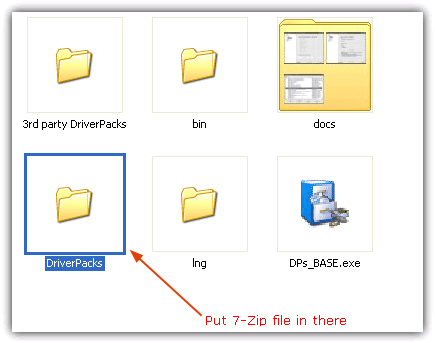
- Copy the downloaded drivers 7z file to the DriverPacks folder inside the folder you extracted DPs_BASE to.
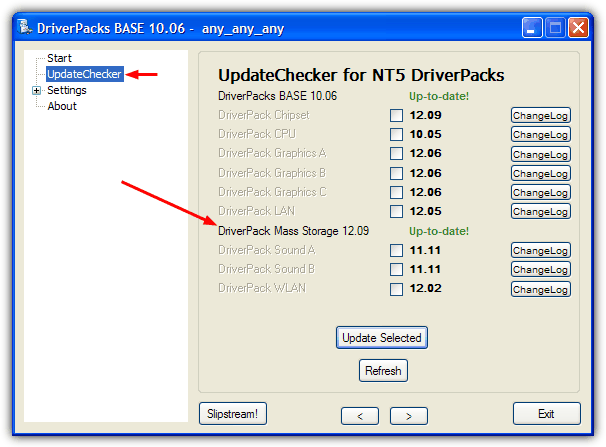
- Go back to the DPs_BASE.exe program (or start it if you haven’t already) and click on UpdateChecker down the left. The “DriverPack Mass Storage xx.xx” should be visible and say it’s up to date. If it’s not there, check the folder you placed the 7z file in from step 3 and click Refresh.
- Click the Next arrow a few times or click on Settings -> Location and click on the Browse button. Locate the folder containing the contents of the XP CD you should have copied over before starting the tutorial.
- Navigate to Settings -> DriverPacks and put a tick next to “DriverPack Mass Storage xx.xx”. Make sure it has also put a tick next to “DriverPack Mass Storage text mode – Update ‘F6’ drivers”.
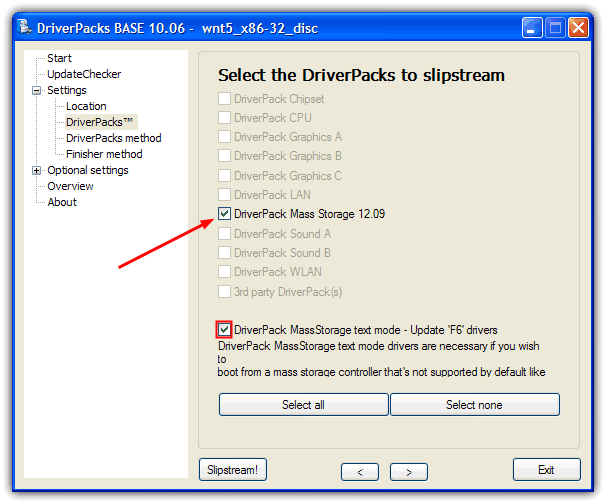
No other settings need to be configured so you can now press Slipstream! to begin the integration. Unfortunately, once complete the DriverPacks tool cannot create an ISO to be burned back to CD, you can either install nLite or download and run a useful portable tool called RyanVM Integrator.
- Download the RyanVM Integrator tool, run it and click on the Make ISO tab.
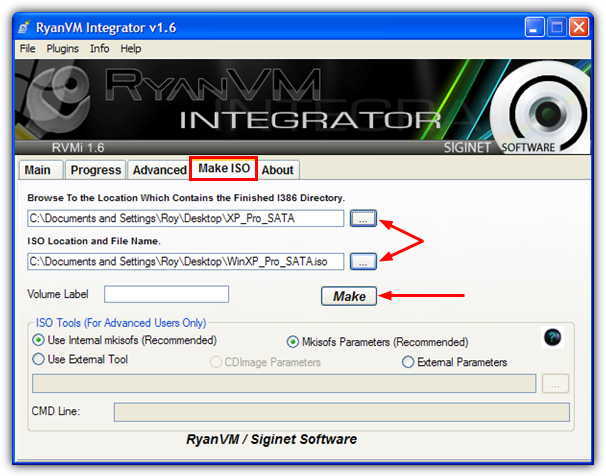
- Use the top browse button to locate the XP folder on your hard drive, the next browse button for the ISO save name and location, and then press the Make button.
- The finished ISO will then be ready to be burned back to CD, use your favorite ISO burning software or choose one from our list of 10 free ISO burning tools.
- Or alternatively, write the XP ISO to USB for a faster Windows installation.
Now you have a new Windows XP CD/DVD that contains the SATA/RAID drivers needed to get your system running in AHCI/RAID mode without the need for a floppy drive. Boot your laptop or desktop with the new XP CD and install as normal without needing to press F6.

Improve this guide

User forum
54 messages