Check Gmail through The Bat! Email Client

I’ve used Microsoft Outlook because it was one of the most powerful email client today. However, it seems to be a bit too powerful and bulky when I simply want to use it as a normal email desktop program to download emails so that I can read and reply them offline. I decided to migrate from Microsoft Outlook to The Bat! Professional email client because there are a lot of positive reviews about it. Unlike Microsoft Outlook that are prone to virus infection through zero-day exploits, The Bat! has been consistently keeping its users safe. The Bat! is also well known for its built-in on-the-fly encryption on the email messages and address book that works in a transparent way without noticeable speed degradation.
I’ve successfully imported all my emails and contacts from Microsoft Outlook to The Bat!. Everything worked fine and it is fast in the sense of receiving the email and also loads very quickly. The Bat! is capable of checking your Gmail email account and I will show you how to configure The Bat! to do that.
1. Login to your Gmail account and make sure that POP is enabled, although it should be enabled by default. Go to Settings -> Forwarding and POP/IMAP -> select Enable POP for all mail (even mail that’s already been downloaded) and click the Save Changes button.
2. Launch The Bat!, click on Account at the menubar and select New
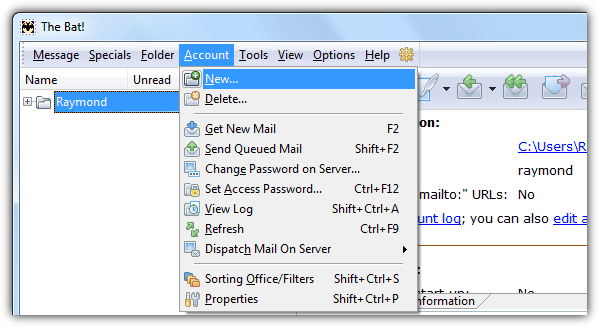
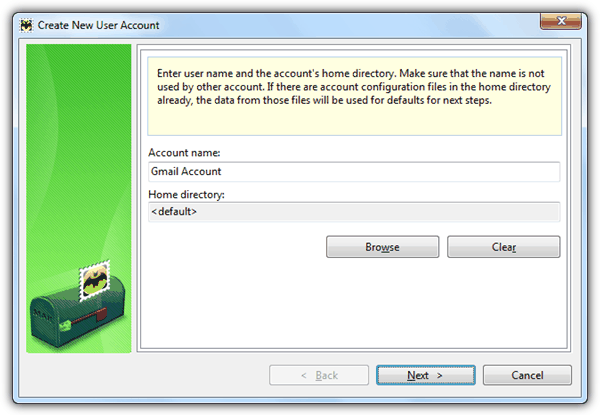
3. Enter Account Name for you to identify your email account. Any name will do as it does not interfere with the email checking process.
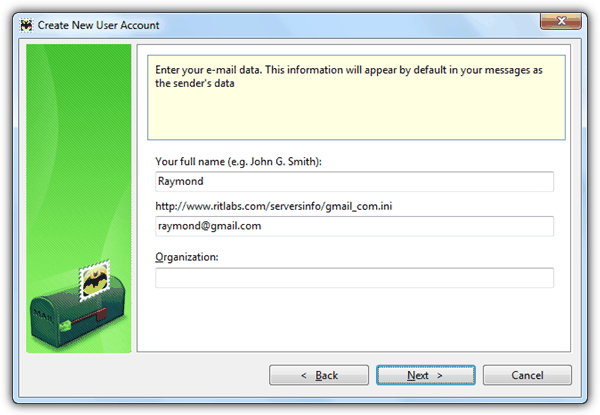
4. Enter your full name and your Gmail e-mail address. Your full name will display to the recipient at From when you send an email. Organization is optional.
5. The Bat! will automatically enter the Gmail server settings if it detected a Gmail address being entered at step 4.
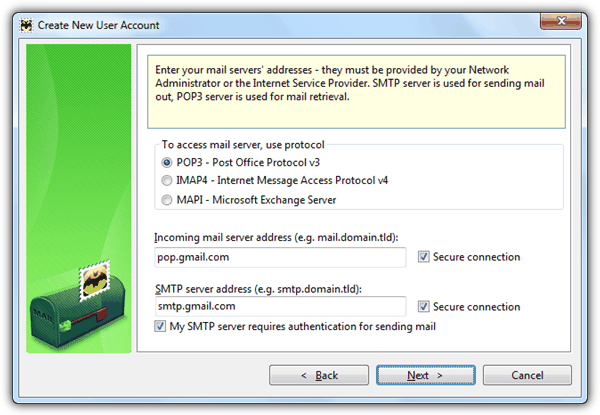
If for some reason the mail server address is left blank, you can manually enter the following information:
Protocol: POP3 – Post Office Protocol v3
Incoming mail server address: pop.gmail.com
SMTP server address: smtp.gmail.com
Check both Secure connection checkboxes and My SMTP server requires authentication for sending mail
6. Enter your full Gmail email address as your Username and also your Gmail password.
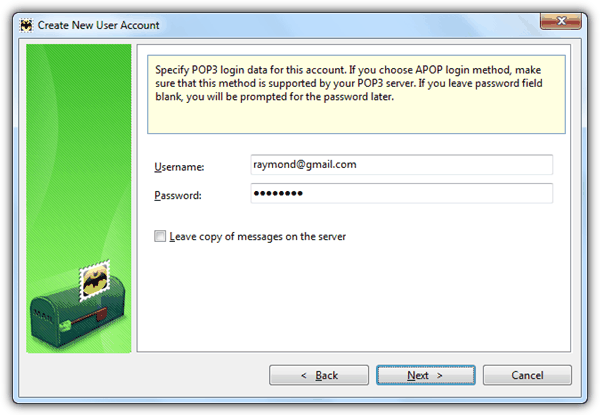
7. Select No when asked “Do you want to check all account’s settings now?” and click the Finish button.
You can now check your Gmail account from The Bat! email client by pressing F2 or Alt+F2.
If you’re unable to send out email from The Bat! using your Gmail account, it is possible that the default port 465 has been blocked by your network or ISP. You can try changing to a different port and connection type. Right click on your email account and select Properties. Click on Transport, click the drop down box for Connection, select “Secure to regular port (STARTTLS)” and change the port to 587. Click OK to close the Account Properties window and try sending the email.
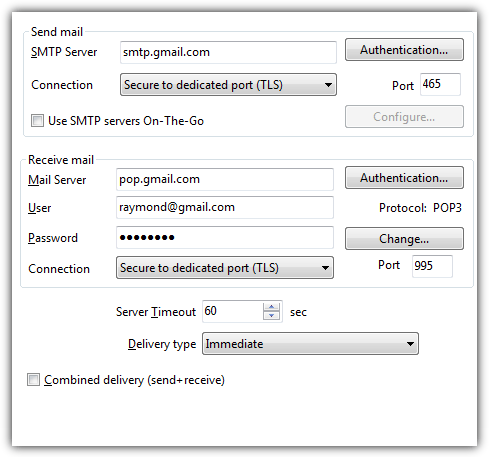
Additional note: If you’ve enabled the 2-step verification for your Google account, you will need to create an application-specific password for your Gmail account and use that as your Gmail password in The Bat!. To enter a new password in The Bat!, right click on your email account and select Properties. Click on Transport and you are able to enter a new password at the Receive mail area.


User forum
9 messages