How To Install and Test Windows Without Affecting The Currently Installed OS

Most of you will have heard by now that Microsoft’s latest operating system, Windows 10, is now in testing phase and begins the long road to a final release sometime in 2015. This will please a lot of people because many of the changes in Windows 8 that made it so unpopular are being scaled back or even reversed completely. For Windows 8 or 8.1 users, this may be good news if you’re currently one of the many not entirely happy with features like the Start Screen or the heavy reliance on the Modern UI.
If you’re a Windows 7, Vista or even an XP user, you might want or need to upgrade and install something newer, whether it’s from XP to 7, or you’re a Windows 7 user looking to see if you’ll like the desktop friendlier Windows 10. Most users don’t try out a new version of Windows before actually buying a license or a prebuilt computer with a license already installed. In the main, it’s simply due to believing there’s a lot of work involved and they will have to erase or tamper with their current operating system to do so. Thankfully, this doesn’t have to be the case.
Messing around with backups, Master Boot Records, multiboot menus and drive partitions can be a dangerous and time wasting, especially if you don’t plan to test the new operating system out for long or you’re inexperienced in these areas. The best and least destructive way to test drive a new operating system is in a virtual environment. Here we’ll show you how to easily get the version of Windows you want to test and how to quickly install it in a Virtual Machine so you can see how it works and whether you like it.
Downloading The Version of Windows You Want to Test
Apart from the virtual machine software itself, you obviously need a version of Windows which you can use inside it. If you have a Windows installation DVD or ISO already, this can be used, but there are special versions of Windows Vista, 7, 8, 8.1 and 10 already pre-built as virtual machines by Microsoft, so you don’t have to go through the whole Windows install procedure. If you’re feeling nostalgic, even Windows XP is there!
1. Visit the Microsoft Modern.IE website. This will take you to the downloads page for all the virtual machines (VMs) Microsoft have created.
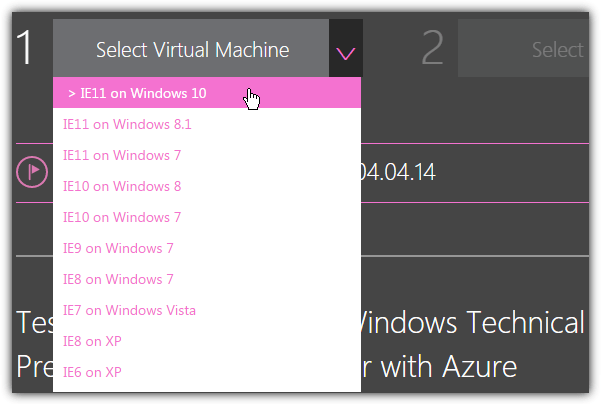
2. Click the button on Step 1. As Modern.IE is aimed primarily at testing websites on different versions of Windows and Internet Explorer, there are several distros for the same OS, such as Windows 7 with IE8-IE11, choose the latest IE version.
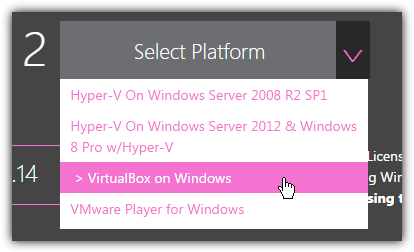
3. With the Step 2 button select either ‘VirtualBox on Windows’ or ‘VMware Player on Windows’ depending on which software you are going to use. We will show you how to install on both VMware Player and VirtualBox below.
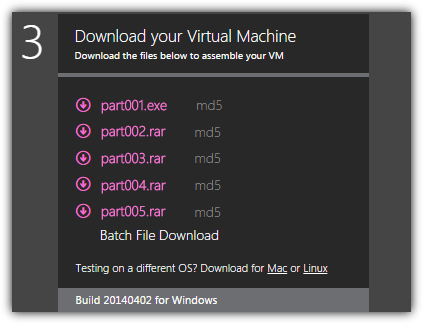
4. Step 3 will automatically display the download links you need to get the VM package. Either click on the links individually or use ‘Batch File Download’ to show all links together which can then be added into a download manager. As each file can be up to 1GB in size, MD5 checksum links are provided so the files can be verified for integrity after download.
These Windows VMs are also available to use in Linux and OS X, simply click the small link and go through the on page steps 1 and 2 again to show the correct files. VirtualBox, VMware Fusion and Parallels are supported.
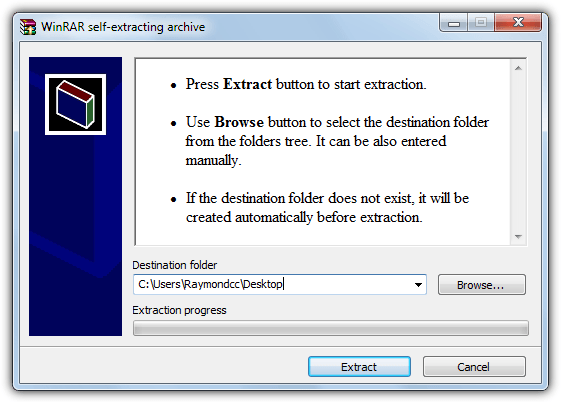
5. Go to your downloaded VM files and double click the Part001.exe to extract the contents to a folder of your choice. The Windows 10 Preview virtual machine doesn’t have a .exe and comes in plain RAR files so you will need an archiver capable of extracting them, such as WinRAR or 7-Zip etc. This will extract a single .OVA file in the case of VirtualBox or three files from the VMware archive, .MF, .OVF and .VMDK.
Note the Windows 10 Technical Preview at Modern.IE is 64-bit and the rest of the operating systems in the list are 32-bit versions.
Running the Virtual Windows in VirtualBox
VirtualBox is currently owned by Oracle and is a hugely popular virtual machine software, it is also cross platform with versions for Mac and Linux as well as Windows. While we’re fans of VirtualBox in general, it isn’t the most reliable software and recent updates to the program have also caused major issues for many users, for this reason we use a slightly older version of 4.3.12.
1. Go to the website and download VirtualBox. If you wish to use the older more stable version 4.3.12, download it from the older builds page.
2. Install VirtualBox using the default options, you can of course change the installation folder if required but make sure to leave the file associations option enabled.
3. Double click the extracted .OVA file which automatically launches VirtualBox and pops up a window with the pre-defined settings for the VM. Unless you specifically want to disable sound or the optical drive etc, simply click Import.
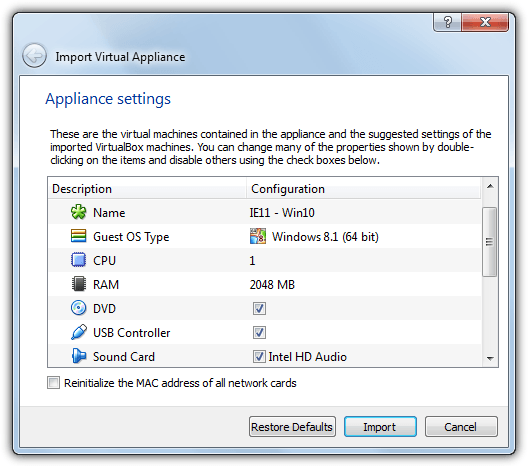
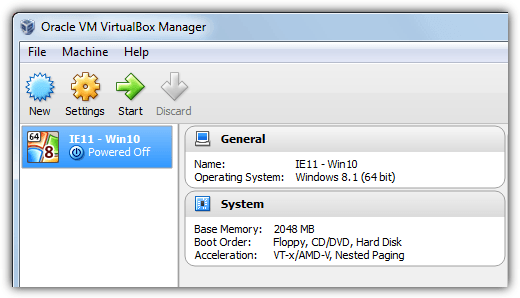
4. After spending some minutes importing the package to VirtualBox, the VM will be ready to use. Make sure the VM is highlighted in the list on the left and click Start to boot it up.
After some screens saying your installation is being configured, you will eventually reach the desktop of your chosen OS. These Virtual machines have a preset default username of IEUser and a password of Passw0rd! (XP lets you create your own password). Various information is displayed on the desktop, you can change this by altering the desktop background or theme.
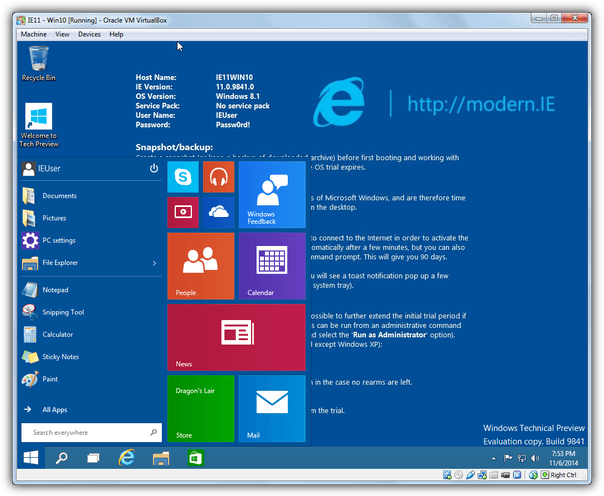
Once installed there are a few changes you can make such as altering the default amount of memory used (no lower than 1GB for Vista, 7, 8 or 10) or increasing the number of used processor cores, the virtual Windows needs to be shutdown to do this. Guest additions can also be installed that adds shared folders and improves the performance and graphics of the Windows VM, which is accessible from the Devices menu while the VM is running.
Note: If you run into a black screen while testing Windows 8 or 10 in VirtualBox, especially an error that ends in 5D, you may need to look for and enable a setting in your system BIOS called “No-Execute Memory Protection”, also known as “Data Execution Prevention”.
Running the Virtual Windows in VMware Player
VMware Player is basically a cutdown version of the full and expensive VMware package, which is regarded as probably the best virtual machine software around. Although Player is missing a few things like snapshots which are available in VirtualBox, it is definitely more stable, easier to use and the virtual operating system generally runs slightly faster than in VirtualBox.
1. Download VMware Player, then install it on your computer. There are no special options to configure during installation.
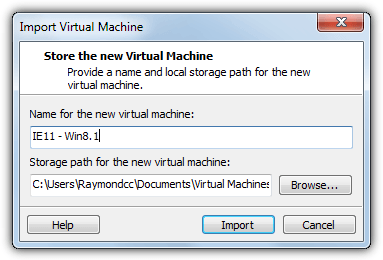
2. In the extracted folder from Modern.IE, double click on the .OVF file. A new window will show that asks what name you want to call the virtual machine and where to store it. Make sure the save location has plenty of storage space available, at least 15-20GB for Vista and above. Click Import and wait a few minutes for the process to complete.
3. Once step 2 is finished, VMware Player will automatically start to boot the VM. If you receive a message that VMware Tools is outdated and an update is available, you can either let it update now or later on. The good thing is VMware Tools is already installed and is similar to VirtualBox’s Guest Additions that improves several areas of the VM performance. The only issue is it may need updating depending how old the virtual machine files are at Modern.IE and whether a newer VMware Player has been released since.
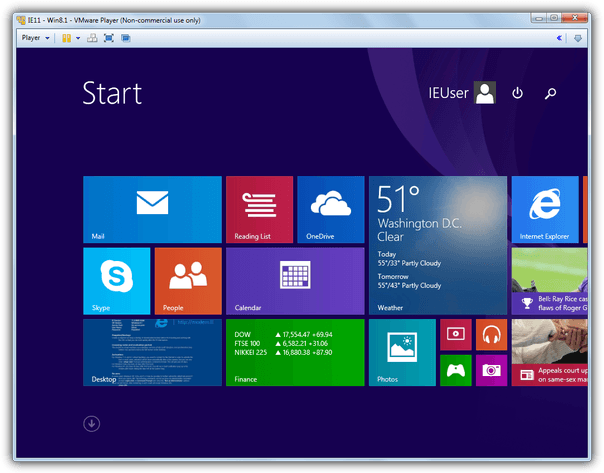
Ctrl+D > Options will allow you to add shared folders straight away. Shutting down the virtual machine first and pressing Ctrl+D will allow you to edit the hardware configuration such as memory allocation or CPU cores, Sound, ROM drive etc.
Notes: As you might expect, the virtual machines at Modern.IE aren’t fully activated versions of Windows (if only!) or ones that you activate with a real product key. They are essentially Enterprise version trials that usually work for 90-120 days. As this article is about testing or trying out a different version of Windows for a short period, the time frame should be long enough to get you well acquainted with your chosen Windows operating system.
A simple workaround to get it working again after your time expires is deleting the old virtual machine from the software and then importing it again from the downloaded files. Alternatively, using the Snapshot feature in VirtualBox will help lengthen the time until expiry.
For best results you need make sure Intel VT-x or AMD-V hardware virtualization extensions are enabled in your system BIOS, you have 4GB+ of system memory, a dual/quad core CPU and plenty of hard drive space. All is not lost if you don’t have these but the specification of the virtual machine’s hardware will have to be lowered and its performance will be reduced.


User forum
63 messages