Free Bandwidth Controler & Limiter: 3 Best in 2025
- Manage internet bandwidth by setting limits for less important programs, ensuring priority for critical tasks like gaming or browsing.
- Use software or router features to control traffic flow and allocate bandwidth as needed.
- Consider traffic-shaping tools to efficiently manage network usage on Windows.
A fast internet connection is crucial for running multiple applications that require bandwidth, like torrent downloads, web browsing, and gaming.
When running all these tasks simultaneously, gaming experiences can suffer from high ping rates, making it nearly impossible to play smoothly.
Learn how to manage your bandwidth effectively by setting limits for less important programs and prioritizing critical ones.
What Is Bandwidth Limiting?
Bandwidth limiting allows you to control how much data certain programs can use, leaving more bandwidth for other applications.
Many software applications, including torrent clients and game portals like Steam, offer built-in settings to adjust download speeds. If your router supports QoS (Quality of Service), it can also prioritize traffic, though not all routers have this feature.
Some users turn to third-party traffic-shaping software to better control bandwidth allocation. Unfortunately, free options are limited, but we’ve found a few that can help.
Best Bandwidth Limiting Tools for Windows
1. TMeter
TMeter is quite a powerful application and one of its features is allowing you to control the speed of any Windows process accessing the network.
Besides that, it has a large feature list that includes packet capture, URL filtering, built-in user accounts, host monitoring, packet filtering firewall, built-in NAT/DNS/DHCP, and traffic recording to report or database.
TMeter controls the speed of programs by assigning filters. The €99 Euro full version has unlimited filters while the free version allows you to create up to four.
With a filter, you can set the overall speed limit of a process, enable a traffic limit to block or change speed, create a schedule, enable packet logging, and enable host header logging.
The procedure of adding a speed limit is not quite as straightforward as you might hope and consists of several steps, here’s how to do it.
1. Download TMeter Free Edition and install it. On the first launch, you will be asked to select a network adapter to monitor. Check the box next to the adapter and select a network type, usually Private. Click OK and Apply.
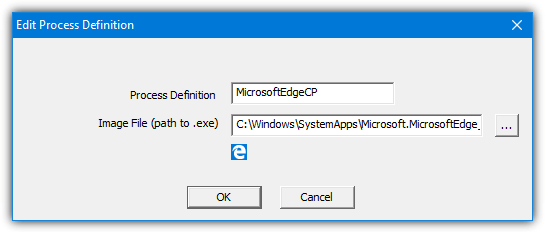
2. Click Configuration > Process Definitions on the left. Two processes (SvcHost and System) are built in, click Add to attach another process to TMeter. Press the three dots on the right and locate an executable file. The Process Definition name is entered but you can change it if you want. Press OK.
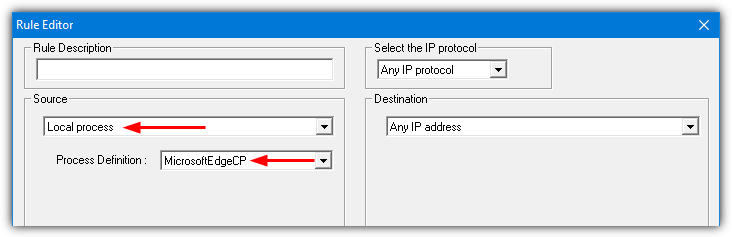
3. Click Configuration > Filterset > Add > Filter > Add Rule. Press the Source drop down and choose Local process near the bottom. In the Process Definition drop down, select the definition name created in step 2. Click OK.
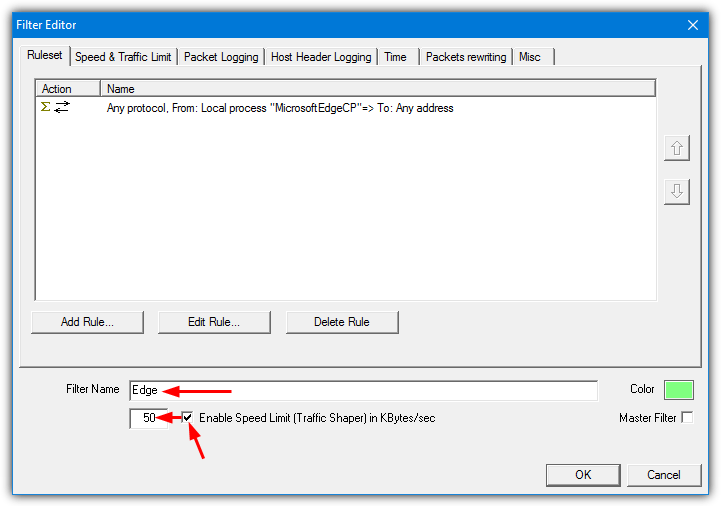
4. Enter a name for the filter at the bottom, then check the box underneath to enable a speed limit. Type a KB/s limit for the process into the box and optionally change the color the process will be displayed as in the traffic graph. Click OK then Apply.
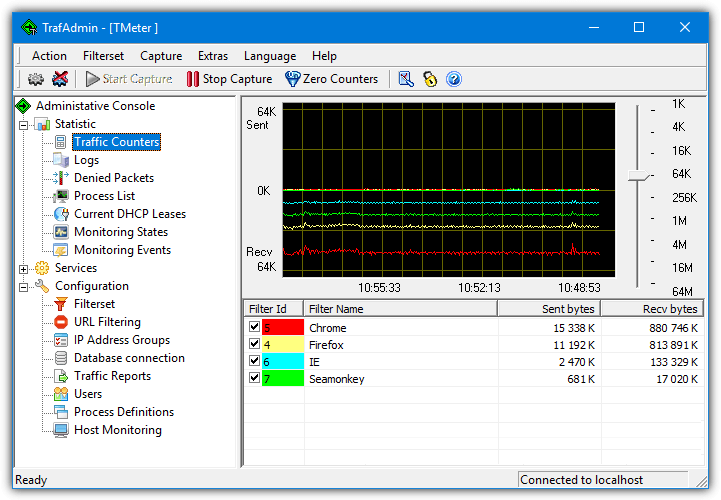
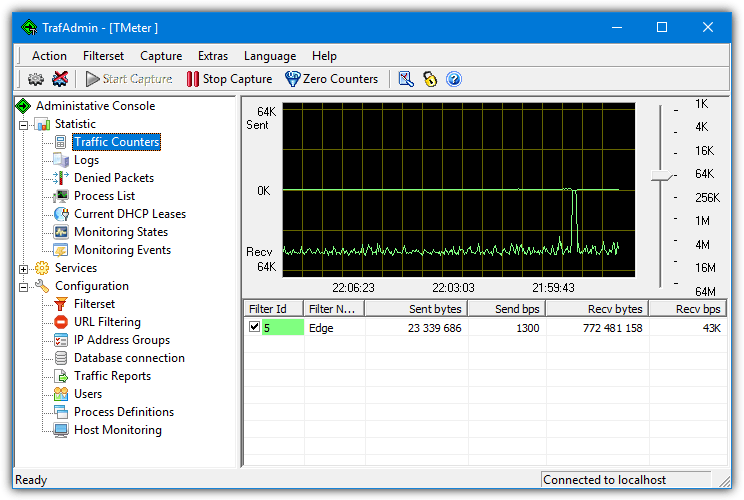
5. Go to Statistic > Traffic Counters and you should see the limit being applied when the selected process is accessing the network. The Recv bps column will give an approximation of the current download speed, Send bps is obviously upload speed.
You can add another three filters to TMeter but must first delete the filters that are included by default. Just highlight ICMP, DNS, and All traffic then delete each filter.
The built in process definition SVCHOST could be useful to control Windows Update download speeds. TMeter cannot apply a limit to a single process when several with the same name are running, like with Google Chrome.
A workaround is applying a destination IP address in the filter to limit traffic only from that IP.
2. NetBalancer
NetBalancer is a well-known and popular bandwidth management application. You can use it a couple of different ways, to either set a download/upload speed limit or set a priority.
That means programs with a higher priority are given more of the bandwidth they need while lower priority programs will run at reduced speeds when required.
NetBalancer is paid shareware and recent free versions don’t allow any rules or limits, only monitoring. Three free rules and three free limits/priorities were removed starting with version 9.3. You can still download version 9.2.7 from the website which has those free functions, but there’s an expiry date hard-coded into the software. Read below how to get around the issue.
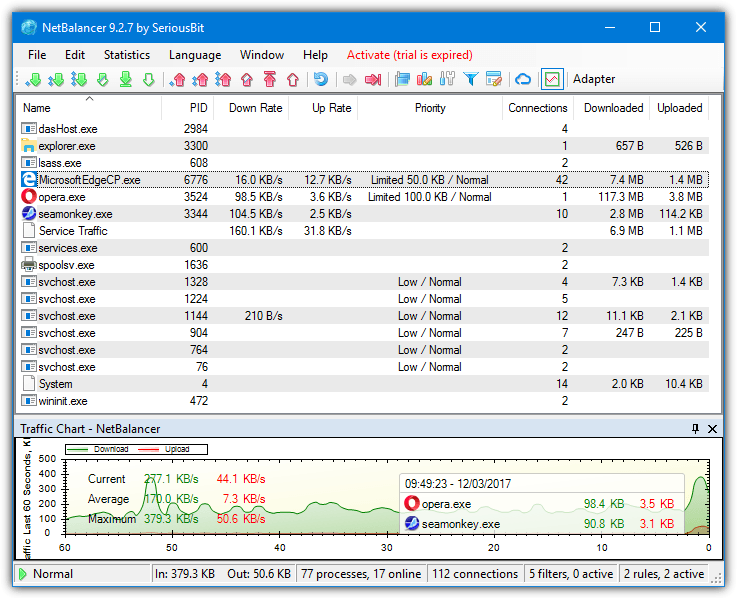
Although there are some advanced functions in NetBalancer, it is incredibly easy to set a limit or priority to a running program.
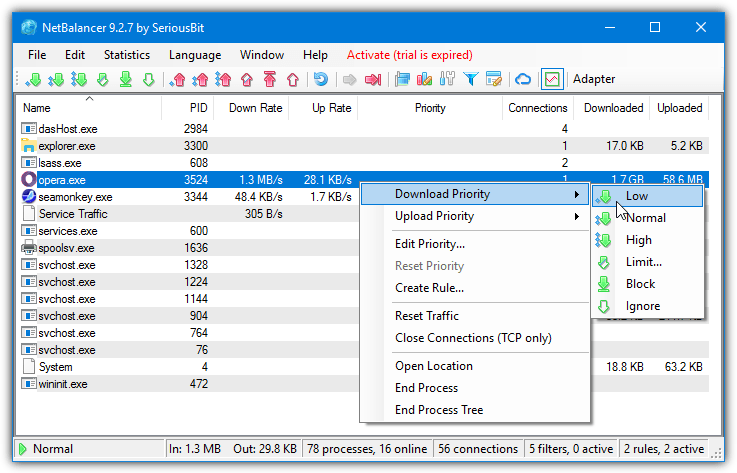
Simply right click on the entry in the window and set the download or upload priority to Low, Medium, High, Limit, Block or Ignore.
The first three set a priority relative to other traffic while Block stops the program accessing the internet completely. Limit allows you to manually set the maximum down and up speed in Kilobytes.
There’s a maximum of three rules that can be applied where you can configure specific limits on a schedule.
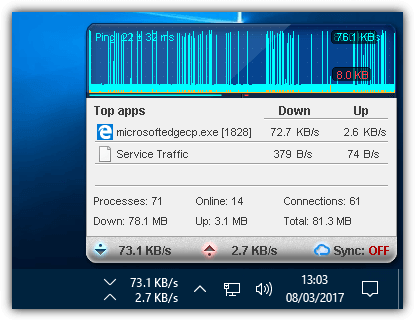
There are some default rules to get you started, including one to block Microsoft telemetry IPs on Windows 10, 8 and 7. A tray traffic monitor which runs on the task bar with visual traffic window is available to run as a separate tool.
How To Get NetBalancer Free To Run
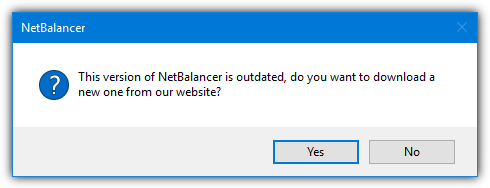
Install and run NetBalancer 9.2.7 and a message box will pop up.
This version of NetBalancer is outdated, do you want to download a new one from our website?
Selecting No does nothing and NetBalancer will not run. We found out the expiry date for NetBalancer 9.2.7 was the 18th of October 2016. The tray or UI components won’t run when the system date is more recent. The NetBalancer service will run but not function correctly.
To get around this, we’ve created a batch script that temporarily sets your system clock to October 2016, starts the service, launches the program, and then sets the clock to the current date.
It’s not a perfect solution but is currently the only way we know to make use of the free bandwidth-limiting functions in NetBalancer.
1. Download NirSoft RunAsDate and extract the Zip to a permanent location. This tool tricks NetBalancer into thinking the date is 2016 on launch and will run every time you open NetBalancer. Make sure to use the correct 32/64 bit version for your system or the process will fail.
2. Download the NetBalancer scripts. There are three scripts in the archive but you only need to use the one that matches the date format of your system clock. Place the script and included shortcuts in the RunAsDate folder.
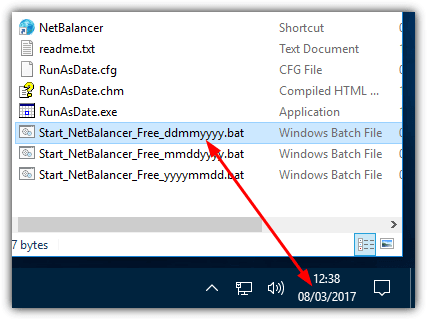
3. Download NetBalancer 9.2.7 and install. Right-click on the batch script and run as administrator. Once NetBalancer opens, optionally accept the predefined priorities, refuse the update, go to Edit > Settings and uncheck start tray icon with Windows and check for new version at startup near the top.
Now use NetBalancer’s free functions as required. It’s best to minimize the program window to the taskbar rather than close it to the tray. If you do that, run the included shortcut to open the window again.
To use the tray network monitor, run the script then the tray shortcut that came with the script. Note that if traffic data in the main window or tray display disappear, restart the service using the batch script. This is part of the date issue for the service and does happen from time to time.
3. cFosSpeed (ASRock XFast LAN)
cFosSpeed is a well known commercial traffic shaping and balancing application. The full version costs $17 but it’s also often licensed to third party motherboard manufacturers like Asus, Gigabyte, MSI and ASRock. We’re looking at ASRock XFast LAN because it’s quite a recent cFosSpeed version. The only real difference from cFosSpeed itself is each vendor has its own custom UI skins.
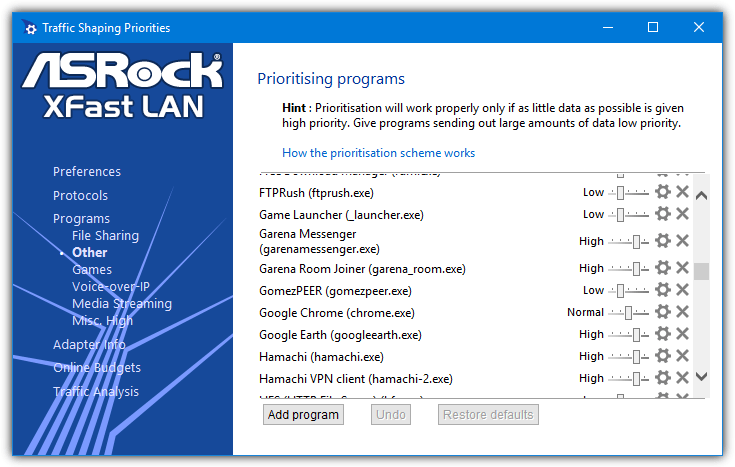
cFosSpeed does not limit traffic to a specific speed like NetBalancer or TMeter can. Instead, it prioritizes internet traffic so important programs can have a higher priority. There are hundreds of built-in presets for different types of programs. For example, VOIP and streaming software is set to a higher priority along with many games. Other software like P2P clients, download managers and game portals (Steam, Origin etc) are set lower.
Most functions are controlled from the tray icon, double click the icon to open a network activity monitor.
From the right-click menu, you can change the activity monitor look, enable/disable traffic shaping, get ping stats and show a usage graph. Use Options > Settings to open the configuration window where the built in priorities can be edited or new ones added.
The Preferences window also has an overall download and upload limit for the connection.
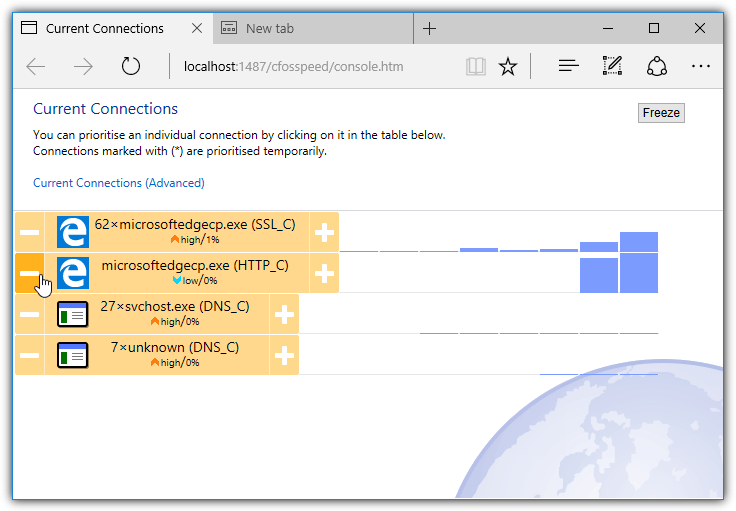
To change priorities on the fly, select Current Connections from the tray menu. A browser window will open with a list of connections, use the plus and minus buttons to adjust the priority. For more precise usage click the Advanced link. This window splits the connections, so for instance, you could change the priority of a single download in your browser. Click on it and adjust using the slider.
Using ASRock XFast LAN On Any Computer
By default, XFast LAN will only install on a computer equipped with an ASRock motherboard. However, there are ways to force it to install on any computer, giving you the full but slightly older cFosSpeed software. If you have an ASRock motherboard, the program can be installed without the steps below.
1. Download ASRock XFast LAN from the ASRock website.
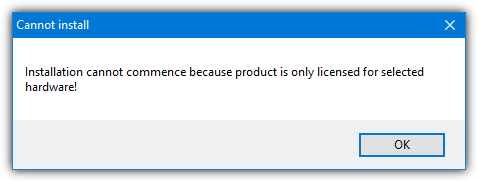
2. Launch the XFast LAN installer to bring up the “Installation cannot commence…” message box. DO NOT close this box.
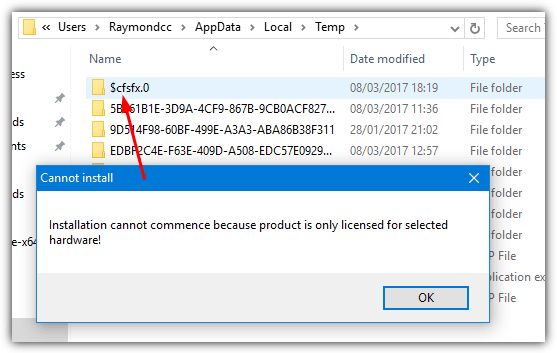
3. Type %temp% into Start, the Run box or Explorer’s address bar to open the Windows Temp folder. Find the folder $cfsfx.0 and copy it to another location. Click OK to close the Cannot install message box.
4. Open the $cfsfx.0 folder and then open Install.ini in Notepad or a compatible text editor. Search for the string mainboard_manufacturer=ASRock.
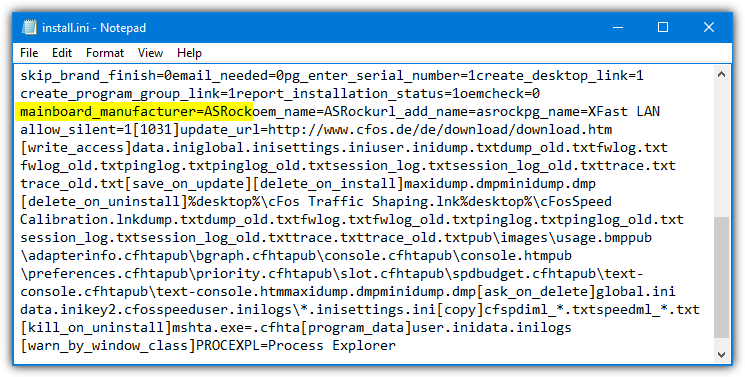
5. Delete ASRock from the string so it reads mainboard_manufacturer=, then save the text file.
6. Launch the installer by double clicking Setup.exe in the $cfsfx.0 folder and cFosSpeed will install.
For convenience, you can skip steps 4 and 5 and download the modified Install.ini file. Unzip it and copy to the $cfsfx.0 folder overwriting the old ini file.
Final Note
Traffic Shaper XP is another traffic-shaping application we’ve mentioned in the past. Sadly, it’s not been updated for nearly a decade and is incompatible with most of today’s operating systems.
It does not work in any version of Windows 10 or any 64-bit operating system but will work in Windows XP, Vista, 7 or 8.1 32-bit.
There’s also limitations placed on this free version such as a maximum of 5 rules, support for TCP only and shaping up to 3,687 KB/s. However, you can still download Traffic Shaper XP if it satisfies your requirements.

Improve this guide

User forum
25 messages