Requirements in Using Networking Tools on Remote Windows Computers

It is common for people especially who are in the tech industry to have more than 1 computer at home with one laptop that they can bring in to their office and the other desktop for their family to use. Setting up a local area network with the computers connected to each other is really easy with a router. When the computers are connected, not only they can share the Internet connection and files, but they can also be managed remotely from one computer as there are many free third party networking tools that comes with remote features.
Some examples are ProduKey and USBDeview by Nir Sofer, USB History Viewer, USB Remote Drive Disabler and Enable Remote Desktop by IntelliAdmin and the excellent PsExec by Windows Sysinternals. Even the built-in Registry Editor (regedit) in Windows has the functionality of connecting to a network registry. As useful as the remote features are in the networking tools, the biggest problem is they don’t seem to work even if you entered the correct username and password. It is common to receive an error message that says “Access is denied” like the image below.
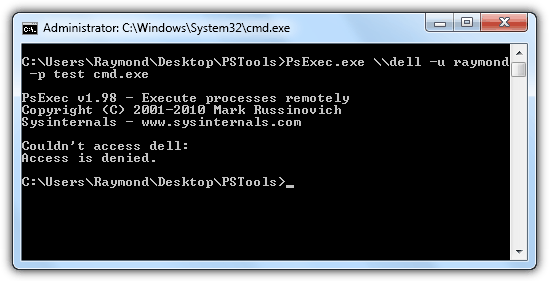
The access denied problem is actually caused by Windows default hardened security settings preventing the tools to work. If you would like to use the networking tools on remote computers, here are the configuration that must be made on the remote computer before you can connect to them.
1. User Account Password
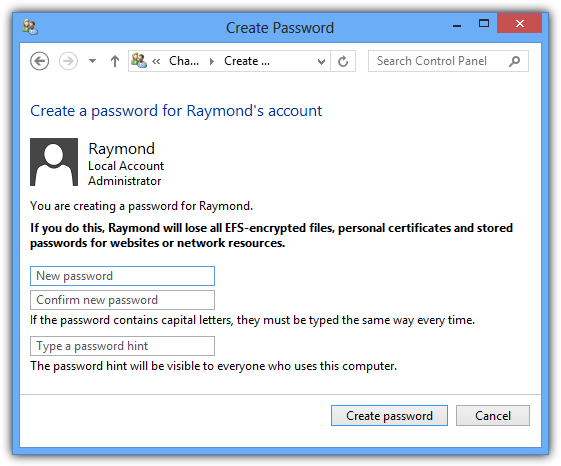
We are putting this as a requirement because Windows does not force you to set a password during installation. So it is possible that your account does not have a password. For the remote functions to work, you will need to create a password for your user account. Make sure that the user account belongs to a group that has proper permissions.
Go to Control Panel. In Windows 7, the control panel is located in the Start menu while in Windows 8, right click on anywhere at the Start screen and click on “All apps” icon at the bottom right. The Control Panel icon is in the list. Then go to User Accounts and Family Safety > User Accounts > Manage Another Account > click on the user that you want to set a password > Create a password. Type in your password twice and click the “Create password button”.
2. Remote Registry Service
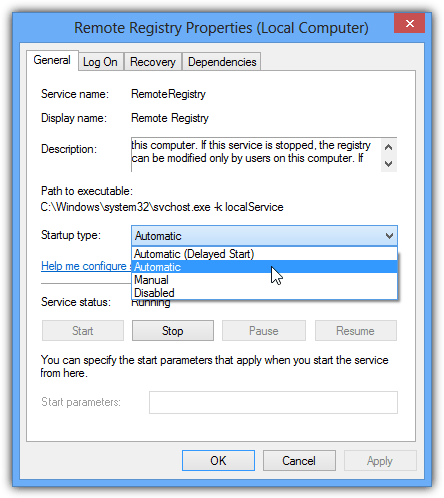
The Remote Registry service has been disabled by default since Windows Vista and is only automatically enabled in Windows XP. This service needs to be started and optionally set to automatic startup type if you need connect to the remote computer next time.
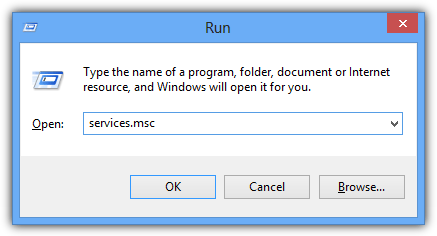
Simultaneously press Win+R to launch the Run window, type services.msc at the Run box and click OK.
At the Services window, look for Remote Registry on the list and double click on it to open up the properties window. Click the drop down menu for Startup type, select “Automatic” and click Apply. Then click the Start button.
Note: Windows XP users can skip this step.
3. Firewall
The File and Printer Sharing services must be excluded in the built-in Windows Firewall. If you are on Windows 8, you can skip this step because it is allowed by default. However for XP, Vista and 7 users, you will need to allow the feature through Windows Firewall, or alternatively disable the Firewall.
Go to Control Panel > System and Security > Allow a program through Windows Firewall. Click on “Change settings” button and tick on the “File and Printer Sharing” option for Home/Work. If you need to do it remotely via the Internet, make sure Public is checked as well. Click OK.

Note: Windows 8 users can skip this step.
4. User Account Control
User Account Control was first introduced in Windows Vista and it blocks changes and commands that is capable of corrupting the operating system. Some tools requires higher privilege to run and to fix this, you can either disable the User Account Control or alternatively just disable UAC remote restrictions by running this simple registry file or the Microsoft Fix it 50005 tool.
Note: Windows XP users can skip this step.
5. Sharing and Security Model
Windows XP comes with Simple File Sharing option enabled by default to easily and quickly create shared folders to share files. You will need to disable the Simple File Sharing option and use the classic mode instead. Go to Control Panel > Folder Options > View tab > scroll right to the bottom and uncheck “Use simple file sharing”.
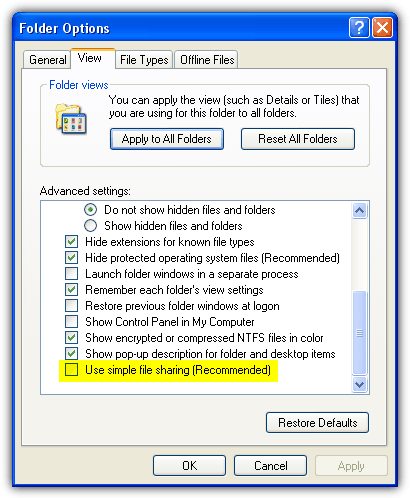
Although Simple File Sharing is only available in Windows XP, you can also check if the classic sharing mode is being used in Vista, 7 and 8 instead of Guest mode. Go to Control Panel > Administrative Tools and run Local Security Policy. Then expand Security Settings > Local Policies > Security Options > and look for “Network access: Sharing and security model for local accounts. Make sure that the “Classic – local users authenticate as themselves” option is selected instead of “Guest only – local users authenticate as Guest”.
Note: Windows Vista, 7 and 8 users can skip this step.
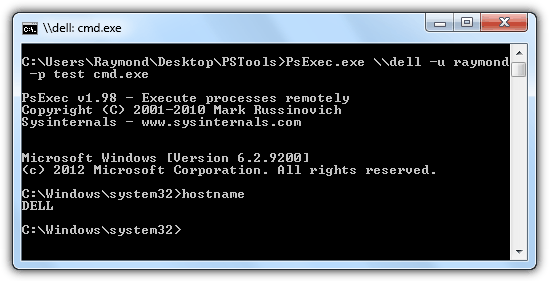
Once all of the above conditions are met, you should be able to run remote commands on another computer instead of getting the dreaded “Access is Denied” error. As you can see at the screenshot below, I have successfully ran a remote command prompt process on my other computer.



User forum
1 messages