Easily Reboot to Safe Mode for Dummies
The Windows Safe Mode is often used to perform a number of tasks when they can’t be undertaken in Windows during its normal use. Removing stubborn and difficult to uninstall software or faulty drivers, and deleting malware are just a few of the things that often require Safe Mode to be used because they are affecting Windows too much and cannot be removed in the standard way.
This “alternate” Windows you can boot to is simply a version of Windows that loads with the bare minimum amount of files, only the basic hardware drivers for the display, keyboard mouse, mass storage drivers etc, and no desktop themes, programs or extra services that would otherwise load up with your system are executed. When the files needed to be worked on are not in use, it’s much easier to delete or move them and help fix any problems you’re having.
Whenever I am required to service a computer that’s not behaving normally, the first thing I’ll do is try to boot in to Safe Mode. Or if I get a call from a friend saying that their computer is acting weird, I’ll also ask them to try and boot in to Safe Mode first and see if the problem will occur there. The problem is, for people who have never heard of or done this before, the chances are I’m going to have a tough time teaching them how to boot in to Safe Mode.
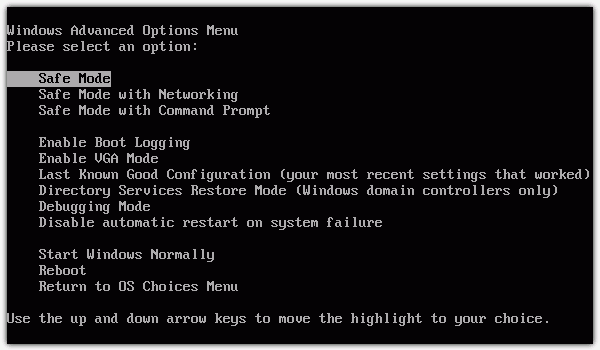
The normal way for anybody to boot in to the Windows Safe mode is to repeatedly press the “F8” key as the operating system boots, just after the BIOS or manufacturer’s splash screen. But the actual amount of time which you have to press this key is quite small and even the most experienced users can often miss it, then have to reboot and try again! If the computer has a Windows boot menu it’s pretty easy because you can simply press F8 on the o/s selection screen.
For people who have never booted in to Safe Mode, most of the time they’ll miss a few times before they get lucky in bringing up the Windows Advanced Options Menu that you can select to boot in to Safe Mode. A lot of time will be wasted by them and you while waiting for the computer to reboot over and over again hoping that the user is able to eventually get to the Safe Mode menu.
Here’s a few different ways how to boot in to the Windows Safe Mode for dummies. These methods do have one drawback which is they rely on Windows being able to boot normally first. If this can’t happen then it leaves no choice but to do it manually with the F8 key.
BootSafe
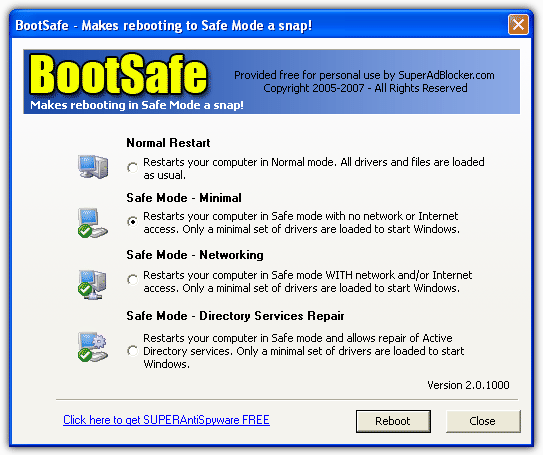
Bootsafe is a simple standalone portable tool that makes it very easy to restart a computer in Safe Mode. Run the 120KB executable and you will be presented with similar options found in the standard safe mode menu when pressing F8; standard Safe Mode, Safe Mode with Networking and Directory Services Repair.
Simply choose your desired Safe Mode and click Reboot. This process has to be reversed when you have finished in Safe Mode by running BootSafe again and selecting Normal Restart which will boot the computer back into the normal Windows again. If you don’t do this, the computer will keep booting into Safe Mode!
BootSafe only works on Windows 98, 98SE, ME, 2000 and XP, Vista and 7 are NOT supported because their Safe Mode option is held in a different location and this tool has never been updated to allow for that.
BootSafe (A different one)
The utility is totally different to the one above but rather unfortunately has the same name! This BootSafe though does work in Windows Vista and 7 and also has another major advantage over the other program; You don’t need to rerun the program when in Safe Mode to get yourself back into the normal Windows install, it does this automatically for you. BootSafe runs itself in the Safe Mode startup process to remove the system configuration option “SafeBoot” and allow normal booting again.
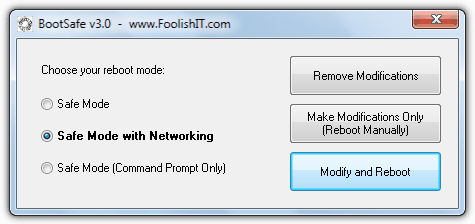
Usage is again really easy, just select the required type of Safe Mode and click “Modify and Reboot”. If you have already clicked the option to reboot manually and wish to undo it, use the “Remove Modifications” button.
BootSafe is a portable standalone executable and is a tiny 30KB. It works on any version of Windows from XP to 7.

Improve this guide

User forum
0 messages