5 Ways to Allow Install of Unsigned Drivers in Windows 7

One of the common problems that people face when using a 64-bit Windows is loading unsigned drivers. This is by design to provide a more restrictive environment to protect Windows from easily being infected by rootkits, a type of malware that uses a driver for low level hooking. It is also very difficult for software that belongs to a high risk category to obtain a digital certificate and one example is the Elite Keylogger where it took them years to get their driver signed.
This becomes a problem when using some legitimate software and you’re unable to load an older program such as PeerGuardian with the error message “Windows cannot verify the digital signature for this file” because of an unsigned driver. We know that PeerGuardian has been superseded by a program called PeerBlock which doesn’t have these issues, but it’s just being used as an example to demonstrate the problem.
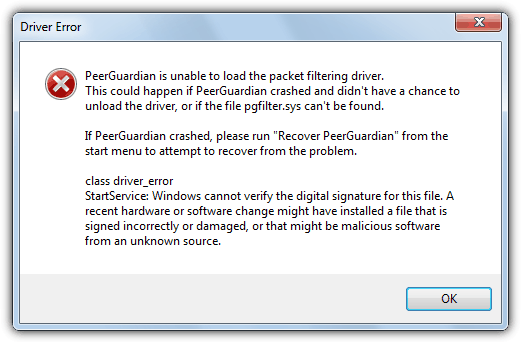
It appears the obtaining a certificate to perform driver signing costs hundreds of dollars per year and not every software developer can afford that kind of money especially when their software is freeware or open source. Fortunately, there are ways to force the unsigned drivers to load in 64-bit (x64) versions of Windows 7, 8 and Vista.
There are some tutorials suggesting that typing this command:
bcdedit /set loadoptions DDISABLE_INTEGRITY_CHECKS
into command prompt will do the job, but it doesn’t work on Windows 7 x64. It is believed this command was rendered useless with the release of Vista x64 SP1 and definitely doesn’t work on Windows 7 or 8. There was also a number of separate security patches on Vista which caused the command to not work. The Windows boot manager editor EasyBCD has an option which uses a command equivalent to DDISABLE_INTEGRITY_CHECKS, but as this is no longer useful, we would recommend you ignore this option in EasyBCD.
There are still a few working ways to load unsigned drivers though…
Option 1
This first method is to continuously press F8 when Windows is booting up until you get the Advanced Boot Options menu, then select “Disable Driver Signature Enforcement”.
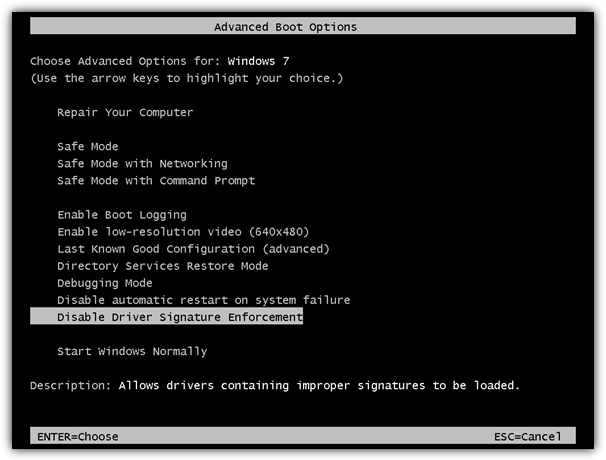
The problem about this method is you have to do that every time you boot up Windows and if you forget to select this option, you won’t get to load the unsigned drivers and the software that needs the driver won’t work.
Option 2
This method is to use ReadyDriver Plus, an enhanced version of the original ReadyDriver program. It does the same thing as the first method by selecting the Disable Driver Signature Enforcement option in Advanced Boot Options, but does it automatically as if you are doing it yourself.
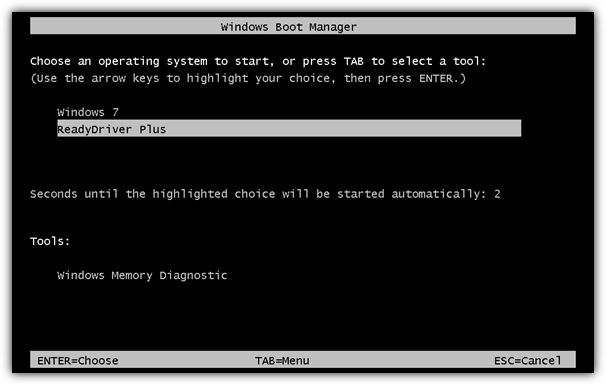
There are modifications made to the Vista/7 Bootloader to load ReadyDriverPlus and you don’t have to touch the keys during boot. ReadyDriverPlus launches itself from the menu and then makes the appropriate selection to disable Driver Enforcement, based on what you choose to install. This tool works great on Windows 7 x64.
Next we’ll show you how to load Windows in Test Mode allowing for unsigned drivers to be enabled.
Option 3
However, if you don’t like the idea of your boot loader being modified, then you could use Driver Signature Enforcement Overrider. This is how you can use DSEO to sign and load the unverified drivers. Run DSEO, click Next, click Yes, select “Enable Test Mode” and click Next.
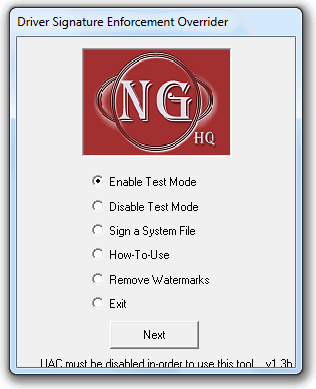
You should get a confirmation window telling you that Test Mode has been enabled. Click the OK button to go back to the DSEO window. Now select “Sign a System File” and click Next. You will now have to type in the specific file name including full path and click OK. For PeerGuardian, it is “C:\Program Files\PeerGuardian2\pgfilter.sys”. Restart your computer and the driver is now loaded and the program should work.
Option 4
This method is a another command that uses the BCDEdit utility similar to the now redundant DDISABLE_INTEGRITY_CHECKS, but this is known to be more reliable. Open a Command Prompt in Administrator mode and then type in the following command.
bcdedit /set TESTSIGNING ON
Then restart the system. Upon reboot you will notice that the Test Mode watermark is present so follow the instructions below to remove it. This command does a very similar job to the Driver Signature Enforcement Overrider program above by enabling the Windows driver Test Mode.
Option 5
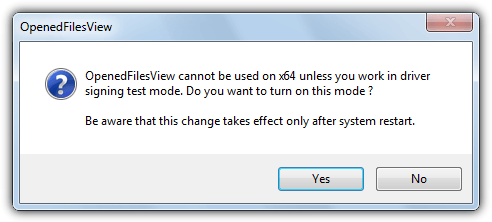
The Nirsoft utility OpenedFilesView isn’t actually designed to enable the Windows driver Test Mode and is used to view all open files running on the system, but the 64-bit version of the tool requires Test Mode to be switched on so it can run with an unsigned driver. The program will ask if you want to enable Test Mode when you run it, so simply download OpenedFilesView 64-bit and run the portable executable, then press Yes when you see the dialog box below. Reboot the computer.
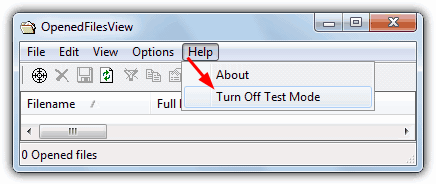
OpenedFilesView can also be used turn Test Mode off again because you shouldn’t leave the computer in Test Mode permanently if you can avoid it. Open the program and go to the Help menu and click on Turn Off Test Mode, then restart.
As you will get the watermark on the desktop, use the tool below to remove it.
Removing the Test Mode Watermark
After enabling Test Mode using one of the above options, you will notice that there is a watermark above the clock at the bottom right of the screen saying “Test Mode, Windows **, Build ****”.
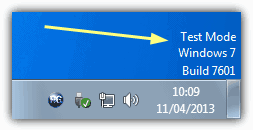
That is normal after you’ve used Driver Signature Enforcement Overrider, BCDEdit or OpenFilesView64 to enable the Test Mode. If you disable Test Mode again, you won’t be able to load the unsigned drivers. In short, you will need to be in Test Mode in order to load the unsigned drivers.
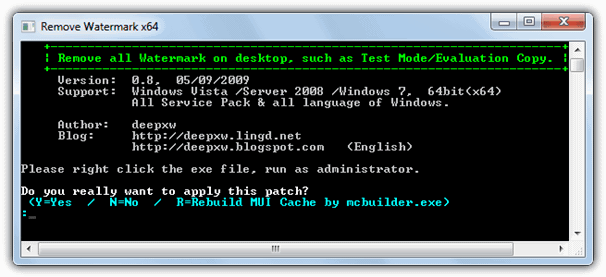
If you can’t stand seeing the Test Mode watermark, you can use a little tool called Remove Watermark to get rid of it. Just download it, extract the zip file and run RemoveWatermarkX64.exe, then type the letter Y. Restart your computer for the patch to take effect. If the watermark is still there after patching, run the tool again and this time hit the R key to rebuild MUI cache. Restart and the watermark should be gone now.


User forum
25 messages