7 Ways to Export WiFi Profile With Password on Windows
Wireless networking connects your devices—smartphones, tablets, laptops, and more—to the internet without cables. It lets you access a network connection on the go, but each network comes with its own unique settings, like a custom SSID and ad-hoc configurations.
Luckily, you can easily back up and restore your wireless profiles—passwords, encryption types, and SSIDs included—to keep your connections seamless. In this guide, we share 7 smart solutions to import and export your wireless profiles.
Here’s how:
1. WirelessKeyView
Nirsoft’s WirelessKeyView is a portable tool that quickly displays the names and passwords of your wireless connections. It also lets you import and export selected wireless profiles to a text file. Note that some antivirus software may flag this tool due to its functionality, though these are false positives.
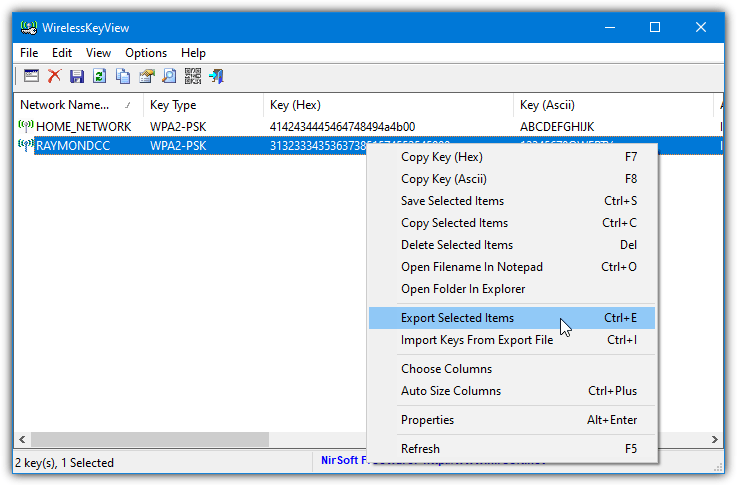
To export a profile, click an individual network or use Ctrl+click for multiple selections, right-click and choose “Export Selected Items” (Ctrl+E), then save the file. For importing, select “Import keys from export file” (Ctrl+I) and locate your text file. Since passwords are stored in plain text, secure your backups appropriately. An added bonus is the QR Code option (F2), which allows quick mobile imports.
2. NetSetMan
NetSetMan is a feature-rich program you might already know for configuring and backing up IP and DNS profiles. It also manages wireless profiles by allowing both import and export. Available in both installable and portable versions, it’s a versatile option.
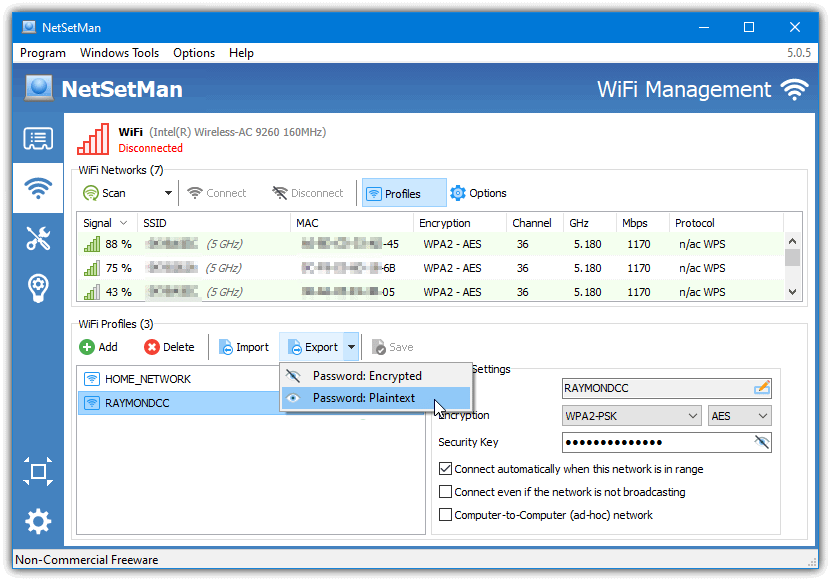
After launching NetSetMan, click the WiFi icon or go to Program > WiFi Management and then press the Profiles button. To export, highlight the desired profile and click Export. You can choose to save passwords either encrypted or in plain text. Importing is just as straightforward.
3. Network Profiles Utility
Created by the author of the well-known d7 repair utility, this tool backs up and restores wireless profiles and general network settings. It’s fully portable (just 304KB) and can be used to transfer profiles between systems.
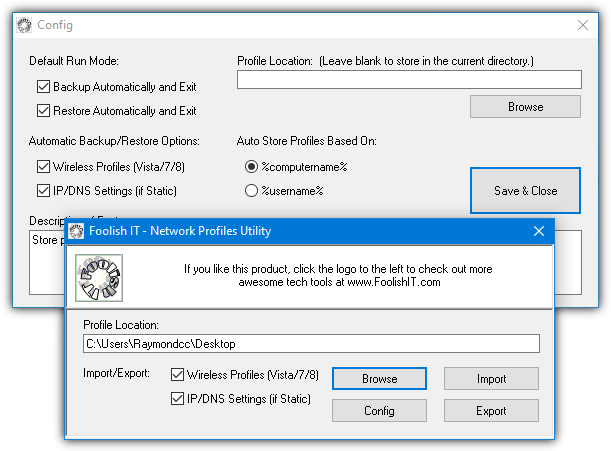
On first run, configure the program by unchecking “Restore Automatically and Exit” (and optionally “IP/DNS settings”), leaving the profile location blank to save profiles in the current folder. Click Export to back up all available profiles (saved as XML files). When importing, you can selectively add profiles by moving out the ones you don’t need. As these profiles store passwords in plain text, ensure you secure them.
Download Network Profiles Utility
4. WiFi Network Backup Manager
This simple tool offers an easy way to import and export wireless profiles. Although it comes as an MSI installer, you can use
Universal Extractor
to create a portable version.
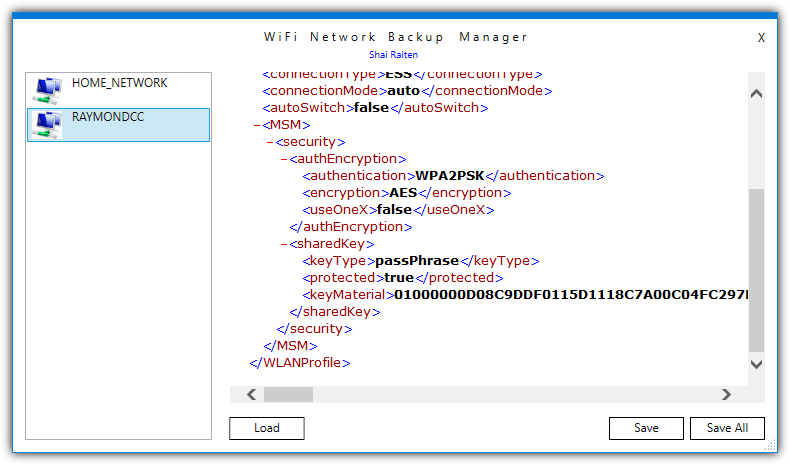
The program displays available WiFi profiles alongside their corresponding XML configuration data. You can save individual profiles or export all profiles into a single .WiFiBackup file. To import, simply click Load and select your backup file. In this tool, the WiFi password remains encrypted in the backup.
Download WiFi Network Backup Manager
5. WiFi Password Revealer
Developed by Magical Jelly Bean—the team behind the famous Windows product key revealer—this tool can export WiFi profile data. Its main limitation is that it cannot import profiles back into Windows.
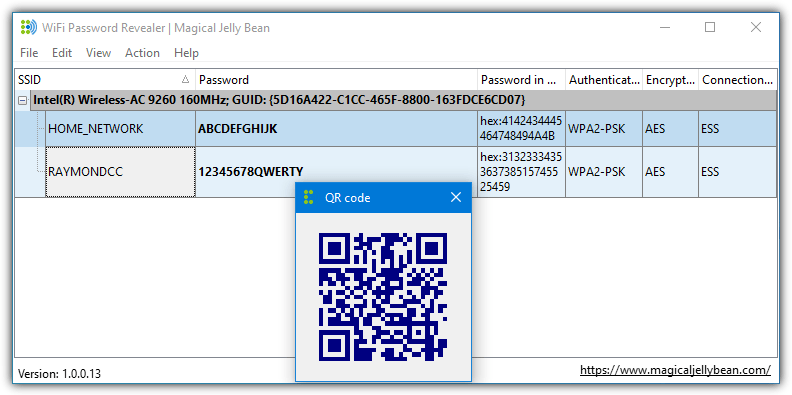
After installation, right-click on a blank space or use the File menu to select “Save As…” and export all your WiFi profiles into formats such as XLS, HTML, CSV, or TXT. It also features the ability to generate a QR Code for quick mobile imports.
Download WiFi Password Revealer
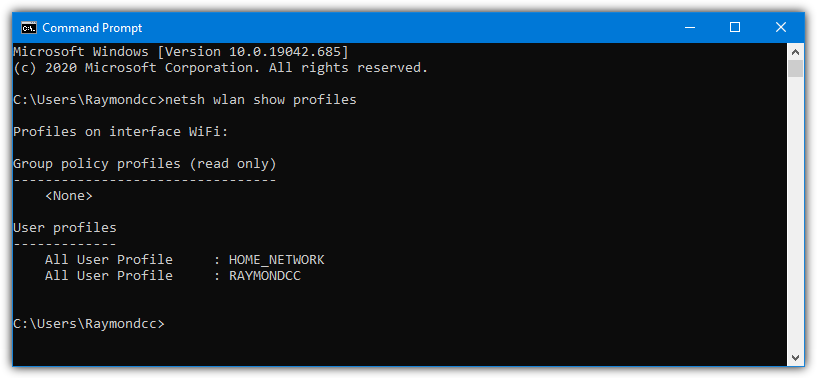
6. Export and Import Wireless Profiles Using Windows Command Line
If you prefer using built-in tools, the Windows Netsh command offers a robust solution available from Windows Vista to Windows 11. This method allows you to configure, export, and import wireless profiles directly from the Command Prompt.
Open a Command Prompt (Start > type cmd) and run:
Netsh wlan show profiles
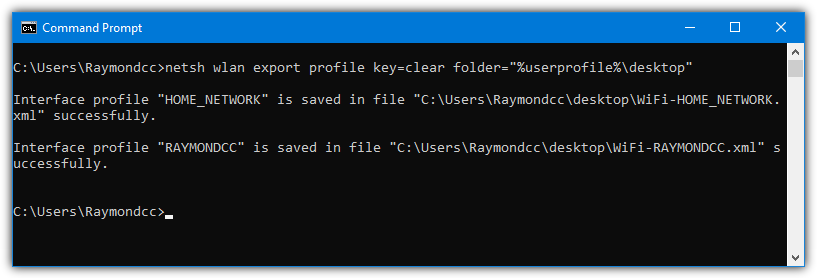
Export Wireless Profile with Netsh
To export (with the key=clear parameter to display passwords in plain text), run:
Netsh wlan export profile [“profile name”] [key=clear] folder=”%userprofile%\desktop”
Import Wireless Profile with Netsh
After exporting, if you need to import a profile (optionally rename the XML file first), run:
Netsh wlan add profile [user=current] filename=”%userprofile%\desktop\WiFi-raymondcc.xml”
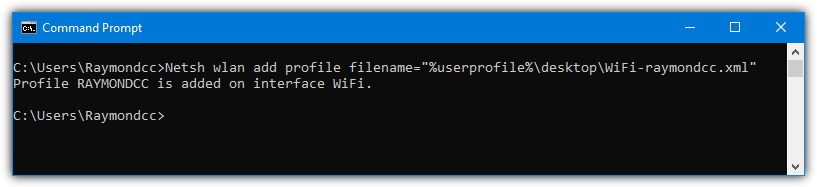
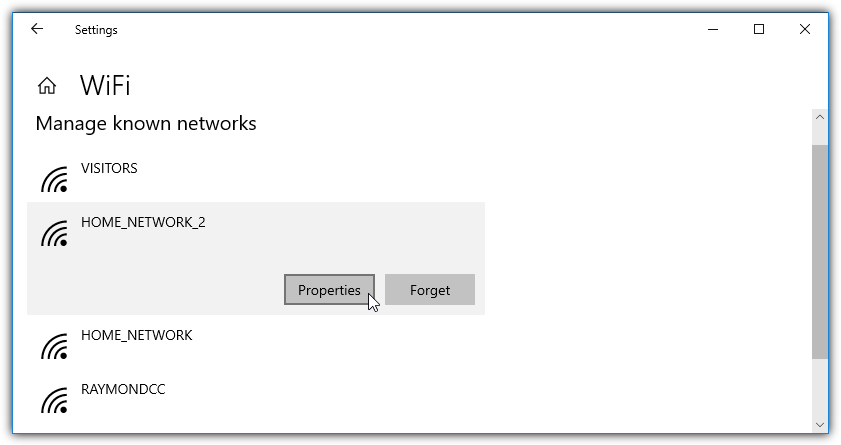
By default, the profile is imported for all users. To restrict it to the current user, include user=current in your command. In Windows 10/11, you can manage imported profiles via Settings > Network & Internet > WiFi > Manage known networks.

Tip: Create a batch script with the appropriate netsh commands to automate the import/export process with just one click.
7. Export and Import WiFi Profiles Using a USB Drive (Windows 7)
Although this feature was removed in later versions of Windows, Windows 7 still allows you to export a wireless profile to a USB drive—a handy option when transferring settings between computers.
Export a Wireless Profile to USB
1. Go to Control Panel > Network and Sharing Center > “Manage wireless networks” and double-click the desired profile.
2. Click “copy this network profile to a USB flash drive” at the bottom of the properties window.
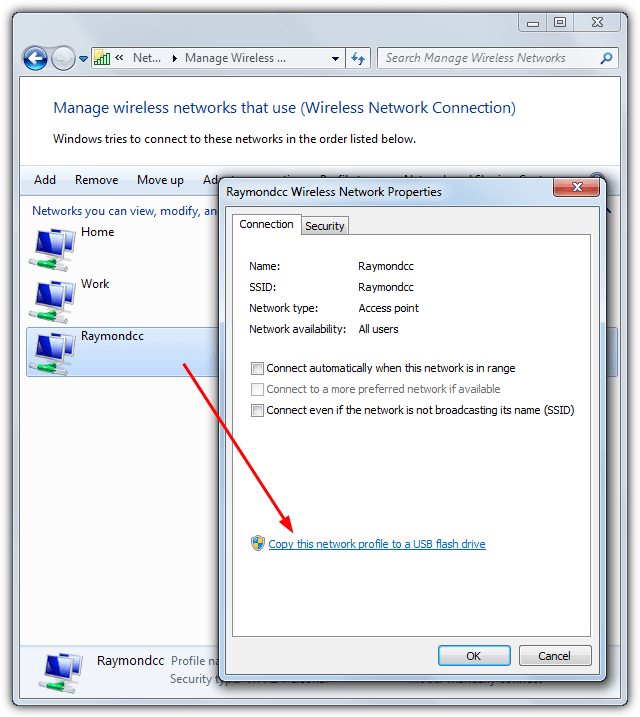
3. Insert a USB drive, click Next when prompted, wait for the process to complete, then click Close.
Import a Wireless Profile from USB
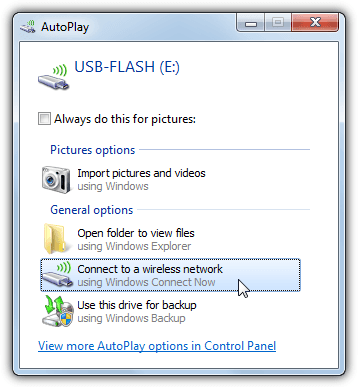
1. Insert the USB drive into the target computer. If autoplay is enabled, you may see a “Connect to a wireless network” prompt; otherwise, open the drive in Explorer and double-click SetupSNK.exe.
2. Follow the wizard’s instructions to add the saved profile. Once completed, a success message will confirm the import.
Backing up and restoring your wireless profiles saves time and ensures you never lose access to your trusted networks. Whether you prefer built-in Windows tools, third-party software, or manual exports, these methods help you stay connected effortlessly.
Looking for more ways to manage your network? Check out our guides on detecting unauthorized Wi-Fi users and automatically disabling Wi-Fi when using LAN.

Improve this guide

User forum
2 messages