How to Access Shared Folder in Windows 7
Windows XP by default allows anyone in the same local area network to access its shared folders without the need to provide a user name and password. This is because the XP Simple File Sharing mode is enabled by default and can be disabled from Control Panel > Folder Options. As for Windows 7, the default security settings for folder sharing have been strengthened and you cannot access anyone’s shared folder on the same network without providing the correct login information. An attempt to connect to another computer will first prompt a Windows Security dialog box asking you to enter network password.
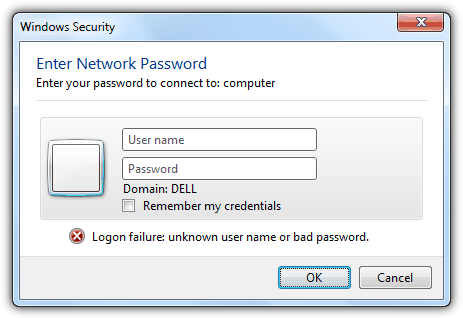
This is an improved security feature because previously anyone can access an unprotected shared folder by simply using SoftPerfect Network Scanner to scan for shared folders on the whole subnet. However, if you’re the only user on the network or your computers only connect to your personal private network, the authentication to access shared folders is quite unnecessary.
Here is how to share folders and access the shared folders in Windows 7.
How to share a folder in Windows 7
First you need to know how to share a folder so that other people on the same network can access the shared folder.
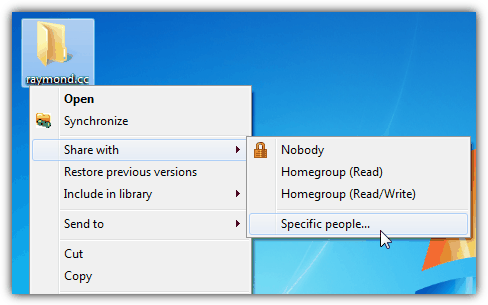
1. Right click on the folder that you want to share, go to Share with and select “Specific people“.
2. By default the owner of the computer with full permission to the folder will be automatically added to the list. If you want anyone to be able to access this folder, select everyone from the drop down menu or manually type it in and click the Add button. You will now see that that the Everyone is added to the list with Read permission only. You can grant them full access by clicking on the Read drop down menu and select Read/Write.
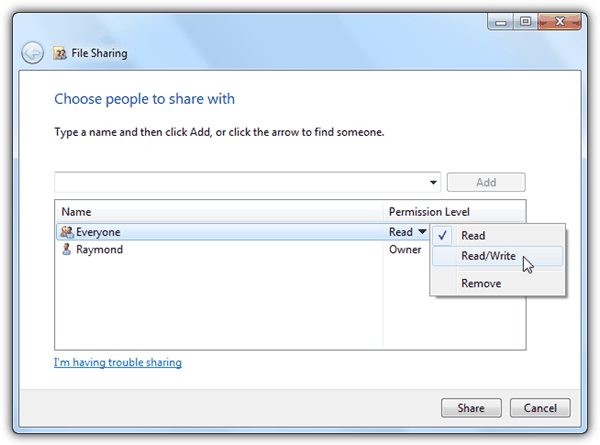
3. Finally click the Share button and click Done to close the file sharing window.
Additional Tip: You may need to double check if the “everyone” group is also listed in the Security tab of the folder’s properties by right clicking the shared folder, select Properties and click on Security tab. Windows 7 should do this automatically when you share a folder but there are times when it fails to add “everyone” in, and this causes you to be denied access to the shared folder.
How to access the shared folder
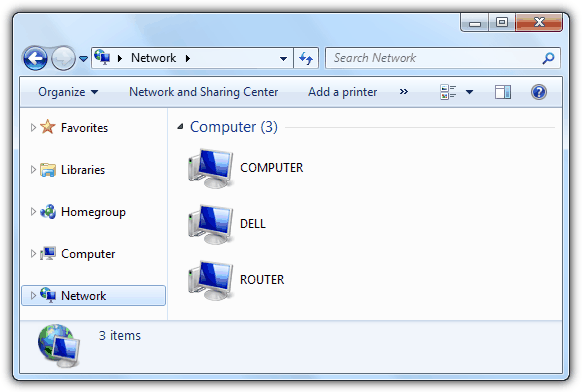
If you have network discovery turned on (which is enabled by default), simply open Computer from the start menu and click on Network to see the list of computers that are connected to the network.
Alternatively, you can simultaneously press WIN+R to launch the Run window and type \\computername (replace the computername with the name of the computer or internal IP address that you’re trying to access).
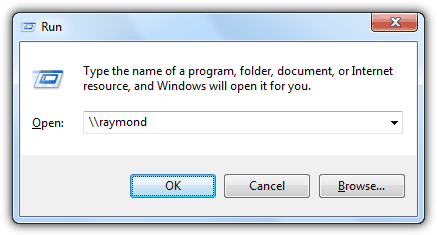
When you connect to a computer to access a shared folder, Windows 7 will first try to use your currently logged in credentials on the other computer. If the remote computer doesn’t have the same credentials as the one that you’re logged in to, then you are prompted to enter the network password.
Authenticate to access shared folders
1. If you’re logged in to Windows as a user called johndoe with a password (eg; mypassword) and the other computer on the network also has the same user account credentials (username: johndoe, password: mypassword), then Windows 7 will automatically use your current credentials to login which is why you don’t get the Enter Network Password dialog box.
2. If both of the computers have different user login credentials, providing a valid username and password in the Enter Network Password dialog box will allow you to access the shared folders.
3. The tricky part is when the user account doesn’t have a password (blank) associated with it. If you’re logged in to Windows as a user called johndoe with a password and you’re trying to access the other computer on the network using an account WITHOUT a password (blank), you will get a logon failure user account restriction message saying “Possible reasons are blank passwords not allowed, logon hour restrictions, or a policy restriction has been enforced”. See the solutions below to fix this problem.
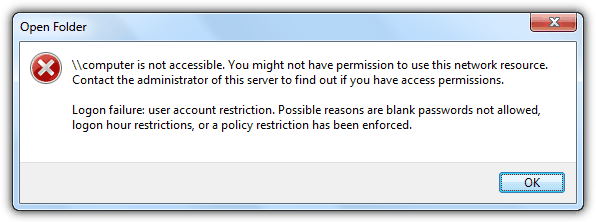
Solutions for accessing shared folders using an account without a password
1. Turn off password protected sharing
Go to Control Panel > Network and Sharing Center > Change advanced sharing settings > expand the network profile that you’re currently using (Home or Work / Public), select the option “Turn off password protected sharing” and click Save changes.
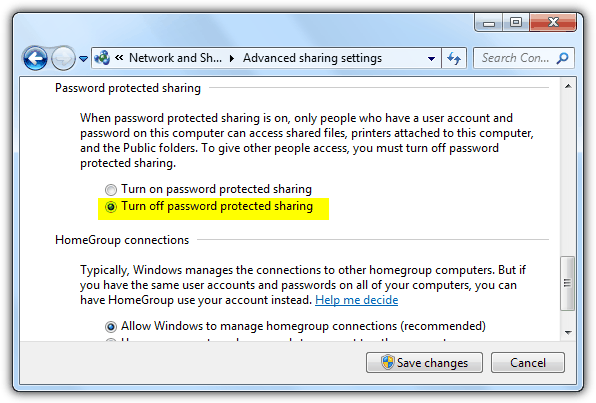
Advantage: Turning off password protected sharing for your network profile allows you to login using any random made up account without a password to access folders that are shared to everyone. If you happen to enter a valid user account that has no password, you won’t be able to access the user’s folder. If you need to access all files from the user’s folder, use the second solution below.
2. Disable Limit local account use of blank passwords to console logon only
For all versions of Windows 7: You can simply download this registry fix file and run it on your computer to take effect instantly.
Alternatively for Windows 7 Professional, Enterprise and Ultimate users only: Click Start, type gpedit.msc in the search box and press enter. Expand Local Computer Policy > Computer Configuration > Windows Settings > Security Settings > Local Policies > Security Options. Look for the following line “Accounts: Limit local account use of blank passwords to console logon only” and double click on it to bring up the properties window. Select the “Disable” option and click OK to save the changes.
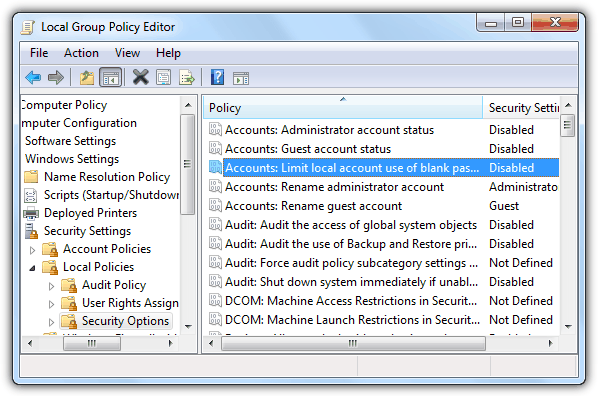
Advantage: You get to access all of the user account’s files (C:\Users\Username) even if they are not shared. This setting will not accept random made up user accounts.
Could you please write about a softwares that can manage the shared files on local ?
Is there any software that can share multiple folders at same time with just few clicks also can manage the shared folders on local?
Please answer me I’m waiting you for a long time.
Thanks G
Raymond thanks a lot. I have gained many knowledge and training from this tutorial which is helping me gradually. Keep on the great works. #bravo.
Thanks a lot I’ve been trapped with this problem for long, but now I’ve found the solution, thanks to Raymond
its work,,, thanks..!
VERY ANNOING FEATURE OF WINDOWS 7. THANKS FOR RESOLVE!
Very helpful! Thanks! I have been searching This for a long time.
Gael043
thank you very much
Finaly, i just have trouble with this last week, thanx raymond.
nice tips, thanks!
Another nice tip by you Raymond. Thanks for the share.
thanks
really very helpful
nice! thanks!