How to Access Shared Folder in Windows 7
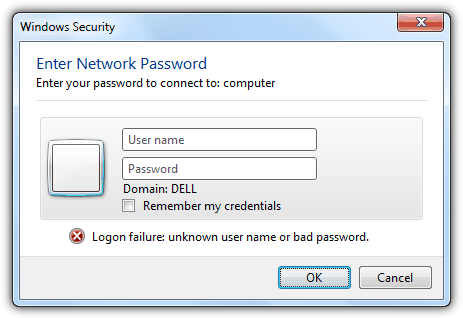
Windows XP by default allows anyone in the same local area network to access its shared folders without the need to provide a user name and password. This is because the XP Simple File Sharing mode is enabled by default and can be disabled from Control Panel > Folder Options. As for Windows 7, the default security settings for folder sharing have been strengthened and you cannot access anyone’s shared folder on the same network without providing the correct login information. An attempt to connect to another computer will first prompt a Windows Security dialog box asking you to enter network password.
This is an improved security feature because previously anyone can access an unprotected shared folder by simply using SoftPerfect Network Scanner to scan for shared folders on the whole subnet. However, if you’re the only user on the network or your computers only connect to your personal private network, the authentication to access shared folders is quite unnecessary.
Here is how to share folders and access the shared folders in Windows 7.
How to share a folder in Windows 7
First you need to know how to share a folder so that other people on the same network can access the shared folder.
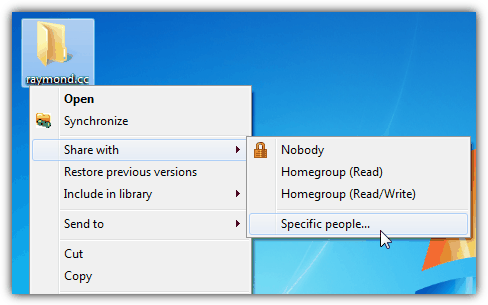
1. Right click on the folder that you want to share, go to Share with and select “Specific people“.
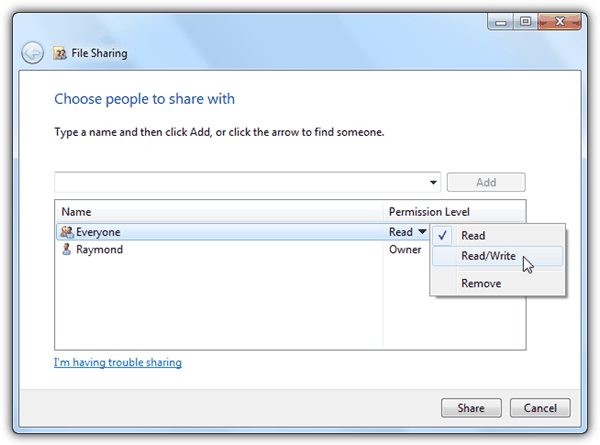
2. By default the owner of the computer with full permission to the folder will be automatically added to the list. If you want anyone to be able to access this folder, select everyone from the drop down menu or manually type it in and click the Add button. You will now see that that the Everyone is added to the list with Read permission only. You can grant them full access by clicking on the Read drop down menu and select Read/Write.
3. Finally click the Share button and click Done to close the file sharing window.
Additional Tip: You may need to double check if the “everyone” group is also listed in the Security tab of the folder’s properties by right clicking the shared folder, select Properties and click on Security tab. Windows 7 should do this automatically when you share a folder but there are times when it fails to add “everyone” in, and this causes you to be denied access to the shared folder.
How to access the shared folder
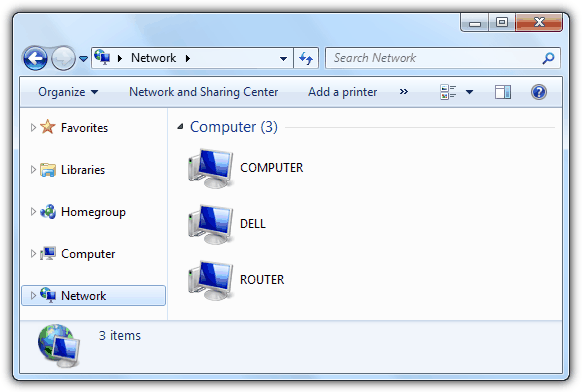
If you have network discovery turned on (which is enabled by default), simply open Computer from the start menu and click on Network to see the list of computers that are connected to the network.
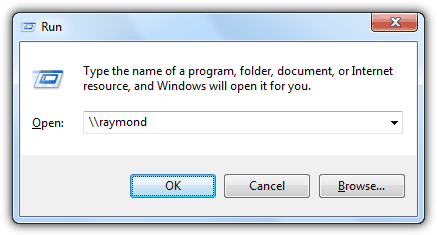
Alternatively, you can simultaneously press WIN+R to launch the Run window and type \\computername (replace the computername with the name of the computer or internal IP address that you’re trying to access).
When you connect to a computer to access a shared folder, Windows 7 will first try to use your currently logged in credentials on the other computer. If the remote computer doesn’t have the same credentials as the one that you’re logged in to, then you are prompted to enter the network password.

Improve this guide

User forum
15 messages