Guide to Install Free SME Server Linux Operating System as File Server
If you have a need for a file server, there are actually quite a few different methods to implement it. From a Windows computer, you can simply share a folder and assign the appropriate permissions. You can also install FTP server software to the Windows computer so that files can be uploaded or downloaded through the FTP protocol. There is also third party software such as HFS (HTTP File Server) that uses web technology to share files.
However, if you’re looking for a really solid and yet free file server, you should consider using Linux to achieve this because the operating system is well known to be stable which will save you money in licensing costs. This is why you find that most websites are hosted on Linux because of the stability, and not Windows server.
The only drawback is most of the people who are so used to Windows might find it difficult to handle a Linux operating system because things are very different. However, there is a Linux distro called SME Server that is based on CentOS which is easy to configure and manage. Once you’ve successfully installed SME Server, you can easily manage and configure the server using a web interface.
In this article we’ll show you the step by step instructions on how to install SME Server and perform the necessary configuration to enable file sharing.
Installing SME Server
1. Download SME Server v9 ISO file. v8 is based on CentOS 5.10 while v9 is CentOS 6.5. Obviously the newer version has better support for modern hardware.
2. Burn the ISO to a CD and boot up the computer with the CD containing SME Server.
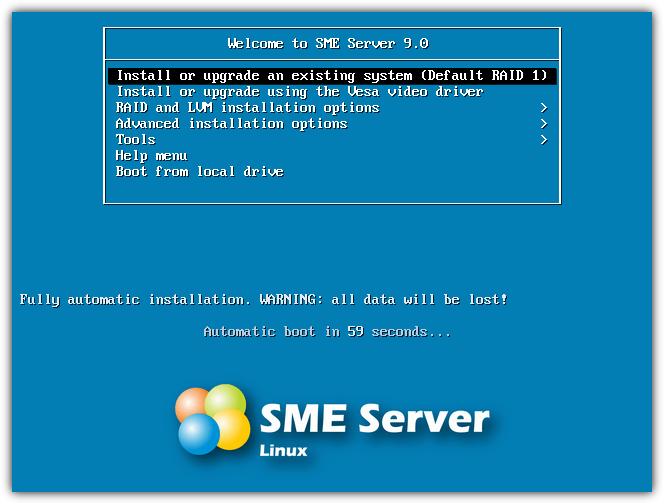
3. You should see a menu like the screenshot below. Press enter to select the first option to install SME Server to the computer.
4. You’ll be prompted to test the media disc to ensure that the whole disc can be read to prevent the installation from failing due to a bad disc. You can select Skip if you are sure that the disc is fine.
5. Select the language to use during the installation process. If English, simply hit the Enter key.
6. If you are using a non-US model keyboard, then select the appropriate one from the list. Otherwise hit Enter for US.
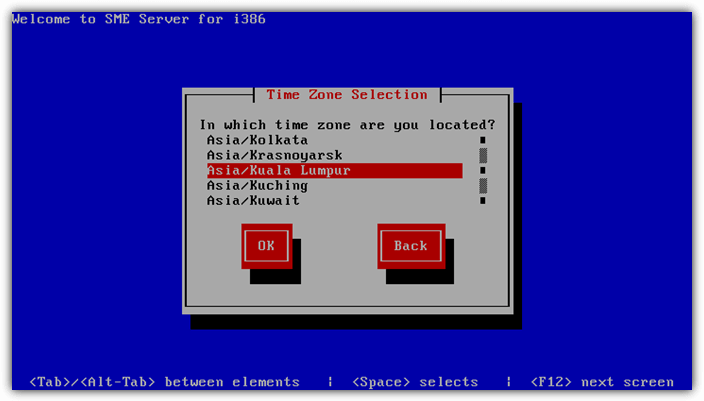
7. Now you’ll need to select the time zone according to your location. The locations are categorized based on continent followed by city.
8. Now the setup will inform you that the installation of SME Server will partition and format your hard drive. You will need to select “Write changes to disk” to continue. The setup will start installing the necessary packages.
9. When the installation is complete, hit the Enter key to restart your computer.
Initial SME Server Configuration
1. Once the computer has been restarted, you’ll be asked once if you wish to restore from backup. Normally the restore option is only used if you’re upgrading or performing a reinstallation. If it is a new installation, simply select No.
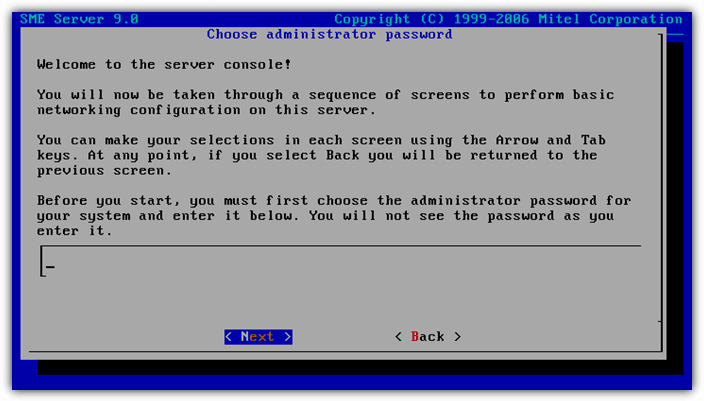
2. You will need to set a password for the administrator account. It would be good to use a strong password containing at least a special character. Do take note that this is the password for the user “admin”.
3. Type your password again to be sure that you’ve entered the desired password.
4. A domain name for your server is required. You can enter anything if the server will not be associated with an external domain name.
5. Next is the computer’s system name which is similar to the computer name in the Windows operating system.
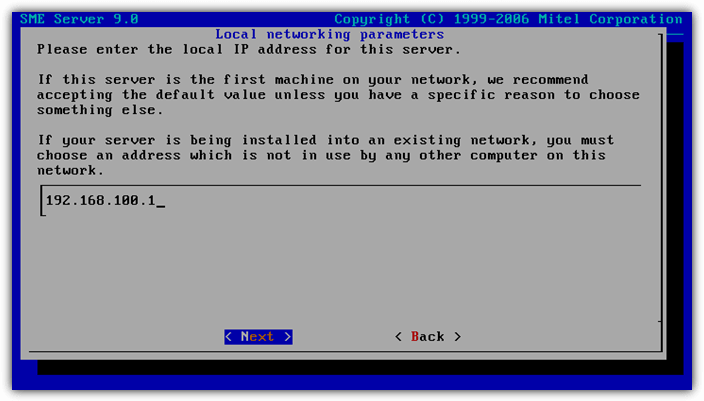
6. It is always advisable to set a static IP address for a server rather than relying on DHCP to assign a dynamic IP address. Hence, you get to enter the IP address, making sure that it is unused and is in the same subnet. For example, if your router is using the IP 192.168.1.1, then this SME Server IP should be somewhere in between 192.168.1.2 to 192.168.1.254.
7. Most of the time you can use the default Class C subnet mask which is 255.255.255.0.
8. If you’re going to use the SME Server as a file server only, select the Server-only option from the operation mode menu.
9. You will now have to specify the gateway IP address, which is normally the IP address of your router. If you’re unsure of the router’s IP address, simply type “ipconfig” in command prompt from within Windows and use the Default Gateway IP address for your default network adapter.
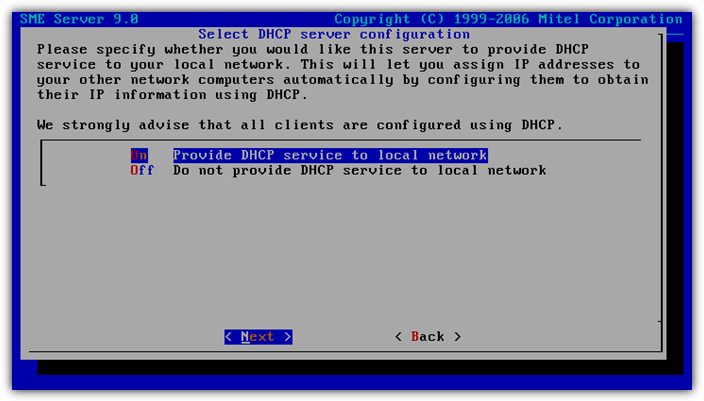
10. If you have a router, most likely the DHCP service is already enabled. So in this step you can select Off so that your SME Server will not act as a DHCP server as well.
11. You can leave the Corporate DNS server address blank and press the Next button.
12. Click Yes to activate the changes.
13. Once the changes have been activated, a black screen showing only the computer name with the word login will appear. Type admin as the login name followed by your password that you’ve specified in step 2. Take note that the login name is “admin”, NOT “administrator”.
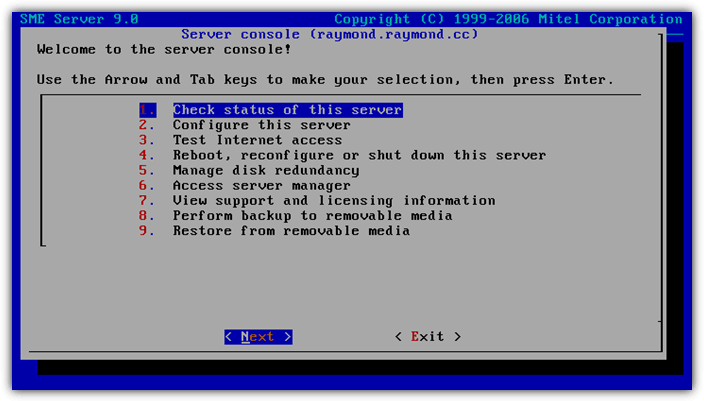
14. After the successful login using the admin account, a server console menu will appear. A few options such as checking the status of the server, configure the server, testing internet access, reboot, backup, restore are available. Basically only the 2nd and 3rd option is most useful whereby the 2nd option leads you back to step 4. As for the 3rd option, it is to ensure that you have a working Internet connection.
Accessing User’s Private Shared Folders in SME Server
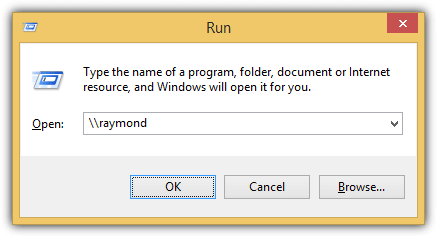
1. Without performing any further configuration, your SME Server is already acting as a file server. You can access your personal shared folder in the server by pressing WIN+R to bring up the Run dialog box and type \\computername. You will have to replace the computername with the “system name” that you’ve specified in step 5.
2. When being prompted to login, enter admin with your password and you will see an admin folder with full control permission.
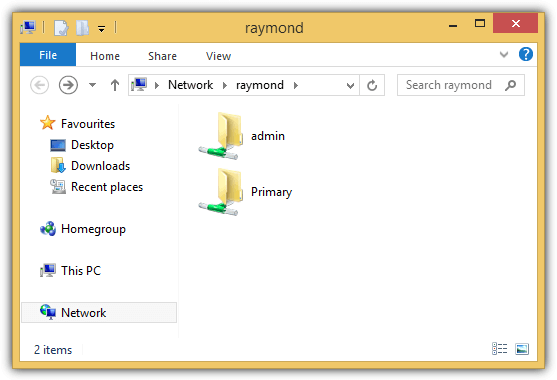
Each user account will have their own personal password protected folder. However the admin account will be able to see everyone’s folders.
Configuring the SME Server using the Web Interface
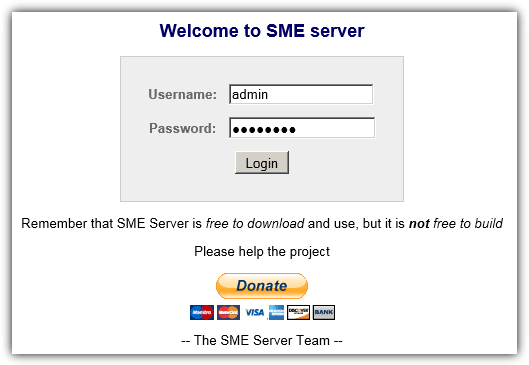
1. To further configure the SME Server, you can do that from another computer in the same local network via web browser. Open your favorite web browser and type https://computername/server-manager/. You will be most likely being warned that there is a problem with the website’s security certificate. It is safe to ignore the error and continue.
2. Login with the username “admin”, your password and click the Login button.
3. At the left hand side, you can add users, groups, set quotas, perform backup/restore, enable shell or FTP access, configure port forwarding, install updates, set date and time, configure ClamAV antivirus settings, and etc.
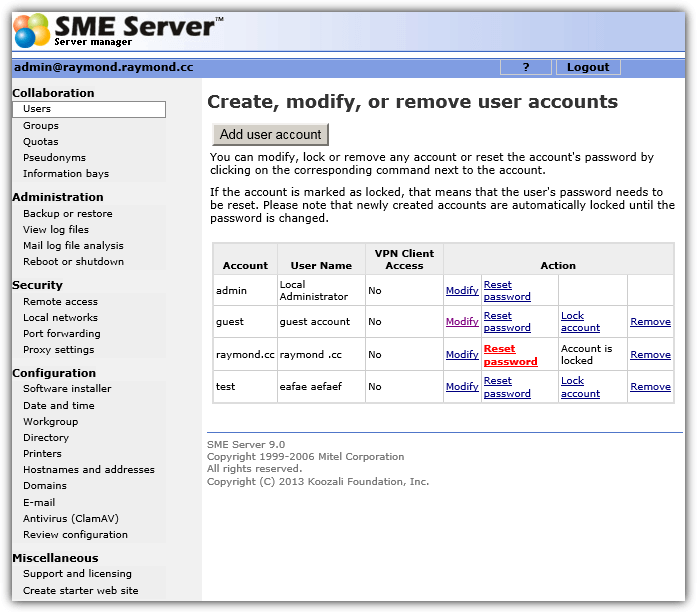
Besides using SME Server as a file server, it can act as a powerful gateway for your entire network. It can also be configured as an email server, web hosting server, firewall and directory services support, and has over 100 software packages addon known as “contribs”.

Improve this guide

User forum
4 messages