5 Free Ways to Password Protect Online Video Files

?Did you know that failing to password-protect your videos could expose your sensitive content to unauthorized access? In 2023, data breaches increased by 20% compared to 2022, affecting millions of individuals worldwide.
Without proper security measures, your personal videos or confidential business presentations could easily fall into the wrong hands. Learning how to password-protect videos online ensures that only the intended audience can view your content.
In this piece, we’ll show you a few reputable tools to effectively secure your videos.
Best ways to password protect your video files
1. GreenForce-Player
GreenForce-Player stands out among free media players because it can lock a video file with a password. It also includes features like screenshot protection, expiration dates, and limiting playback to a specific computer. While it’s not the most feature-rich media player, it does offer CD/DVD playback, playlists, subtitles, coverflow player, and snapshot options.
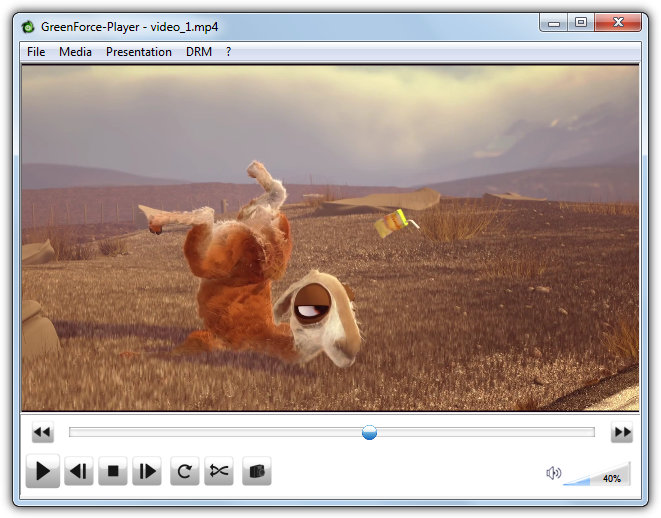
The downside is that it relies on external codecs to play video files. This means any system that wants to play the protected video must also have the correct codecs installed. You can use codec packs like K-Lite Codec Pack to resolve this issue.
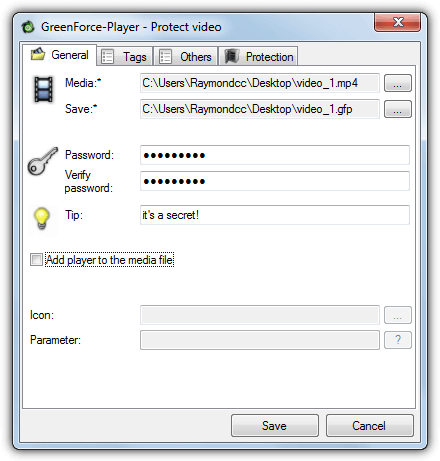
To add protection, go to the DRM menu, click “Protect video,” select the video, enter a password, and save it in the .GFP format. Double-clicking the file will open it in GreenForce-Player, which must be installed on the system.
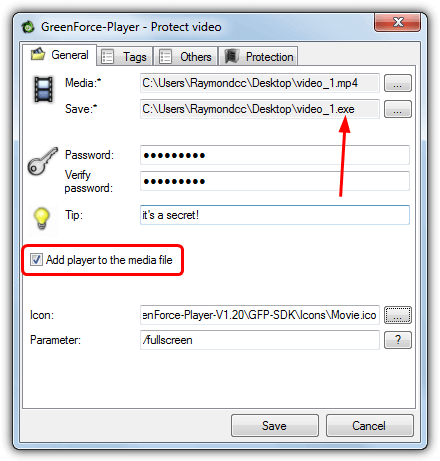
If you need the video to work on systems without GreenForce installed, you can use the “Add player to the media file” option, which embeds the player and video into a single executable file.
GreenForce-Player offers additional protection options, including preventing screenshots and limiting playback in virtual machines. You can also set an expiration date and enable copy protection based on the machine’s ID.
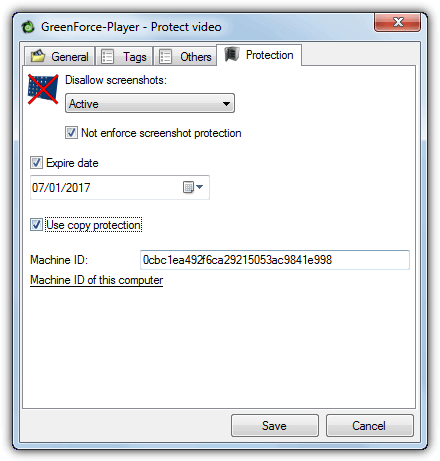
Since the protected video resides only in memory, it can’t be copied. Although the program hasn’t been updated since 2012, there is a GitHub page with updates from 2016.
2. Create Password-Protected Video Using a Bat to Exe Converter
This method uses a combination of programs to create a self-contained video player that extracts and plays the video after the correct password is entered. It eliminates the need to worry about installing the right codecs on the target system.
- Download Mpv Player, extract the archive.
- Download Bat To Exe Converter, extract and run it. In the editor tab, type
Mpv "videofile.ext", ensuring to use quotes for filenames with spaces. Save it as a .BAT file.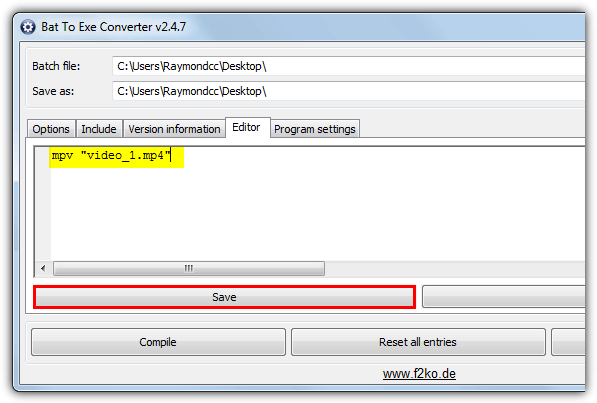
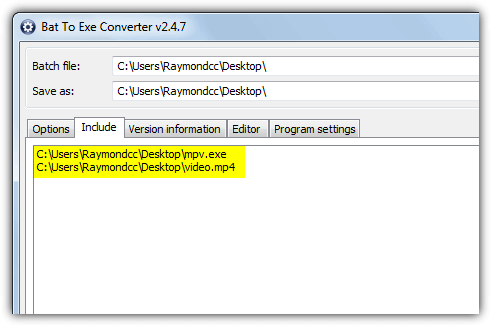
- In the Include tab, drag and drop the Mpv.exe and video file to add them to the executable.
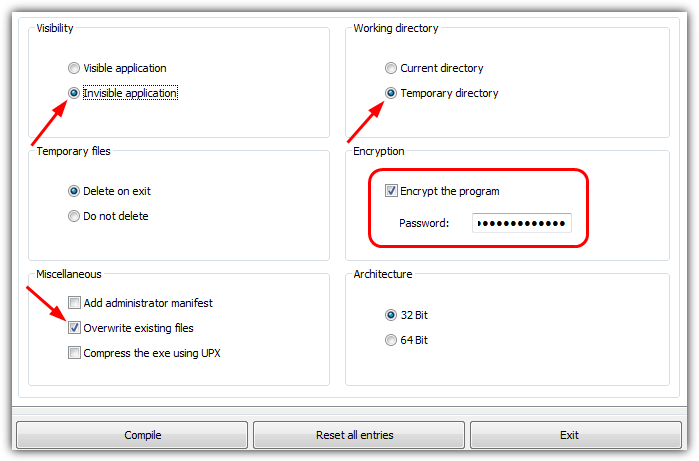
- In the Options tab, select Invisible application, Temporary directory, and Overwrite existing files. Then, check Encrypt the program and enter a password to lock a video file with a password. Finally, click Compile to create the executable.
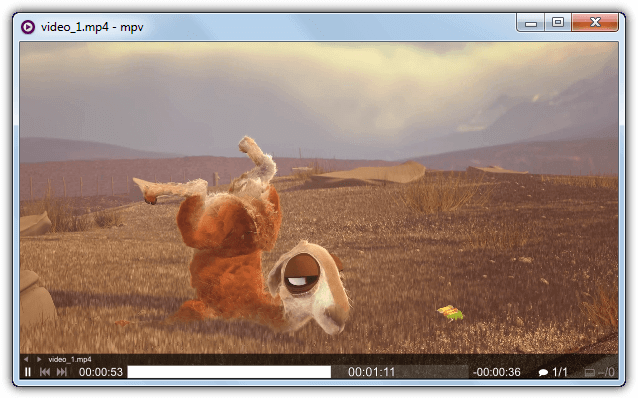
When the new exe is double-clicked, it will prompt for the password. Once entered, the video and player will be extracted to the temp folder and automatically played. Afterward, they will be deleted from the temp folder.
This method is a bit slow and uses a lot of system resources, so it’s best for videos under 100MB.
3. Create a Password-Protected Video File with an Archiver
Another method is to use a password-protected archive to package the video, though this won’t auto-launch the video. For added functionality, we’ll create a self-extracting executable archive.
- Download WinRAR Archiver and install it. Even after the trial expires, you can still use it with a nag screen. Also, download Mpv Player.
- Place the video file and Mpv.exe in the same folder. Right-click and choose WinRAR > Add to archive…
- In the archive window, check Create SFX archive, set the compression method to Fastest, and click Set password. Enter the password and optionally check Encrypt file names. Then, click OK and choose the filename as .exe.
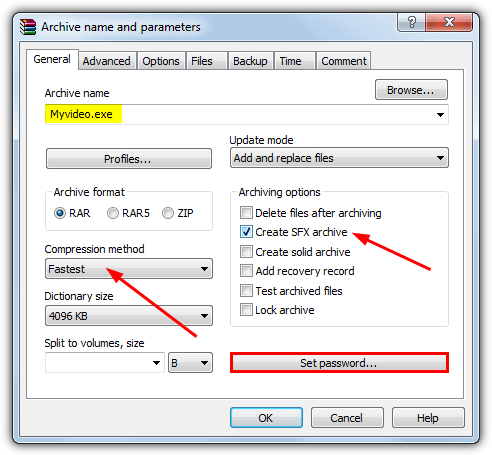
- Click the Advanced tab and press SFX options. In the required tabs, edit the settings to run the player and video after extraction (e.g.,
mpv "video.file").
In this method, the video will be extracted and played automatically when the archive is opened. Like the Bat to Exe method, it’s slower and uses more CPU/RAM, so it’s best suited for smaller files.
4. Jumpshare
Jumpshare is a cloud-based tool designed to host and share videos securely. It allows you to put a lock on a video directly through its platform. Here’s how you can do it:
- Upload your video to your Jumpshare account.
- Once uploaded, select the video and click the Share button.
- Choose Password Protection from the sharing options, and set a password.
- You can now share the video with the password protection enabled. When someone clicks on the video link, they’ll be prompted to enter the password before they can view the video.
Jumpshare provides a simple and secure way to share videos, without the need for complicated software or settings. However, it requires an internet connection, and the files are hosted on Jumpshare’s servers.
5. Wave.Video
Wave.Video is another online video hosting platform that offers password-protected video sharing for added security. It is a powerful tool for creators who need to share videos securely with a specific audience. Here’s how to password protect videos online with Wave.Video:
- Sign up for a Wave.Video account.
- Upload your video to the platform.
- Go to your video settings and select the Password Protection option.
- Set a password for the video, which will be required for access.
- Share the password-protected video link with the intended recipients.
Wave.Video makes it easy to protect your videos with a simple password, offering more control over who sees your content. It also provides a range of editing features, making it great for content creators.
These five methods offer a range of options for password-protecting videos online, giving you more control over who can access them. Whether you’re using free software like GreenForce-Player or an online service like Jumpshare, you can find a solution that fits your needs for secure, password-protected video sharing.
If you’re interested in adding extra features to your videos, such as slow down or speed up YouTube and other Flash videos, displaying thumbnail previews for video files on Windows, or extracting video frames to images, there are plenty of tools available.
You can even add multiple subtitles to AVI videos to enhance your content further. If you’re experiencing issues with YouTube videos not playing properly in browsers like Google Chrome and Firefox, there are solutions for that as well!
By incorporating these additional features, you’ll ensure your videos remain secure, customizable, and ready to share with the right audience.


User forum
3 messages