Volume Low Even Though it's all the Way Up: Why & Fix

Most computer users probably like to play music or watch TV shows and movies on their desktop PC or laptop. Although there shouldn’t be any problems most of the time, one area where many people encounter an issue is with the sound of the music or video soundtrack not playing as loudly as they would like.
Of course we’re not talking about turning the dial up to 11, but the fact that even though your speaker or headphone controls might be up high, or your laptop doesn’t seem to go any louder, you’re still struggling to get a decent level of volume.
Rather strangely there are many different areas of your system where a volume level can be set, each one can have an adverse effect on the overall volume of the music file or video track coming out of your speakers.
Here we show you the common and not so common places to check and make sure the volume level is set correctly.
Windows Volume Control
The first and most obvious place to check your sound volume is finding out what the overall audio volume that Windows itself is using. If the Windows sound level is set to low or muted, it doesn’t matter about any other software based sound levels the system may have, Windows has the final say.
![]()
The easiest way to check is from the system tray, hover your mouse over the icon that looks like a speaker and it will tell you the current overall level percentage for Windows. If this is low or has a red circle over the icon, the level needs to be increased. Simply left click on the icon and slide the level up to a higher value, or click the muted icon to unmute.
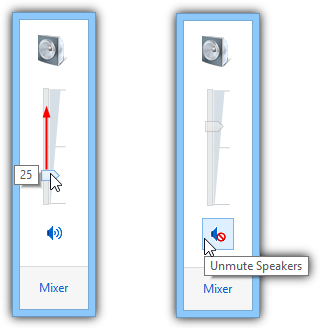
If you can’t find the icon in your tray it can also be accessed via Control Panel > Sound. Double click the audio device you want to hear the sound from (this could be speakers, headphones, TV etc), click the Levels tab and adjust the horizontal slider.
Make sure the audio device you are using is set as the “Default Device”, if it isn’t, right click and choose “set as Default Device” or you will hear no sound at all even though the volume is up and not muted.
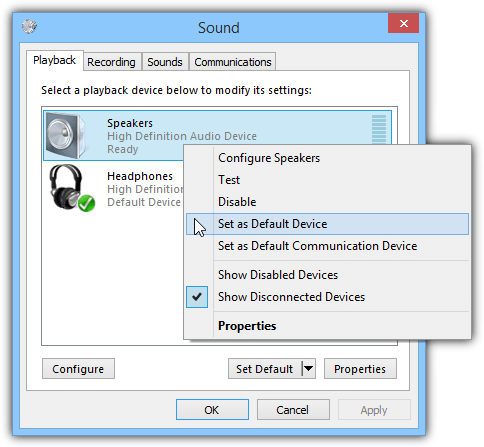
Setting or Locking the Windows Volume Level
It’s quite possible that other software or erroneous settings in Windows keep adjusting the Windows volume when you want it to stay at a certain level. Here’s a couple of tools to help with that.
Speaker Admin
Speaker Admin is a program for XP, Vista, 7 and 8 that can lock your Windows volume level to an exact value at specific times of the day, or it can set the level above or below a certain threshold, for instance quieter in the evenings.
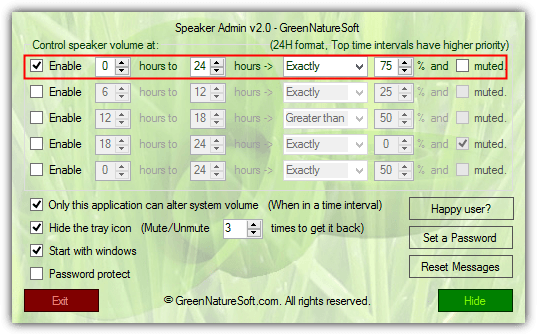
To permanently lock the Windows volume level in Speaker Admin, disable all rules apart from the top one, enter 0 and 24 for the hours, select Exactly for the rule type, enter the volume level to lock to as a percentage and make sure Muted is unticked. Then tick “Only this application can alter system volume” to stop other software trying to alter the master volume in windows, Tick to start with Windows and click Hide to send the program to the background.
Try to alter the master volume now and it will just keep springing back to the level you set. Do note that if you change the default sound device the program needs to be restarted to recognise the change. You can also hide the tray icon and even set a password to stop other users from altering the sound. Watch out for an adware option on install.
Download Speaker Admin (Advanced Volume Control for XP)
NirCMD
If you would like it set the system volume to a default level every time you start your computer, this tool can help. NirCMD has hundreds of different functions for manipulating various options in Windows from the command line, one of those functions is controlling the system volume level. Download and run NirCMD as administrator, then allow it to copy itself to the Windows folder for easier usage.
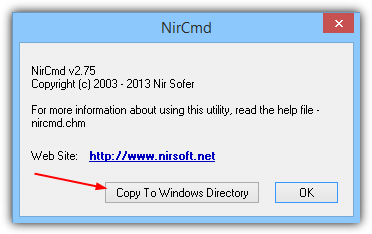
To create a shortcut which you can either double click on from the desktop or place in your Windows startup folder to set the volume every time you logon to Windows, right click on Desktop > New > Shortcut and type the following into the box:
nircmd.exe setsysvolume 49150
Click Next, give the shortcut a suitable name (Set Volume 75%) and click Finish. Your system volume should now reset to 75% whenever you launch the shortcut. The NirCMD volume setting goes from 0 to 65535, to set if half way use 32767 or obviously to 65535 for 100%.
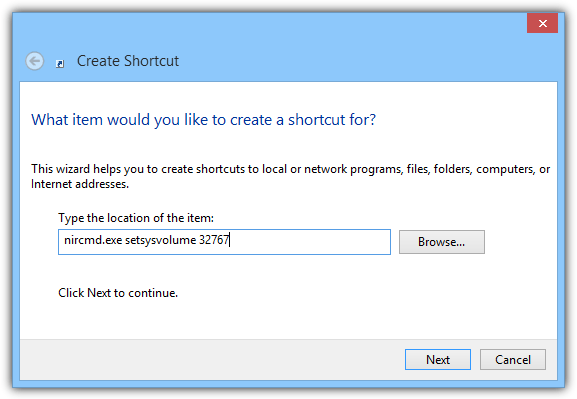
To simplify things we have created 3 shortcuts for you, for 50%, 75% and 100% volume, complete with a proper icon.
Download NirCMD Volume Shortcuts for XP
Download NirCMD Volume Shortcuts for Vista, 7 and 8
The only requirement for these shortcuts is making sure you have run NirCMD and placed a copy of it into your Windows directory or a recognized system path.
Adjusting the Volume in the Music or Video player
If the Windows Volume settings look OK then there’s a possibility that the software you are using has its own volume controls which behave independently of the system volume. Most third party video and audio playing software has its own volume slider within the play controls which won’t affect the master volume level.
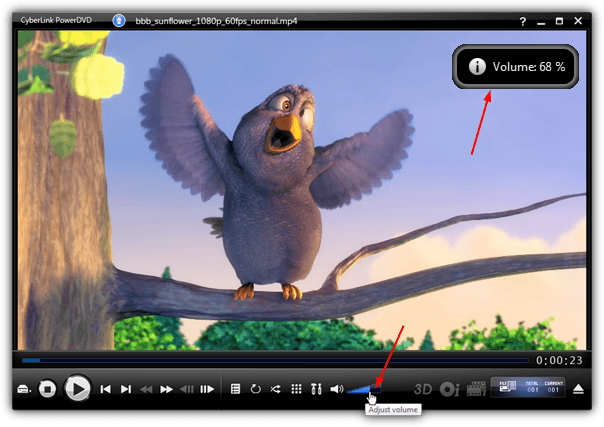
For example, PowerDVD has a slider which is very easy to spot and you can simply click along it to increase or decrease the level. Other software such as VLC, Media Player Classic or Windows Media Player have something similar. VLC also has an option to boost the level to 125% which makes the sound even louder than normal.
The Windows Volume Mixer
Another area to check is the Windows Volume Mixer because the reason most player software doesn’t affect the main volume control is they have their own entry in the mixer settings. For example, VLC player has an entry below which is set to zero in the Mixer, even though the main Windows volume and the VLC sound level in the program window itself is still set to a high value. You would not hear anything with the below setting.
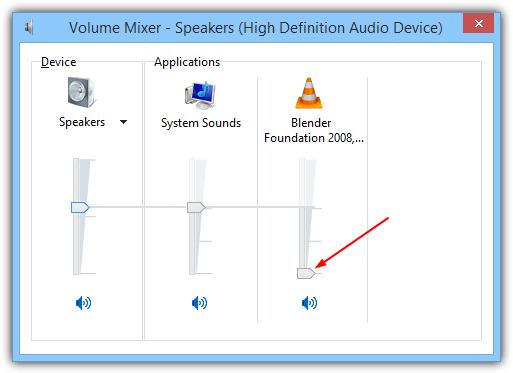
Simply click on the speaker tray icon and select Mixer or type Sndvol into the Start menu search or Run dialog box. Check to see if your player software has an entry and move the slider up if it looks too low. Note the slider will not go above the level of the main Windows volume setting on the far left.
NirCMD mentioned above can also be used for this purpose and set the volume for a specific application in the Mixer to the level you choose. Use the guide above to create a shortcut and enter the following command instead:
nircmd.exe setappvolume {process name} 1
To get the process name open Task Manager (Ctrl+Shift+Escape) and look for the name of the player in the list. For example, VLC will be vlc.exe, Media Player Classic 64bit will be mpc-hc64.exe. The volume level is a number between 0 and 1, 1 is 100%, 0.5 is 50% and etc.
Hardware Volume Controls
Although this seems to be less common nowadays, many laptops and some netbooks actually have a volume control slider, or more likely a rotary volume control on the side or front of the laptop. This is a hardware control and behaves the same way as an inline volume control on a set of headphones and is completely separate from any operating system volume controls or levels.
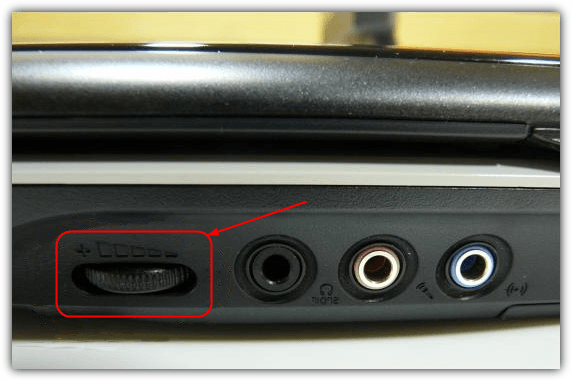
The control is usually on the side or front of the laptop, often near the line out, mic and headphone connection sockets. Note these controls are separate to the media controls on some laptops that are between the keyboard and the screen, those do actually alter the master volume level in Windows. The easy way to find out is change the level on your media keys and watch the sliders in the Sound Mixer window.
Codecs and Filters
Depending on what type of sound source is being played, it is sometimes naturally lower in volume than other types. For example AC3 audio can sometimes appear to be quiet when played through a 2 speaker Stereo system. Codecs and filters used to play certain audio formats can also have their own volume levels over and above anything you’ll find in the Windows Volume Mixer or even the media player’s own interface.
AC3Filter is an audio decoder and processing filter that can boost and enhance the audio levels of AC3 and DTS audio. If you already have it and the audio sounds too quiet, it’s worth increasing the levels in AC3Filter. If you don’t have AC3filter it’s worth installing anyway because 5.1 audio which usually sounds very quiet can be boosted.
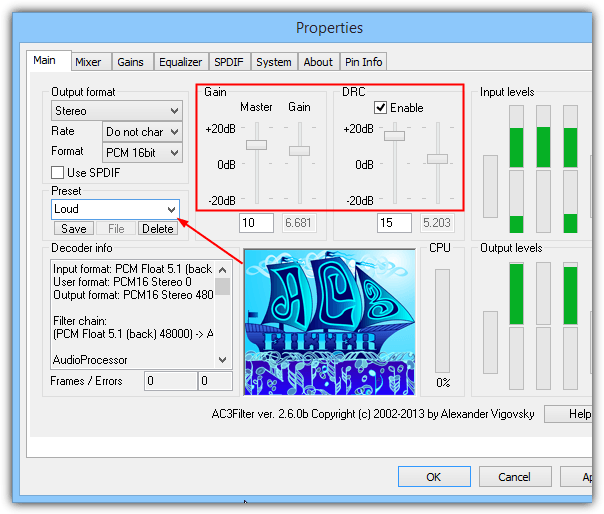
Install AC3Filter and go to Start > All Programs > AC3Filter and run AC3Filter Config. On the Preset drop down menu on the left select Loud. This increases the Gain levels of all channels and enables DRC (Dynamic Range Compression) to stop the audio distorting. You can then alter the master sound level or the level in the media player safe in the knowledge the AC3 or DTS audio is already at its safe maximum level.



User forum
51 messages