Firefox has Prevented Unverified Add-on: How Force Enable
Google Chrome and Mozilla Firefox are the most used web browsers today. One of the most impressive features found on both of those web browsers is the amount of available free extensions or add-ons that you can download and install to modify the existing behavior of the browser or even add new features such as a FTP client (FireFTP), download manager (DownThemAll!), or advertisement blocker (Adblock Plus) without requiring a dedicated third party software. Currently there is more than a whopping 12,000 extensions that can be installed on the current Firefox.
Although the extensions are very useful, the constant browser updates which are released every month can cause some of the extensions to stop working if they are programmed to only run with specific versions of Firefox.
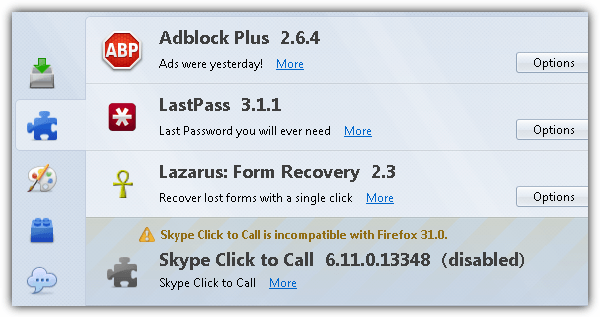
This is actually a safety feature to allow the extension developers to fully test and verify that their extension is compatible with the latest Firefox and not crashing it. However there are times when it reports that the extension is incompatible with Firefox or you cannot install because the Add to Firefox button is grayed out with a text saying not available for Firefox. Here we have 4 ways to force the installation of incompatible extensions in Firefox.
1. Nightly Tester Tools
The Nightly Tester Tools is an extension for Firefox which has the ability to disable add-on compatibility checking. After installing the extension, restart your Firefox web browser, press Alt+T to show the menu bar, go to Nightly Tester Tools and select “Force Addon Compatibility“.
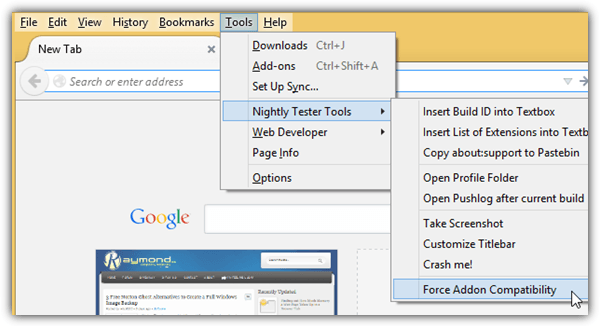
After enabling the force addon compatibility option, you can now forcefully enable an incompatible addon. Go to the Add-ons Manager window by pressing Ctrl+Shift+A, right click on the incompatible add-on and select Enable. Please ignore the the warning message that is shown in the Add-ons Manager telling you that the compatibility checking is disabled and you may have incompatible add-ons.
2. Disable Add-on Compatibility Checks
On older versions of Firefox, it is possible to easily disable add-on compatibility checks by simply toggling the extensions.checkCompatibility preference from the about:config to false. However since version 3.6, Firefox requires you to include the application version at the end of the preference. This would be an inconvenience because Firefox is updated every month which means you’ll need to recreate a new preference name on every major release.
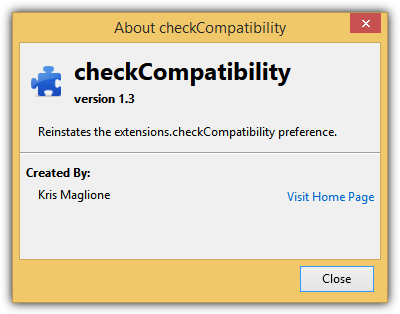
To get through this problem, an addon called Disable Add-on Compatibility Checks can be used to reinstate the retired extensions.checkCompatibility preference without respect to the current application version. Install the addon and there’s nothing to configure.
Download Disable Add-on Compatibility Checks
3. Editing Extensions.checkCompatibility Preference
If you belong to the advanced user group who would prefer to learn how to manually change the Extensions.checkCompatibility preference to disable the extension compatibility checking, here are the steps.
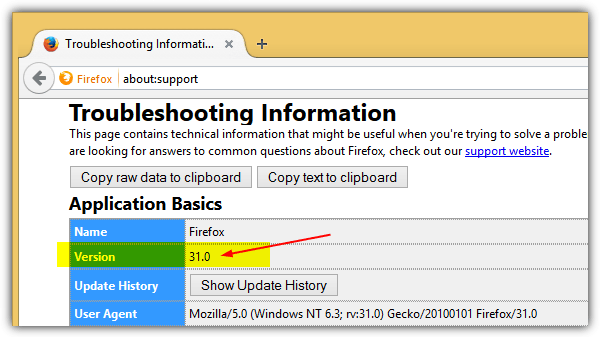
3a) First you need to identify the version of Firefox that you’re running. You can either view it in About Firefox from the Help menu bar or visit the internal URL about: or about:support.
3b) Access the URL about:config from the address bar and click “I’ll be careful, I promise!” button.
3c) Right click in the window, go to New and select Boolean.
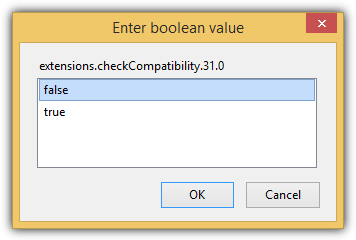
3d) When asked to enter the preference name, type extensions.checkCompatibility.31.0 and click OK. You may need to replace the 31.0 with the version number that you see from step 3a.
3e) Select “false” as the boolean value and click OK.
The changes take effect immediately without requiring you to restart Firefox. Take note that you’ll need to recreate a new preference name of extensions.checkCompatibility with the current version number whenever Firefox is updated.
4. Hacking the Extension
You can find an instruction on the minimum and maximum version number of Firefox that the extension can be installed on and this value is added by the extension programmer. Fortunately it is possible to edit the extension and increase the maximum version number so that even the outdated extension can be installed on a newer version of Firefox.
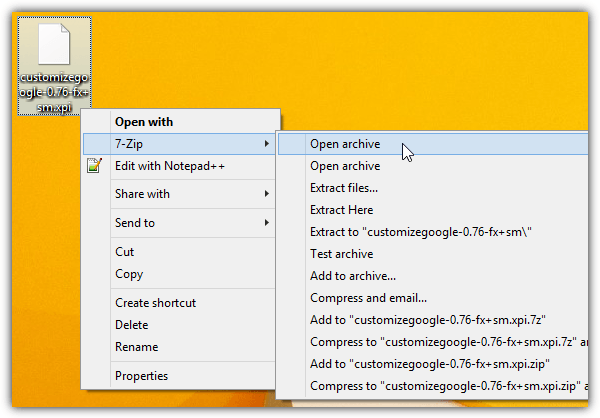
4a) Go to the webpage of the extension that you would like to install. Right click on the grayed out “Add to Firefox” button and select “Save Link As…“. Firefox will now download the add-on file which has a .XPI extension.
4b) Locate the XPI file that you’ve downloaded, right click on it and open with 7-Zip.
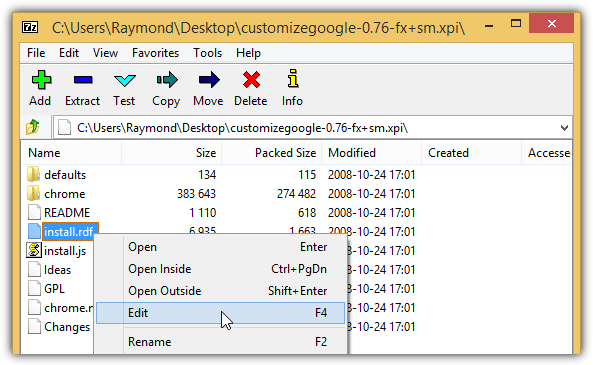
4c) In 7-Zip, right click on the install.rdf file and select Edit. It is advisable to use a better text editor such as Notepad++ to edit the install.rdf file because Windows Notepad does not recognize new line breaks. You’ll need to configure 7-Zip to use Notepad++ as the default editor from Tools > Options > Editor tab.
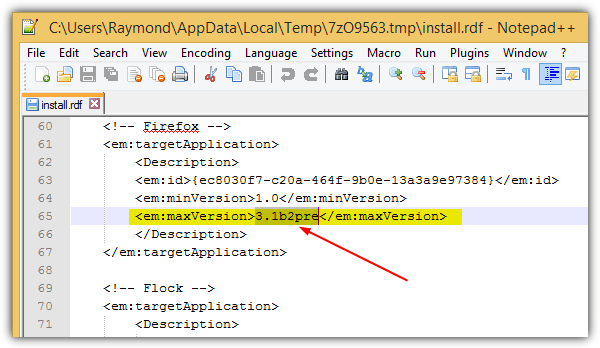
4d) Locate the code <!-- Firefox --> in the text editor and take note of the value for maxVersion. As you can see from the screenshot below, this extension can only be installed on Firefox starting from version 1.0 up to 3.1b2pre. Simply change the maxVersion value to a number that is equivalent or higher than the current version and save the changes.
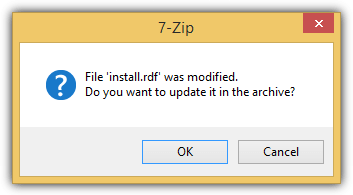
4e) 7-Zip will detect that the install.rdf file was modified and will prompt you if you want to update it in the archive. Click the OK button.
4f) The final step is to drag the modified XPI file onto the Firefox window and will prompt you to install instead of telling you that the extension could not be installed because it is not compatible with Firefox.

Improve this guide

User forum
41 messages