5 Ways to Stop Windows Automatically Restart After Installing Updates

Windows Update is a component that can schedule and automatically download and install important security updates for your version of Windows in the background without the user having to interact with the process. While this feature can be very useful for many Windows users to keep their computer up to date, it can also be a complete pain as well because there are one or two issues that can spring up and surprise you when you least expect or want it.
Anytime you install a Windows Update that requires you to restart your computer, you must restart it or be annoyed with a pop-up message that tells you the computer needs restarting to finish installing the updates. Although you can choose to postpone the restart for a few hours manually, you actually need to tell Windows because depending on the configuration, Windows may restart the computer anyway without your say so!
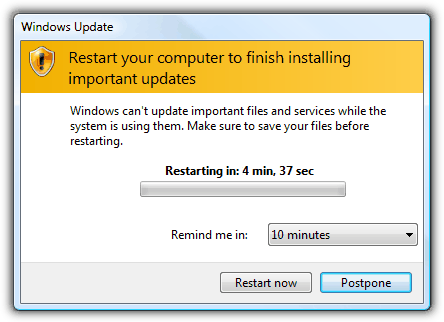
If Windows is trying to install critical updates on a schedule or at the next available opportunity that require a reboot, it will popup the restart dialog. But it will also show a timer which will automatically reboot your computer to finish the update, whether you want it to or not. This can lead to lost work or you could lose large downloads etc. There are ways to stop this happening though, here are 5 solutions for you to look at which will stop Windows rebooting automatically after an update.
1. Editing the Registry
The most useful way to turn off the scheduled update countdown and reboot is to edit or add a key into the system registry. This will tell Windows Update not to reboot automatically even if the update requires it. To make things easier, here is the .reg file which you can download and simply double click to export the value into the registry which works on all versions of Windows.
Download Disable Windows Update Restart .reg
To edit the registry manually:
1. Open Regedit and navigate to:
HKEY_LOCAL_MACHINE\SOFTWARE\Policies\Microsoft\Windows
2. On the Windows key, right click and create a new key called WindowsUpdate, and then right click on WindowsUpdate and create a new key called AU.
3. Right click on AU -> New DWORD value, call it NoAutoRebootWithLoggedOnUsers. Then double click on it and enter a value of 1. Close Regedit.
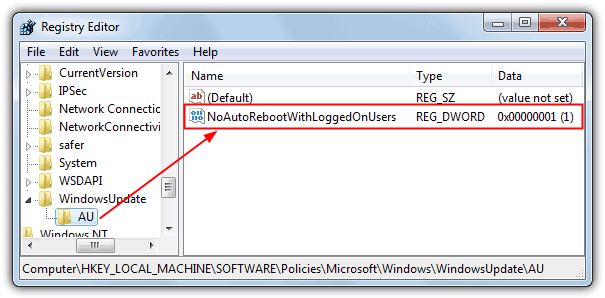
This edit does need a reboot to complete the process though. There’s also a tiny tool by Intelliadmin called AutoRebootSetter that does exactly the same thing, but can also re-enable the setting again if you wish.
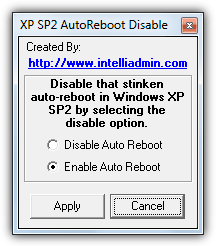
Just run it and select the option you want, followed by Apply. Administrator privileges are required. Although it says for Windows XP SP2 in the program, the registry key is still the same so also works in newer Windows versions.
2. Stopping the Windows Update Service
To get rid of the automatic reboot and stop Windows updating completely for a period of time, a simple option is to stop the Windows Update Service. No updates will be installed while it’s off but the service will restart and the computer will return to normal after a reboot. If the computer isn’t rebooted or shutdown for days at a time, this method needs to be used with care.
Go to Control Panel -> Administrative Tools -> Services, right click on “Windows Update” and click Stop. Windows XP users need to stop the “Automatic Updates” service instead. Simply do the opposite or reboot to start the service again.
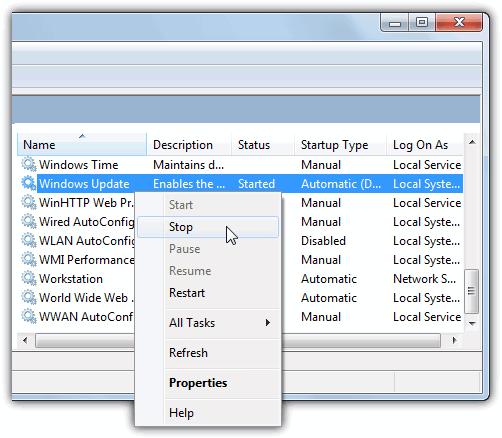
If you want a quick way to do that, using the “net start” command via command prompt is an option. Alternatively, it’s possible to make a desktop shortcut like the ones we’ve created here for you, one to stop the service and another to restart it in case you don’t want to reboot the system.
Start/Stop Windows Update Shortcuts | Shortcuts for Windows XP
A little tool you can place on the desktop to stop the service for you is Leave Me Alone!. All you have to do is run it and click the button, then “Windows Update” or “Automatic Updates” will be stopped until you restart the service or reboot.
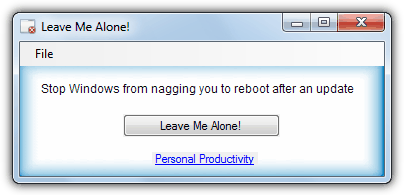
Something Leave Me Alone! doesn’t do is restart the service again for you.
3. Use a Reboot Prevention Tool
If you’re someone who doesn’t like to play with important Windows functions or the system registry, something you could use as a substitute is a simple tool that will forcefully stop Windows from rebooting. In addition to stopping Windows Update rebooting the computer, a tool could also stop Windows shutting down if another program has a shutdown on completion option accidentally set or the system is set to hibernate or sleep and you don’t want it to.
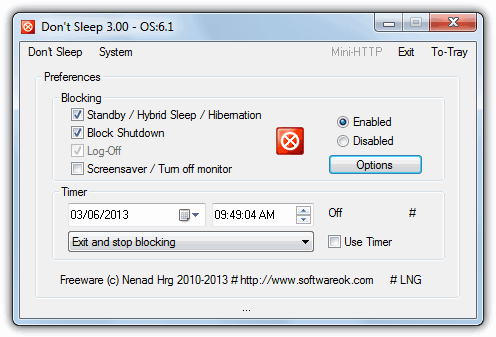
One tool that can do this and more is Don’t Sleep. All have you to do is start the tiny portable Don’t Sleep program and click “To-Tray” in the top right. It will then prevent any type of sleep, hibernate, shutdown, restart, log off and optionally stop the screensaver or monitor off function kicking in. You can also put it on a timer and stop reboots for xx amount of minutes or hours. Any attempt by Windows Update to reboot the computer will then be blocked while Don’t Sleep is running in the tray.
4. Changing the Windows Update Method
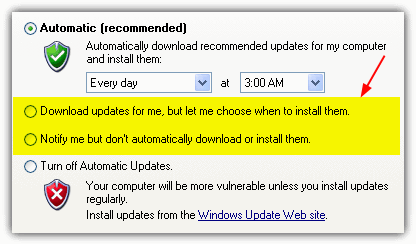
Because Windows will reboot itself without your say so if you have your Windows Update settings configured to fully Automatic, an obvious way around is to turn off automatic updates and set it to notify you first. This way you control when the updates are installed and will know when a reboot is likely to be needed.
Go to Control Panel -> System -> Windows Update -> Change Settings, then set the Important Updates drop down to either the “Download updates…” or “Check for updates…” option.

For Windows XP users go to Control Panel -> System -> Automatic Updates tab.
5. Using the Group Policy Editor
It’s easily possible to turn off the automatic restarting after a critical update by way of the Group Policy Editor (gpedit.msc). This isn’t in Home versions of Windows so if you try to do this on Windows 7 Home Premium or XP Home for example, it won’t find gpedit.msc. This method does the same thing as the registry editing trick and you can simply use that instead.
1. Go to Start and type gpedit.msc into the search box and click OK, or use the Run box (Win+R).
2. Navigate to Local Computer Policy -> Computer Configuration -> Administrative Templates -> Windows Components -> Windows Update.
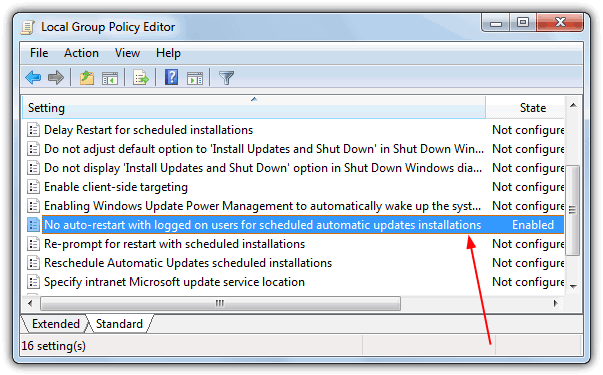
3. Double click “No auto-restart with logged on users for scheduled automatic updates installations”. Select Enabled and click OK.
Windows is unfortunately too “helpful” in forcing and annoying the user to restart the computer after a windows update. A notification would be fine, but an annoying popup that appears every 10 minutes and gives you 5 or 15 minutes to decline or have your Windows system reboot automatically just causes so much hassle for many users.



User forum
10 messages