How to Create a WiFi Login Page [Free Tools]
Want to create a WiFi login page? This guide shows you how to turn your PC into a hotspot with a secure captive portal. Follow our step-by-step instructions to add a login page for controlled, password-protected internet access.
How to Create a WiFI Login Page
Part 1: Turn Your Computer into a Hotspot
- Download & Install WiFi Creator
Get it from WiFi Creator.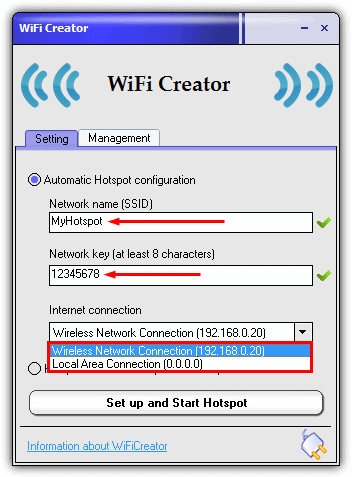
- Setup Options
Choose “Automatic configuration.” Optionally rename your hotspot and set a new password (8+ characters). Select the network adapter connected to the internet (wired or wireless). - Start the Hotspot
Click “Set up and Start Hotspot.” A new virtual adapter is created and internet sharing is enabled.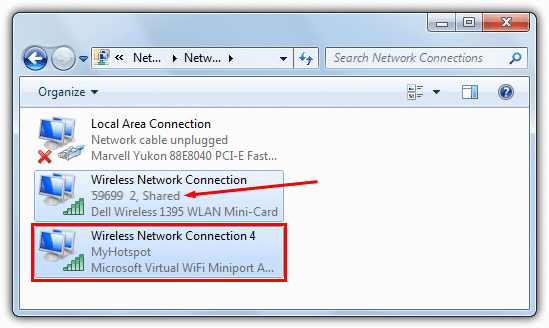
Part 2: Add a Captive Portal (Login Page)
Option 1: ARPMiner
- Download & Install ARPMiner
Get it from ARPMiner. Ensure your WiFi Creator hotspot is running. - Create a User
Open the Users tab, enter a username, password, and session duration. Click “Add/Update.”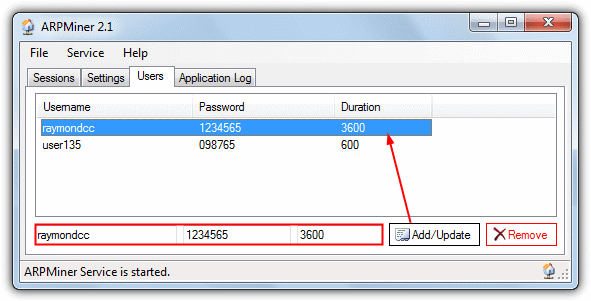
- Configure NAT Settings
Go to the Settings tab and click NAT. Set the internet-connected adapter as the Public Network and the WiFi Creator virtual adapter as the Private Network. Click Save and then Start.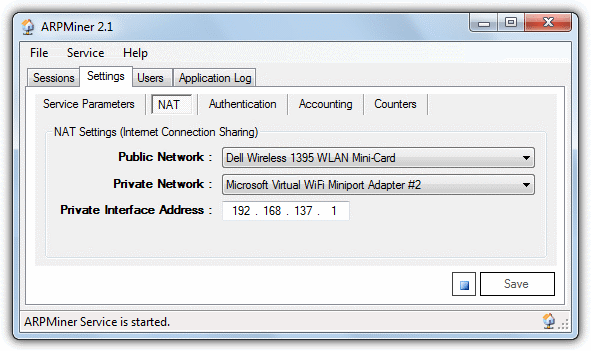
- Test the Setup
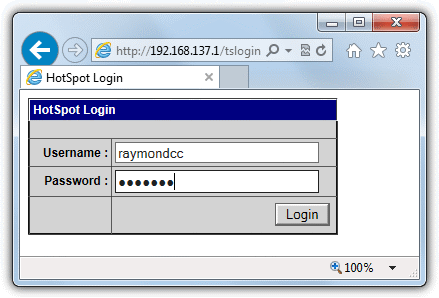
Connect another device to the hotspot (default SSID: “MyHotspot”, key: “12345678”). Open a browser to see the ARPMiner login page.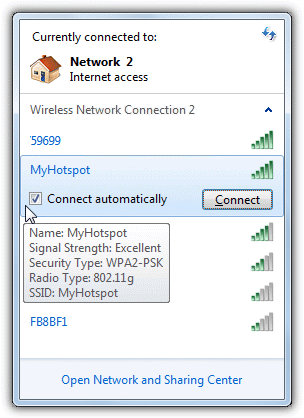
Option 2: Microsolut
- Download & Install Microsolut
Get it from Microsolut. Ensure your WiFi Creator hotspot is active. - Setup Microsolut
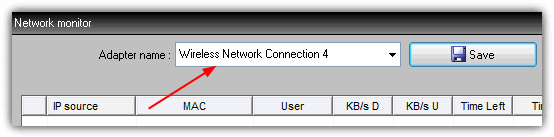
Launch the program and click “Login” when prompted. Go to Setup ? Web Server, select “192.168.137.1” from the dropdown, and click Save. Then go to Connections ? Monitor, select the adapter created by WiFi Creator, and click Save.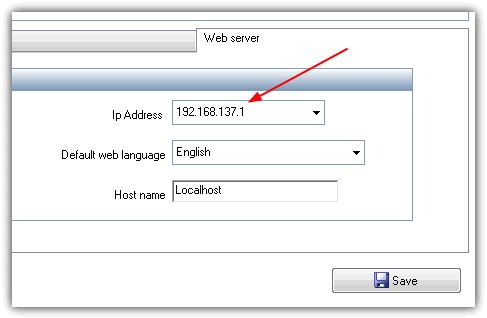
- Test the Setup
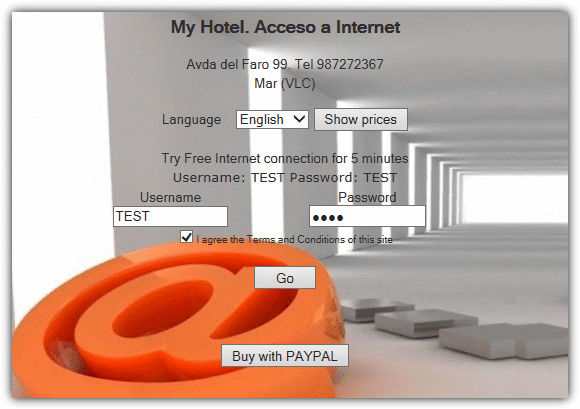
Click “Start Hotspot” and allow any firewall prompts. Connect another device to the hotspot and open a browser to view the Microsolut login page. Log in using the pre-configured TEST user.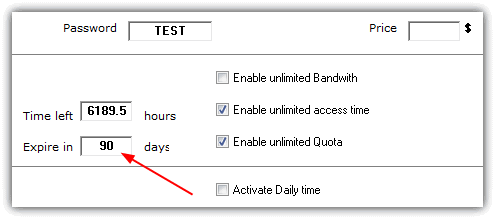
Option 3: MyHotSpot
- Download & Install MyHotSpot
Get it from MyHotSpot. Reboot if required and ensure your hotspot is running. - Setup Options
Launch MyHotSpot and select “Automatic” in the network configuration. Choose the internet adapter (top dropdown) and the hotspot adapter. Click Next and enter your city and country. When prompted for credentials, click “Login.”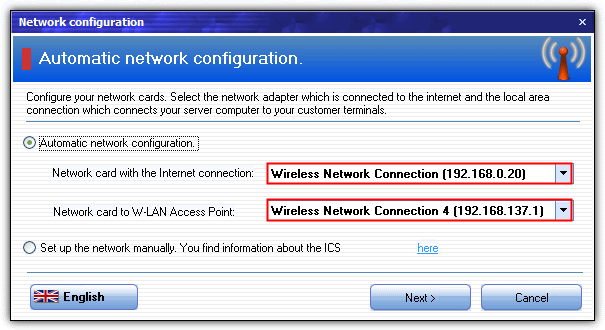
- Enable Guest Login
Go to Edit ? Hotspot Configuration ? Access. Click Advanced Settings, tick “Enable guest-login” (set a password if desired), and click Close.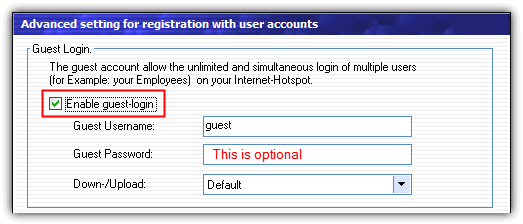
- Test the Setup
Connect another device to the hotspot and open a browser. The MyHotSpot login page should appear. Log in as “guest” (with the set password if applicable).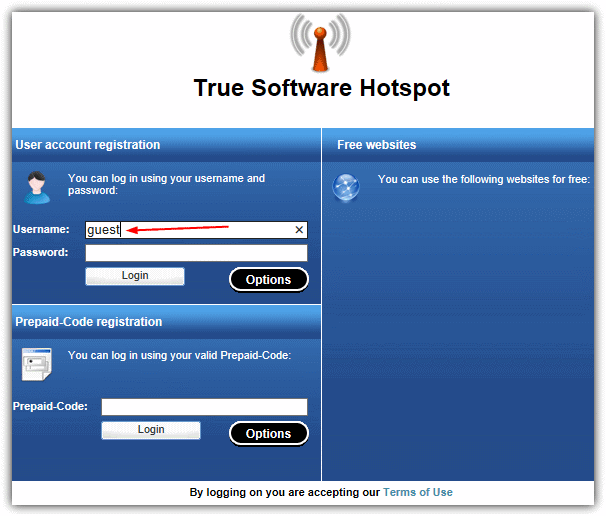

Final Notes
- The login page may not appear if you first access a secure (HTTPS) site. Use a standard HTTP website.
- This guide assumes a basic setup with one WiFi adapter (and optionally a LAN adapter) behind a standard router.
- Check your ISP terms if you plan to run a public or monetized hotspot.

Improve this guide

User forum
67 messages