Create, Edit, Clear or Disable Jump Lists in Windows
Today we’ll walk you through everything you need to know about Jump Lists in Windows, including how to access, customize, and clear them. Whether you’re looking to disable specific lists or manage the items that appear, we’ve got you covered with simple, step-by-step solutions.
What are Windows Jumplists?
One of the many positive enhancements to come out of Windows 7 and highly requested for a return in Windows 10’s Start Menu is the Jump List feature. Jump Lists have proved to be very popular because they are very useful and allow convenient access to recently or frequently used files or website links in the Start Menu and on the Taskbar. Many applications these days come with their own custom Jump List and include custom tasks related to the program as well a the recently opened, recently closed, commonly used items and etc.
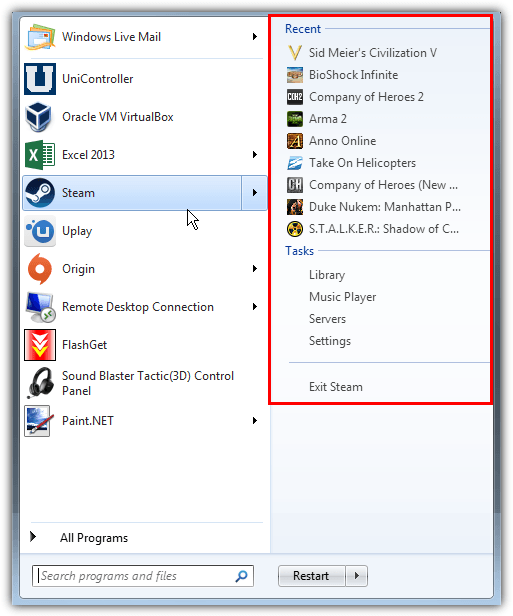
One issue with a Jump List is it will show recent activity and history for each program that has a pinned Taskbar icon or Start Menu entry. If you don’t want a specific list to show or want to clear one or more lists, it isn’t immediately obvious how to do it. To disable specific Jump Lists, clear one, some or all Jump Lists, create your own Jump Lists or turn the option off altogether, we have a number of solutions for you to look at. Note the following methods work the same in Windows 7, 8.1 and 10/11 unless stated.
Disable and Clear all Jump Lists
If you want to completely disable Jump Lists in windows it’s very easy to do. Disabling and then re-enabling the option also has the effect of clearing all Jump List entries.
For Windows 7
Right click on the Taskbar and select Properties. Click on the Start Menu tab and untick the option “Store and display recently opened items in the Start menu and the taskbar”, then click Apply.
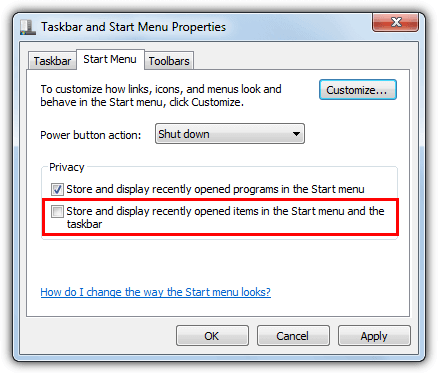
If you just wanted to clear all the lists, simply re-tick the option and press Apply again.
For Windows 8.1
The Windows 8.1 method to turn off Jump Lists is slightly different to Windows 7, right click on the Taskbar > Properties > Jump Lists, untick “Store and display recently opened items in Jump Lists”.
For Windows 10
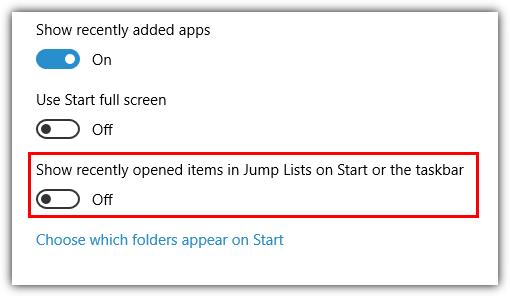
Click on Start > Settings (Winkey+I) > Personalization > Start and turn off the option “Show recently opened items in Jump Lists on Start or the taskbar”.
Clear All Jump Lists
Besides disabling and enabling the actual Jump List function, there is another easy way to delete all the Jump Lists in one go, which is to use a junk and privacy cleaning tool, CCleaner is one such program that is able to do this.
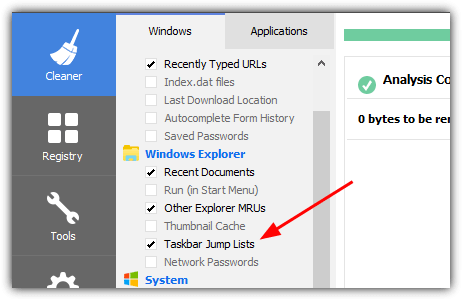
All you have to do is tick the “Taskbar Jump Lists” option in the Windows Explorer section on the Windows tab of the Cleaner, and then run a clean. Oddly, although the option deletes the Jump List stored files, CCleaner itself doesn’t actually tell you it has found or deleted anything.
Clearing a Single Entry From a Jump List
Deleting all the jump List entries at once is fine, but what about if you want to just delete one or two entries from a Jump List and leave the rest in tact? It’s quite easy to do.
Open a Jump List in the Start Menu or on the Taskbar so you can see the list. Then simply right click on the entry you want to delete and select “Remove from this list”.
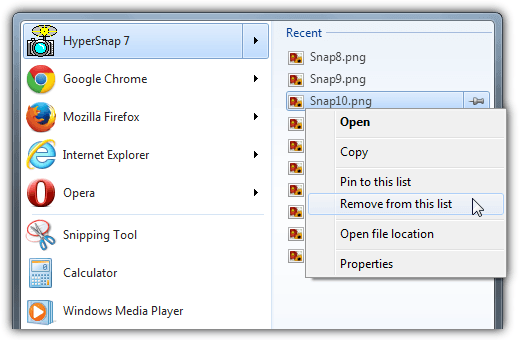
Note you will only be able to remove the recently opened, saved or visited items in the list and tasks put there by the application cannot be touched (such as opening a new browser window).
Delete a Single Application Jump List
You can use the method above to manually delete all the entries in the jump List of an application one by one, but it becomes a pain if you constantly want to clear the lists for one or two programs only. Windows itself has no option to do this but with a few steps you can easily create a desktop shortcut to quickly delete all entries of a single Jump List.
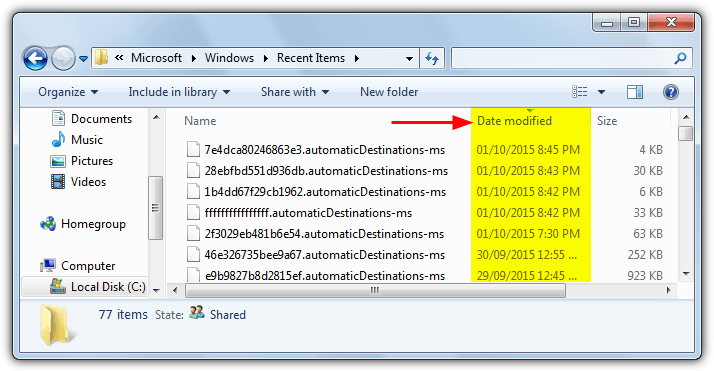
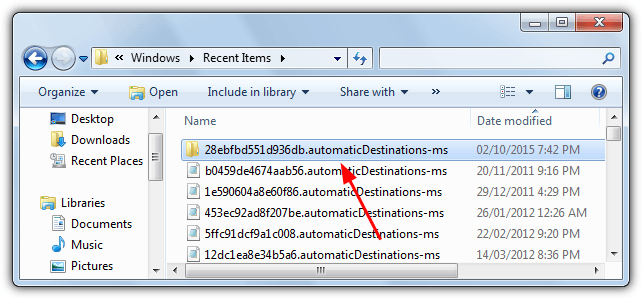
1. Open Windows Explorer, click in the address bar and type or paste the following path:
%APPDATA%\Microsoft\Windows\Recent\AutomaticDestinations
2. Click on the Date modified header to sort the files by date with the newest at the top.
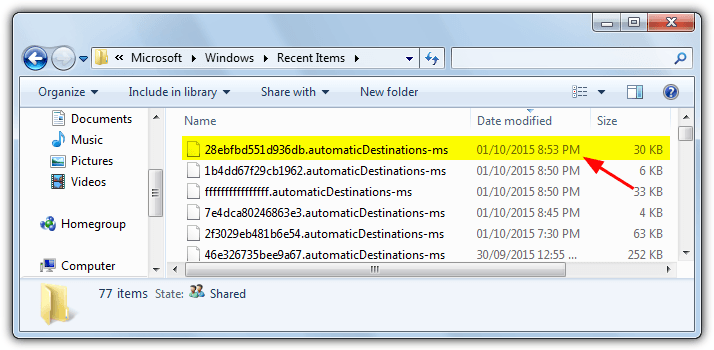
3. Leave this window open and go back to the Jump List which you want to clear, right click on an entry and remove it from the list. Note you will need to have at least two items on the list or this method won’t work.
4. In the Explorer window press F5 to refresh, there should be a file which has just been modified. This is the Jump List for the application, deleting or moving the file will remove its Jump List entries.
Tip: If there are no time changes in the AutomaticDestinations folder when you remove the entry, look in the following location instead:
%APPDATA%\Microsoft\Windows\Recent\CustomDestinations
The random looking name for the file will be the same for the application every time it creates a new Jump List so it’s easy to create a shortcut to delete the file.
1. Right click on the desktop > New > Shortcut, add the following into the box, replace the filename with your own:
cmd /c del /q %APPDATA%\Microsoft\Windows\Recent\AutomaticDestinations\ 1234567890abcdef.automaticDestinations-ms
2. Change the names above to CustomDestinations if your date change was in that folder. Press Next and give the shortcut a name, then click Finish.
Now when you launch the shortcut the Jump List entries only for the chosen application will be deleted. To use the command in a batch file instead of a shortcut leave out “cmd /c” from the line.
Disable a Single Application Jump List
To completely disable the Jump List for a particular application rather than regularly cleaning the list, you might be lucky to find an option somewhere inside the software that allows the list to be turned off. Firefox is one such program that has an option buried inside its about:config page.
If the software doesn’t have a disable option or you can’t find it, there are a few workarounds:
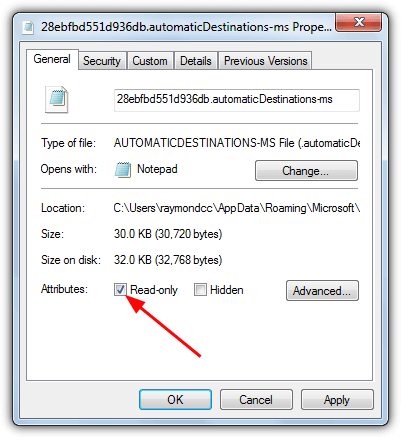
1. Follow steps 1-4 above for deleting a Jump List for a single program but do not delete the file. Instead right click on the file, select Properties and tick the Read only box to write protect the file, then Apply. Depending on the application this will lock the current Jump List in place preventing new items from being added or remove the existing entries and then lock the list .
1a. An alternative to the above is not to write protect the file but replace it. Copy the complete name for the file (1234567890abcdef.automaticDestinations-ms) and then delete or move it. In its place create a new folder (right click > New > Folder) and give it the exact same name as the file you just deleted.
This will remove the Jump List totally and block the program from creating a new one. Delete the folder to start using the Jump List again.
Create Your Own Jump Lists
We haven’t come across any programs that can edit existing Jump Lists reliably, but there are a few tools around that allow you to replace an existing Jump List with your own or create a custom list for an application that might not normally have one.
1. JumpList Launcher
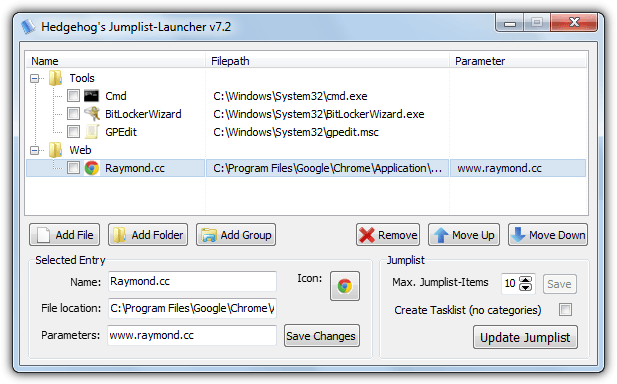
This is more of a program menu launcher that uses Jump List functionality allowing you to choose and place your most convenient shortcuts in a single list. The process is quite easy, pin the JumpList Launcher executable to the Start Menu or Taskbar and open the program’s configuration window. Add programs or folders to the list with optional parameters and put them in separate groups if you wish. Save the changes, update the Jump List and then right click on the pinned icon to access the list. JumpList Launcher is a single portable executable and works on Windows 7 and above.
2. Jump Folder
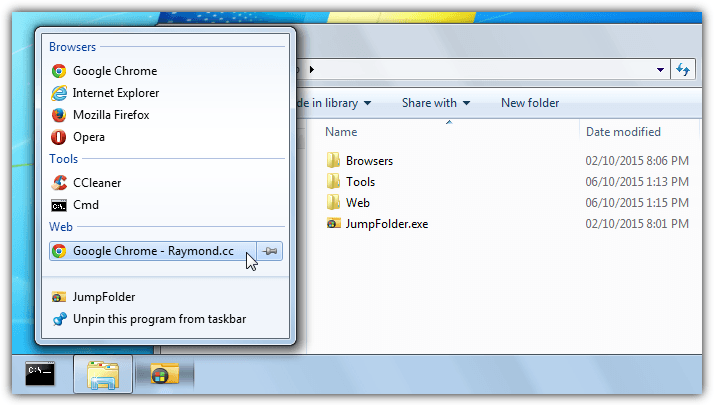
Jump Folder is similar in operation to JumpList Launcher above in that it creates a menu shortcut system that behaves like a Jump List. This program though requires manual setup and has no user interface. Extract the zip to a folder, pin JumpFolder.exe to the Start Menu or Taskbar, then create folders at the same location as the executable to act as categories. Inside the category folders add program or folder shortcuts then run the program once to register the entries. The result is a Jump List style menu system, tested and working on Windows 7 to 10.
3. Jumplist Extender
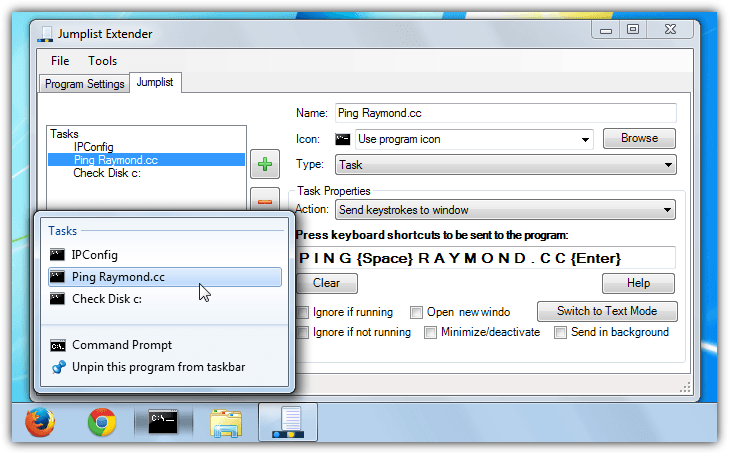
This is like a more advanced version of the tools above and it creates, edits or imports/exports custom Jump Lists for applications. JumpList Extender allows you to use keyboard shortcuts to perform task functions from within the pinned program, you can also send other keystrokes, run from the command line or even create custom scripts if you have experience of the AutoHotKey scripting language. One negative is JumpList Extender requires installation although you can unpack the files with Universal Extractor to make it portable.
4. JumpList Editor
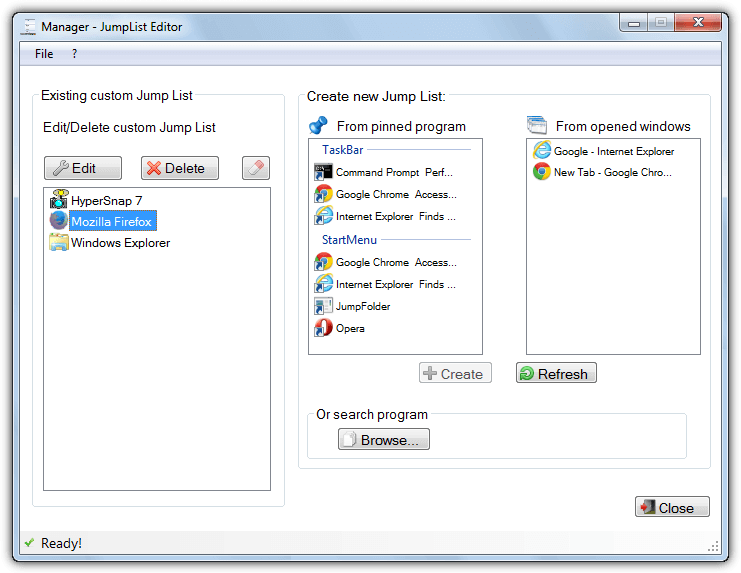
JumpList Editor is potentially more useful because it has the ability to include standard or frequent lists into your own custom Jump Lists. This makes them behave much more like what you get from real Jump Lists. Select a pinned icon or opened window to create a list for, and then edit the list to your requirement. The automatic list can be either frequent items, recent items or a custom list, then add your own custom tasks like opening a single file or folder, or even a multiple operation task. JumpList Editor is not portable but can be made so with Universal Extractor.
In conclusion, customizing your Jump Lists in Windows can boost your productivity. For further optimization, learn how to set process priority in Task Manager, or replace Windows Task Manager. You can also simplify your experience with Vista4Experts, explore a Windows 7 Classic Start Menu, and restore missing Accessories shortcuts. These tips help enhance your Windows experience.

Improve this guide

User forum
8 messages