3 Ways to Change Windows Route Metric: Step-by-Step
In this guide, we’ll show a few ways to change the network adapter’s metric in Windows, giving you control over which connection takes priority.
Windows automatically assigns metrics based on speed, but you can manually adjust them using route.exe, disable automatic metrics, or use third-party tools for more precise network management.
How to Change Route Metric on Windows
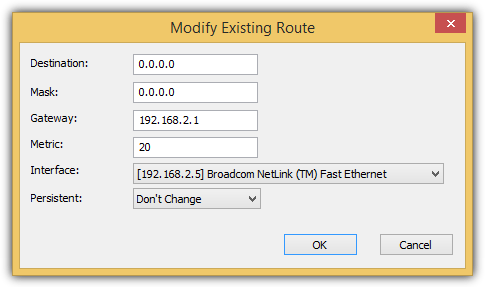
1. Using NetRouteView (GUI Method)
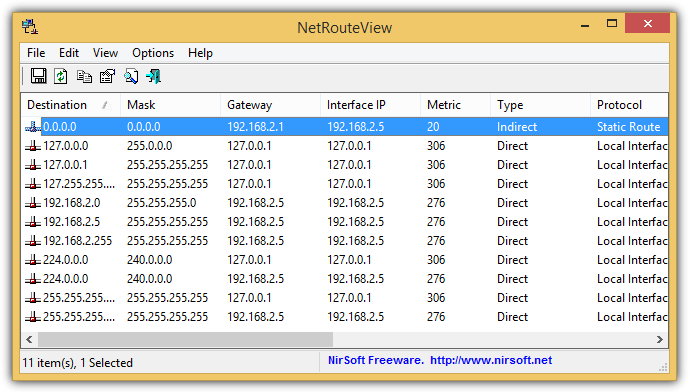
NetRouteView is a simple tool for modifying Windows’ routing table. To change the metric:
- Run NetRouteView as an administrator.
- Find the route with the destination
0.0.0.0(your default gateway). - Double-click it, modify the metric, and click OK.
- If you want the change to persist after a reboot, set
PersistenttoYes.
2. Using Route.exe (Command Line Method)
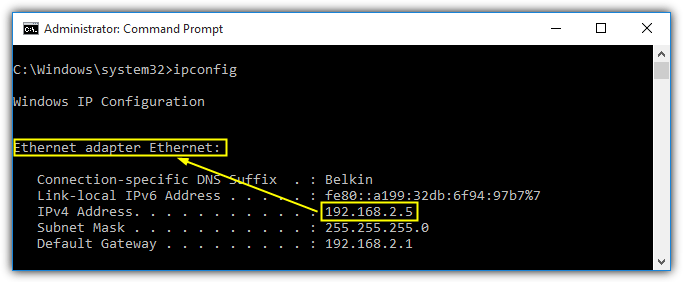
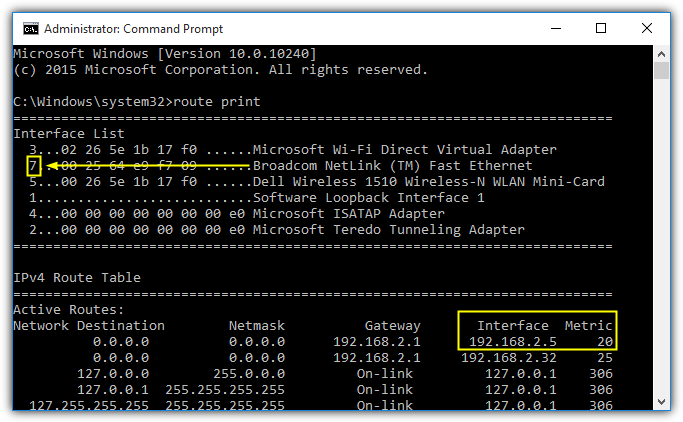
Next, type “route print” in command prompt to get the interface number and also the current metric for the particular network adapter. The Ethernet adapter has an interface number 7 and metric 20.
To increase the metric for an Ethernet adapter with an IP of 192.168.2.5, the command would be route.exe CHANGE (Network Destination) MASK (Network Mask) (Interface IP) METRIC (NUMBER) IF (INTERFACE NUMBER). An example:
route.exe change 0.0.0.0 mask 0.0.0.0 192.168.2.5 metric 5 IF 7
By typing the command above, the metric for the Ethernet will become 25.
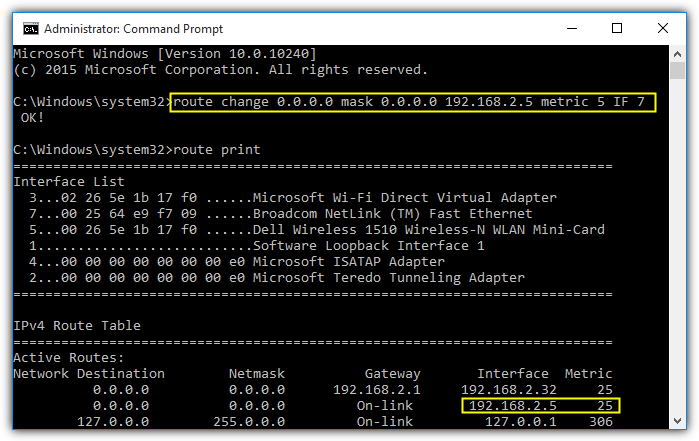
As you can see, the route change command does not replace the current metric with 5 but instead the 5 will be used to add to the current metric 20, making it 25.
3. Setting a Custom Interface Metric (Permanent Method)
- Press
Win + R, typencpa.cpl, and press Enter.
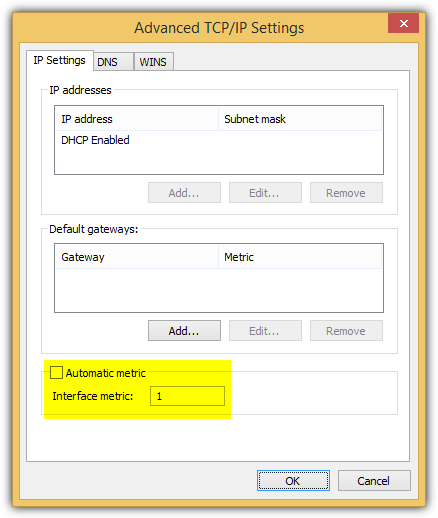
- Double-click on the Internet Protocol Version 4 (TCP/IPv4) and click at the Advanced button located at the bottom right.
- Select Internet Protocol Version 4 (TCP/IPv4) > Advanced.
- Uncheck Automatic metric, then enter your preferred value.
Alternatively, you can use this command:
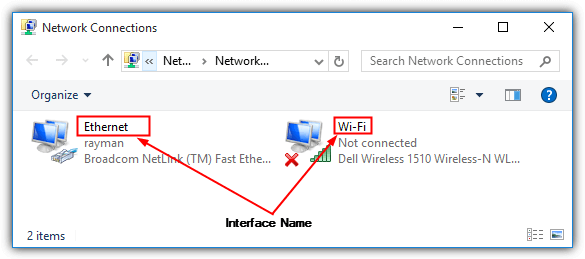
netsh interface ipv4 set interface "[Interface Name]" metric=[Number]Replace [Interface Name] with the adapter’s actual name (e.g., Ethernet or Wi-Fi).
Additional Notes: The new Windows 10 is much smarter in handling multiple connections to the same gateway by ignoring the “Connect Automatically” option and not automatically connecting to the gateway using the wireless when the wired is already connected.
We’ve also tested the order of network adapters found in the hidden “Adapters and Bindings” extensively and it doesn’t seem to have any effect on which adapter is to be used.
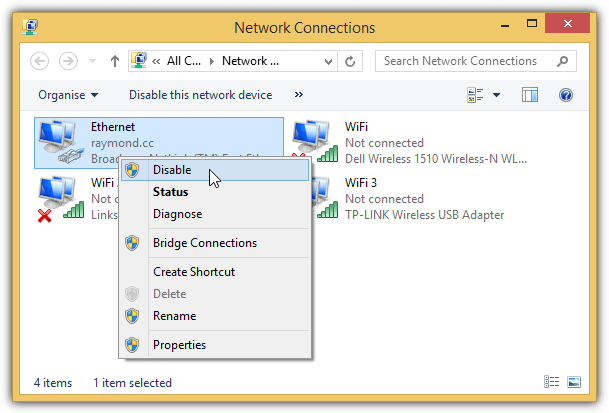
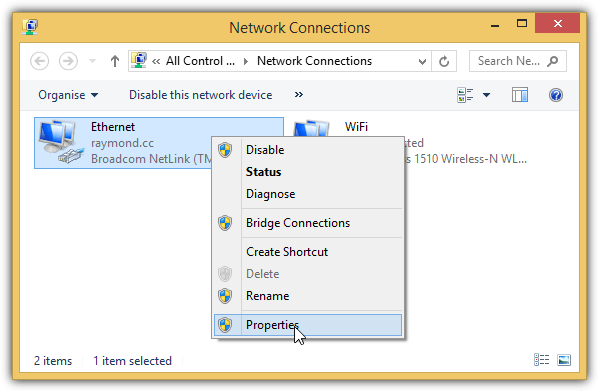
If you’re interested in trying it out, it is at Network Connections which can be launched by running ncpa.cpl from the Run window, pressing Alt+N, and finally selecting Advanced Settings.

Improve this guide

User forum
24 messages