Check Audio Codec on Windows 10: Best Tools in 2023

Sometimes when you try to play a video file in a player like Windows Media Player, you might receive an error that the file cannot be played, or a codec is not installed on your system. In fact, a number of audio and video playback issues can often be caused by not having the correct codec installed on your computer, a problem with the installed codec, or even the wrong version installed.
The term “codec” is made up of the words Coder-Decoder, and is simply a device or a piece of software that can encode or decode a piece of data, in our case audio or video data. If for example, you download a video from the internet, your media player has to have access to the same decoder that it was encoded in. A less experienced user probably couldn’t tell you if they have a certain codec installed to be able to play a file.
Finding this information can be quite difficult for an average user, but there are ways to get it. Here we’ll provide the manual way of finding your installed codecs through Windows and some automatic ways through third party software to help determine what video and audio codecs are installed on your system.
1. Nirsoft InstalledCodec
Nirsoft is known for producing simple and effective utilities, and InstalledCodec is yet another one that does exactly what it’s designed to do. In addition to the audio and video codecs present on the system, it can also display the DirectShow filters. A useful option for 64-bit Windows users is the ability to display the relevant 64-bit codecs and filters. Any missing or problem codecs will show in pink in the main window.
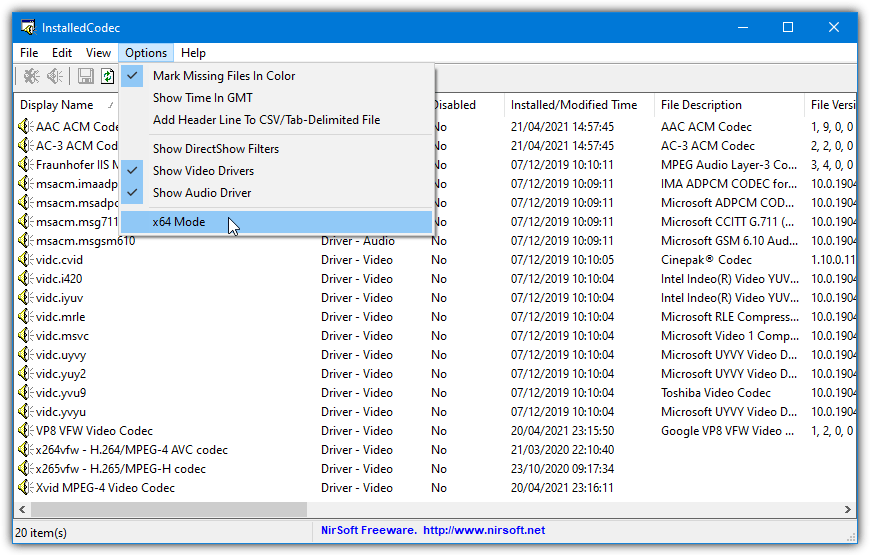
Each entry has a lot of information displayed on its line including names, descriptions, locations, sizes, and also the merit of the codec, which is the priority a codec is given over other compatible codecs for a particular format. Another useful option is the ability to enable or disable anything in the list, ideal for troubleshooting. InstalledCodec is a portable program, use x64 Mode in the Options menu to see 64-bit codecs.
2. VideoInspector
This program is by KC Softwares who are well known for the popular SUMo software update monitor software. VideoInspector is primarily used for the purpose of loading in and gathering information about video files. This includes specific details like the type of video file, what video codecs are required to play the file, and whether they are currently installed on the system.
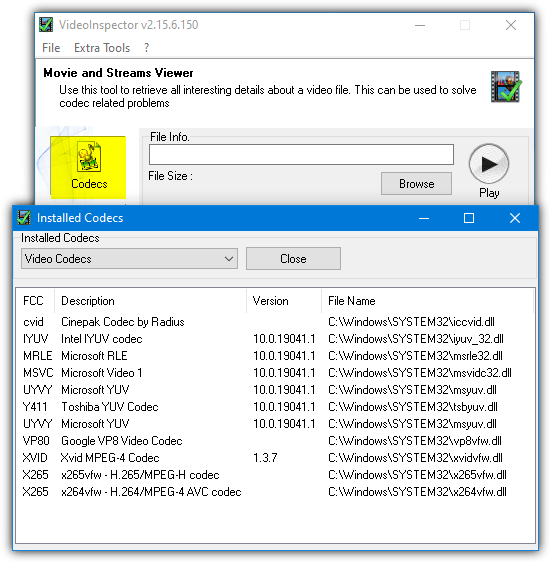
In addition to video file information, VideoInspector also has a separate window that shows what codecs are installed. All you have to do is press the Codecs button on the left of the program window. Video codecs will be displayed by default, choose Audio Codecs from the drop down to see if you have the required decoder to play audio in your files. Installer and portable (zipped) versions are available.
3. CodecTweakTool
Many users might have encountered CodecTweakTool before without actually realizing it. That’s because it’s sometimes included with codec bundles like the popular K-Lite Codec Pack. As the name might suggest, CodecTweakTool is more of a repair and optimize utility for Directshow filters and codecs but you can also get a list of what is installed on the system. CodecTweakTool is a portable executable.
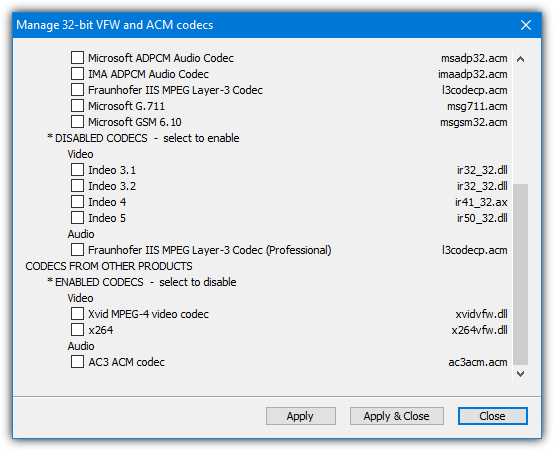
Once you launch CodecTweakTool, codec information is found in the “Codec and Filter Management” section. Simply click on the ACM/VFW (x86) or ACM/VFW (x64) button to show 32-bit or 64-bit codecs. The window will show the codecs that are installed along with which ones are currently enabled or disabled. If you want to change the status of a codec, simply check its box and press Apply.
4 FilMerit
The main purpose of FilMerit is to find and fix problematic codecs and filters and also to alter the priority of which codecs are utilized first (merit). In order to do that FilMerit will show a complete list of codecs and filters installed on the system (32-bit codecs only). FilMerit is a single portable executable.
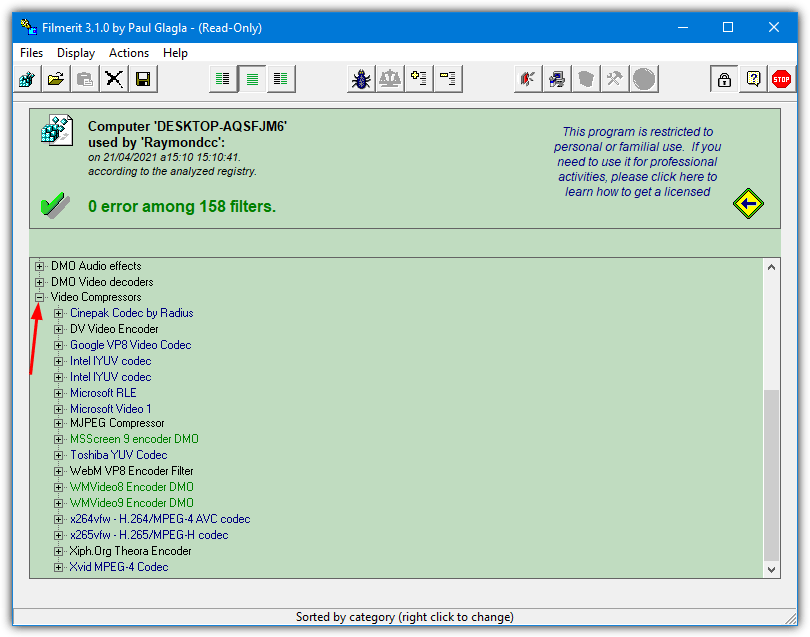
Upon launch, FilMerit automatically scans the system and displays a list of codecs and filters in the main window using a tree type format. DirectShow filters are displayed by default but you can simply click the plus next to Audio or Video Compressors to expand the list. Inexperienced users cannot inadvertently damage or delete installed codecs because you have to physically press the unlock button to allow editing.
5. GSpot
In the past, GSpot was a very popular tool for gathering all sorts of information about a video file. Sadly, it hasn’t been updated since 2007 and has fallen behind the times. Some files and codecs can’t be identified and it doesn’t recognize common formats like Matroska (MKV) video files. However, despite those issues, GSpot can still show a list of all the installed codecs and filters on the system.
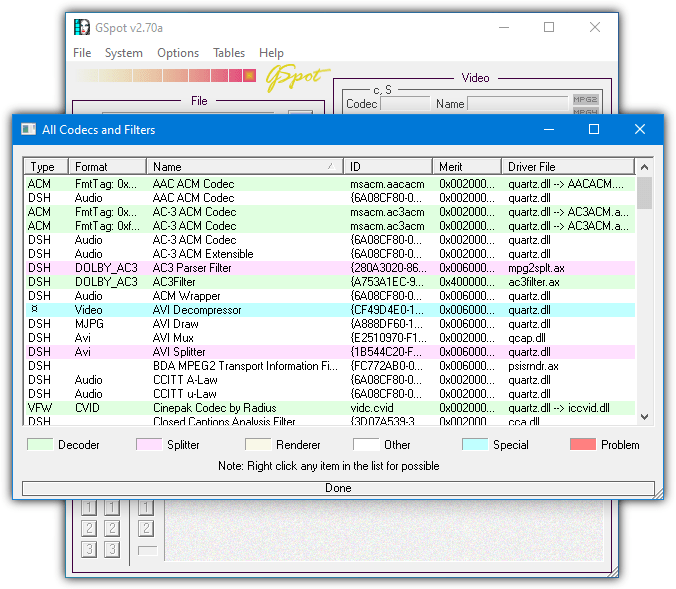
All you have to do is run the GSpot tool, go to the System menu, and select “List Codecs and Other Filters”. The list is color coded so all codecs are listed in green, splitters are in pink, problems are in red, and etc. Right click and select Details to get more information about a codec or use the bottom option to copy the entire list as text to the clipboard. GSpot is portable.
6. Sherlock – The Codec Detective!
A program to give useful information about installed codecs is Sherlock – The Codec Detective! Everything is listed in the single window and you can easily see information about the codec, its associated driver file, version, date, and description. Sherlock is a tiny portable executable file of around 80KB. When you run The Codec Detective it will first scan for installed codecs and list in a window any that appear to have problems.
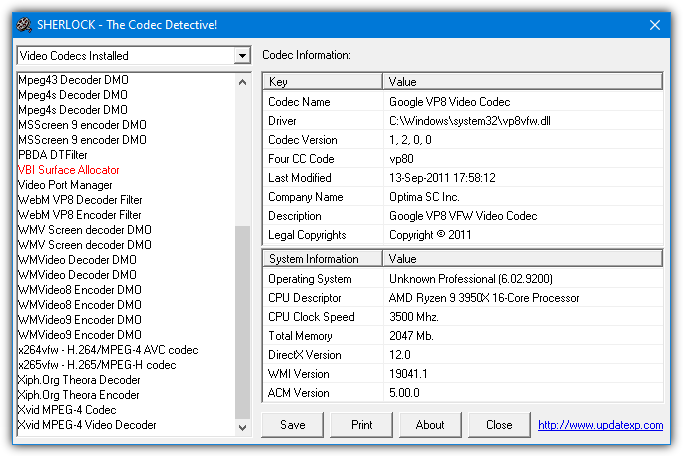
You can easily switch between audio and video codecs by selecting from the drop down in the top left of the window. There is also an option to export the data about all the installed codecs to a handy text file or directly print it out. Do note that in Windows 10 you will probably get an error about the “VBI Surface Allocator”, this can be ignored. Any codecs identified as “broken” will show in red.
Download SHERLOCK – The Codec Detective
7. Codec Information Through Windows Media Player
One way of checking without any additional software is through any version of Windows Media Player. Open Windows Media Player and if you don’t have a toolbar menu visible, right click towards the top of the program to bring up the context menu. Go to Help > “About Windows Media Player”, then click on the Technical Support Information link at the bottom.
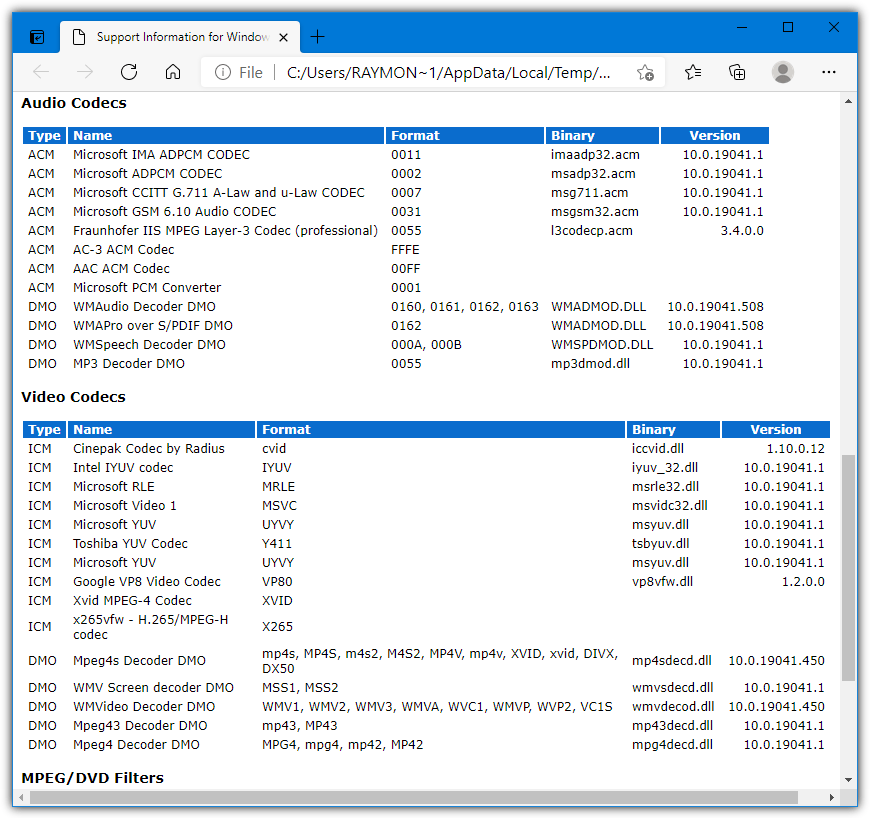
This will open a webpage that lists several bits of information including most installed audio and video codecs (32-bit codecs only). There is also the MSInof32 built in Windows utility which can display codec information. However, it doesn’t display everything installed and isn’t particularly helpful in identifying codecs.
Final Note: Many third party multimedia players like VLC, Media Player Classic – Home Cinema|Black Edition, PotPlayer, and others don’t require external codecs to be installed. They have their own set of software decoders built in. Windows Media Player will be the most common player software that does require external codecs installed on the system.
Also note that most codecs are 32-bit versions, even on a 64-bit Windows. If a 64-bit version of a codec has specifically been installed, you will only see it listed in Nirsoft InstalledCodec (64-bit version or x64 mode) or in the ACM/VFW (x64) window of CodecTweakTool.


User forum
0 messages