Automatically Scan for Viruses When Plugging in a USB Flash

In more recent years, one of the most common ways for a virus to spread itself has been through the autorun.inf file that resides on the root of your removable device such as a USB stick or hard drive. When you insert the device into a computer, the autorun file then executes the program it’s told to which in many cases can be malicious file, and then you have a problem on your hands.
Thankfully in Windows XP and above the Autorun.inf virus issue is now pretty much redundant as the inf file no longer gets executed by default in Windows when it’s inserted and so the malicious file cannot get launched. The problem with removable USB devices is they are so portable that the drive could have been plugged into several other computers before it comes back to you. And with that in mind, there’s always a chance that it could have been infected and other types of malicious files might have been transferred onto it along the way.
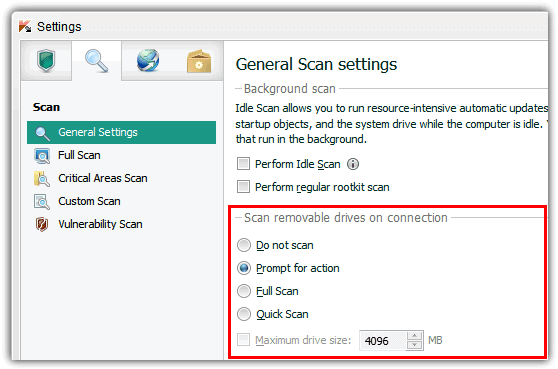
Several Antivirus packages these days will offer to scan USB devices when inserted, but sometimes this option is buried in the settings and not automatically enabled.

Some others don’t offer this function or only scan the Autorun.inf file to see if it has been infected and you would have to run a manual scan yourself which can easily be forgotten. Here we have a way to automatically scan the USB flash drive whenever it is inserted or plugged in to a Windows computer.
USBVirusScan is a small program that will launch any program you provide as a command line parameter each time a USB drive is inserted. As you might guess, the author uses it to start a full virus scan on the inserted USB drive, and named it as such. But the program can actually be used to launch any program, batch file or script you tell it to and isn’t limited to just running security software.
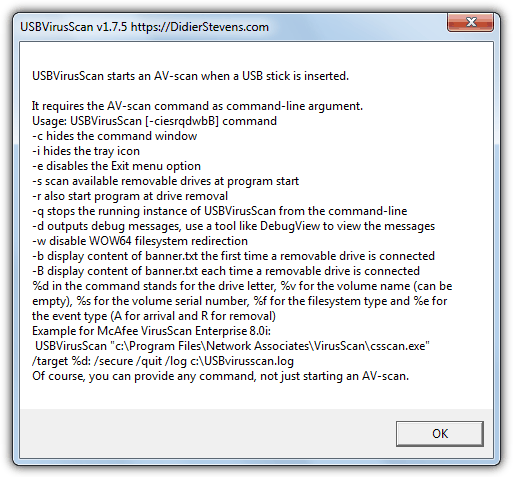
USBVirusScan isn’t really a tool for beginners though because it doesn’t have graphical user interface (GUI). The configuration and launching is done from a batch file called Start.bat and the tool itself only has an About screen that looks like the image below which shows the command line options.

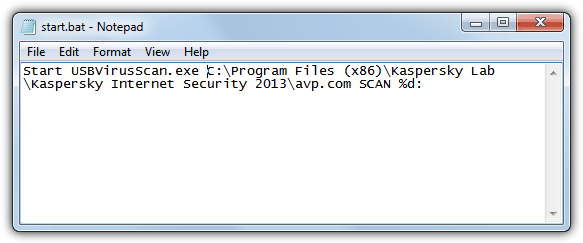
The only thing you need is an Antivirus package installed. If you don’t have one and don’t want to pay for one, have a look at our comprehensive list of free Antivirus software. Then you’ll need to find out the commands that need to be on the line that can perform a scan when you insert a USB drive. Once you have the command line, just edit the Start.bat file in the USBVirusScan folder.
The command line options can be a bit confusing for some users and finding the correct syntax and commands is not always easy because every antivirus software is different. So for your convenience we’ve provided a few command lines for some popular antivirus software. If you’re using a 64-bit Windows, you may need to change the \Program Files\ entries to \Program Files (x86)\ depending on which folder your Antivirus uses. The simplest way to check is to browse and see which folder the Antivirus is in and use the correct one in the batch file.
Place “Start USBVirusScan.exe” without the quotes at the beginning of Start.bat and add one of the commands to the line depending on the Antivirus software package you have. Then simply execute the bat file and the program will sit in the system tray waiting for a USB drive to be inserted. Memory usage is small occupying only 1MB on our Windows 7 64-bit test system, so can easily sit in the background all the time if you come into contact with lots of USB flash drives.

On the next page we’ll show you the command line options required for USBVirusScan in 15 popular antivirus and internet security packages.


User forum
12 messages