4 Ways to Automatically Disable Wireless Network Connection when Local Area Connection is Enabled
4. Create a Scheduled Task to Auto Switch
Using this method relies on your computer’s LAN adapter sending an event to the Windows Event Viewer when it disconnects and reconnects. With this information you can then create tasks to disable or re-enable the Wifi adapter depending on the connection status of the wired connection. This does not work on Windows XP because it doesn’t have the option to trigger a task when a specific event is logged.
1. Go to Control Panel -> Administrative Tools -> Event Viewer. When Event Viewer is open, go to Windows Logs -> System.
2. Disconnect and reconnect your Ethernet cable a few times to generate some events. Press F5 to refresh the window and click on the newest events, hopefully you will find a “Port is up”, “link up” or similar description in the lower General tab to indicate the LAN has connected, and another one when the LAN was disconnected.
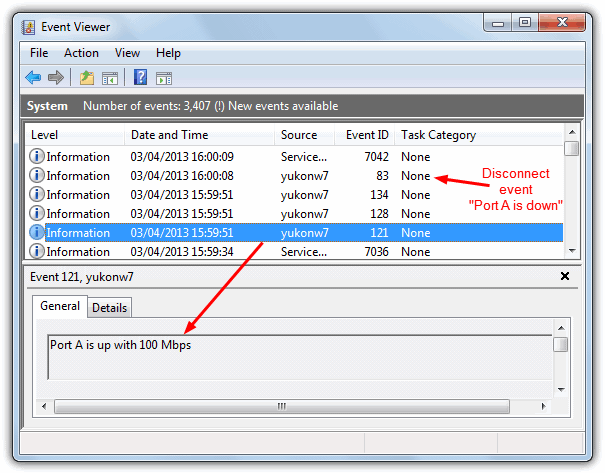
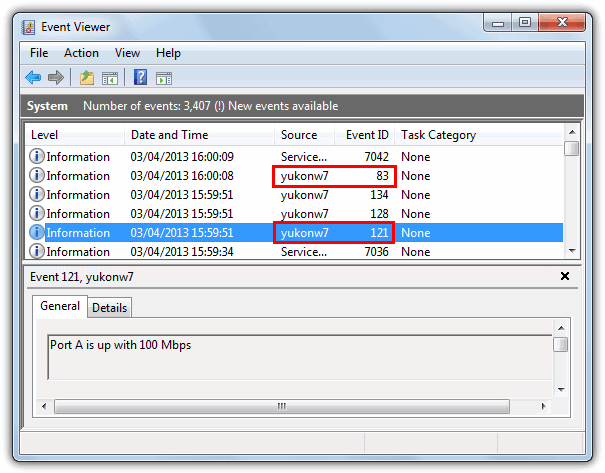
3. Make a note of the name in the Source column and the Event ID for the connect and disconnect events you found. On our Dell laptop we got a connect Event ID of 121 and disconnect of 83 with the Source name of “yukonw7”, yours will likely be different though. If you can only find a Source event for Services Control Manager and not one that looks like the LAN adapter name, this method will not work because an event needs to be generated by the Ethernet adapter itself.
4. Go to Control Panel -> Administrative Tools -> Task Scheduler, then click on Task Scheduler Library -> Create Basic Task.
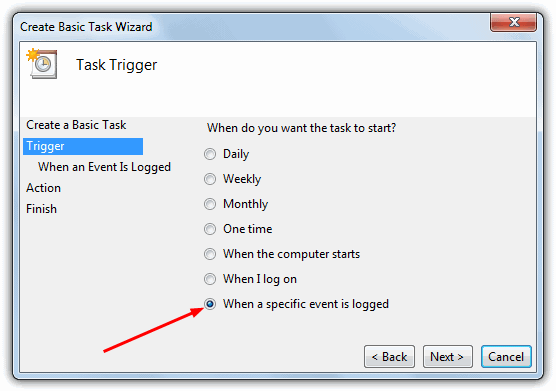
5. Give the Task a name, such as “Undock Laptop” or “Switch to Wifi” etc. Click Next, select “When a specific event is logged”, and click Next again.
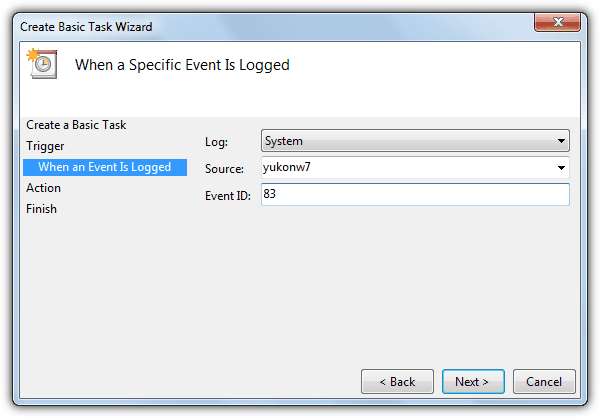
6. In the Log drop down select System, find the source name from step 3 in the drop down list or type it in, then enter the Event ID for the disconnect event. Click Next, make sure Start a program is selected, click Next again.
7. In the Program/script box enter C:\Windows\System32\Netsh.exe or browse for it. Enter the following into the Add arguments box:
interface set interface “Wireless Network Connection” enable
This is assuming your WiFi connection is called “Wireless Network Connection”. To check go to Control Panel -> Network and Sharing Center -> Change adapter settings, and change the name if it’s different. Click Next, review the task making sure it’s correct, then click Finish.
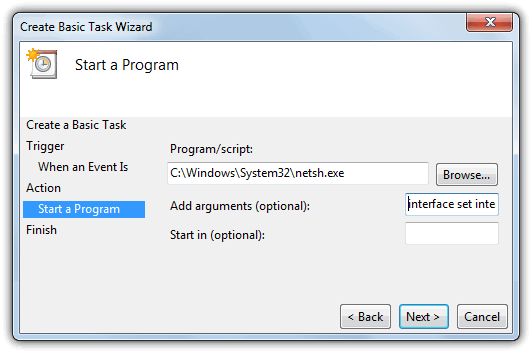
8. Now you have a task that enables the WiFi on a LAN disconnect, you obviously have to do the opposite to disable the WiFi on LAN reconnect. Repeat steps 4 – 7 again, but change the name in step 5 to “Dock Laptop” or “Switch to LAN” etc, enter the connect Event ID in step 6, and on the argument line in step 7, swap the word enable for disable.
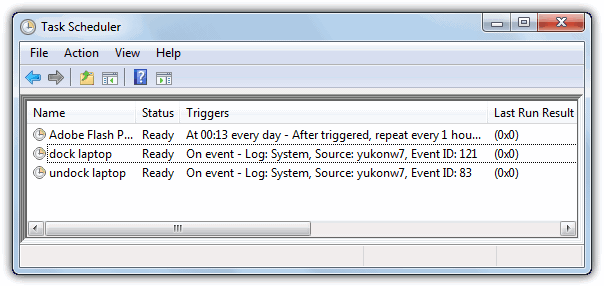
Open the Network Connections window and you should notice the wireless connection disable itself when the Ethernet cable is inserted and vice versa. This worked flawlessly on our Dell laptops, but didn’t work on an older MSI laptop because it wouldn’t generate a specific event on connecting/disconnecting the Ethernet cable.
is thare anywere i need to put the dat file on windows xp like system32 or something?
whats the dam password for the zip file
Apologies, we missed the password for this one. It’s now in its normal place on the download page.
Here is the simplest way to solve this issue.
Press F2 on boot to get into the Bios. Go to Power Management Select Wireless Radio Control Enable Control WLAN radio and Control WWAN radio
If Enabled, this feature will sense the connection of the system to a wired network and subsequently disable the selected wireless radios (WLAN and/or WWAN). Upon disconnection from the wired network, the selected wireless radios will be re-enabled.
The netswitch.vbs is working properly, but what, if I would like to deploy it through the GPO and client computers has diffrent names of connections?
The task is a great idea, but for us it doesn’t work well in practice. We once almost pushed it out, actually, but ran into an issue with some of our test users.
If they shut down their computers before they disconnect the Ethernet cable or un-dock, it does not register the event that causes the wireless to enable itself. When they get to a new site, or home, their wireless is still disabled, and it causes confusion (even if you have gone over this with the user). Conversely, if they dock their laptop or connect the Ethernet cable before they boot up (which is what they normally do), it won’t register the event to disable the wireless. So this is a great idea, but in most cases, for us anyway, it doesn’t work as intended.
how do you reverse the netswitch.vbs to get it back to the default setting prior to running the script?
Sorry not a great VB person
Thanks you so much dude….
Windows 10 Pro you need to look for the events in Event Viewer under:
Applications and Services Logs -> Microsoft -> Windows -> Network Profile -> Operational
Will likely be event 10000 for Connect and 10001 for Disconnect respectively
This will also happen when the wireless connects and disconnect too, so this doesn’t work to watch
Use
Powershell
for the program/script and
netsh.exe interface set interface “Wireless Network Connection” enabled
for the arguments
Windows 7 and above allows the task to be run “hidden” and with the “highest privileges”
Add one more task, triggered by startup, to re-enable Wifi in case wifi was disabled, the system shutdown and then the network cable removed.
sorry, my fault. No problem right now, thanks again…
Thanks for the info but I have a problem with .vbs solution. I have created a shortcut of .vbs file and also added the “Local Area Connection” “Wireless Network Connection” arguments in the Target box. But when I restart the computer it gives an error => “Error – Could not find the adapter “Wireless”. Is this happening because the script is working before the Wifi link is up? When I do it manually, it is working. What do I have to do to solve this problem?
Thank you…
The Scheduled Task is a great idea, but it won’t work unless you have admin privileges. Netsh will not execute the necessary command without admin: support.microsoft.com/kb/929858
You need to run this under the SYSTEM account. Once you create the task, edit the task and make it run under the SYSTEM account. Also, make sure to uncheck the option to not run the script when running on battery mode. Works flawlessly with these changes.
thanks ray….