How to Check Windows Boot Performance: See What's Slowing Down Startup

I’ve definitely had those moments where I turn on my computer and it feels like it takes ages to start. Checking my boot time helped me figure out what was slowing things down.
It’s a simple step that can make a big difference in getting my system running faster. Let’s talk about how to check it and why it’s worth the time.
Windows Performance Toolkit
The Windows Performance Toolkit (WPT) is used to analyze issues like slow boots, system lag, and resource usage. It’s a powerful tool, but better suited for advanced users. Now included in the Windows ADK for Windows 10 and 11, it’s more user-friendly than older versions.
Windows Performance Toolkit for Windows 10 and 11
The Windows Performance Toolkit (WPT) is now included as part of the Windows Assessment and Deployment Kit (ADK) for Windows 10 and Windows 11. This modernized version of WPT makes performance analysis and troubleshooting more accessible compared to previous SDK-based implementations.
Installation and Setup:
- Download the Windows ADK:
Visit the Windows ADK download page on Microsoft’s official website. The ADK supports both Windows 10 and Windows 11, ensuring you get the latest tools and updates. - Run the Installer:
During installation, you’ll see a selection screen for various components. For WPT, simply select the Windows Performance Toolkit. This ensures you install only the parts you need without extra overhead. - Accessing WPT Tools:
After installation, you can launch:- Windows Performance Recorder (WPR): Use this tool to capture detailed trace logs of your system’s boot process, application launches, and overall performance events.
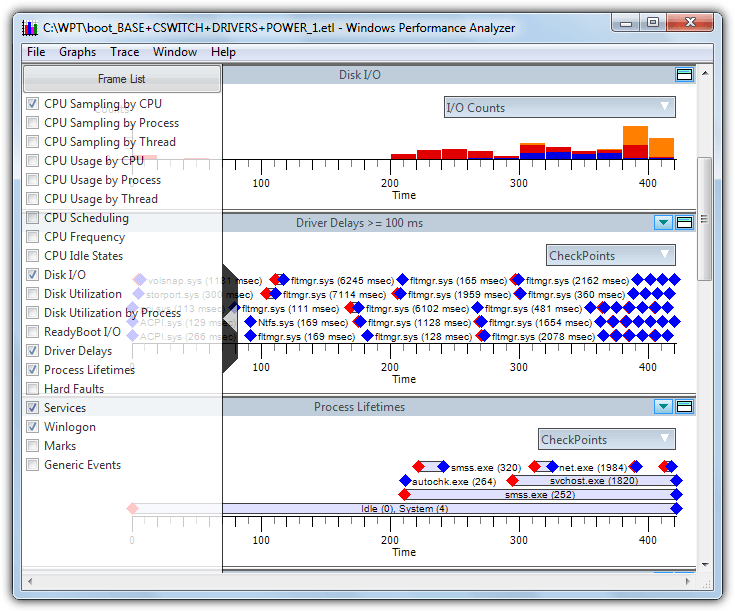
- Windows Performance Analyzer (WPA): Open and analyze the trace logs with an intuitive interface that displays various performance metrics and graphs. Both tools can be found in the Start menu once installed.
- Documentation and Learning Resources:
If you’re new to performance analysis, check out the Windows Performance Toolkit documentation for detailed guides, practical examples, and troubleshooting tips. There’s also a useful Getting Started with WPT guide that walks you through the process step-by-step.
Windows Software Development Kit (SDK) for Windows 8.1
The first thing to note about The Windows 8.1 SDK is that if you intend to use this on Windows 7, Microsoft .NET framework 4.5 is required. If you don’t already have it the setup file will install .NET 4.5 automatically.
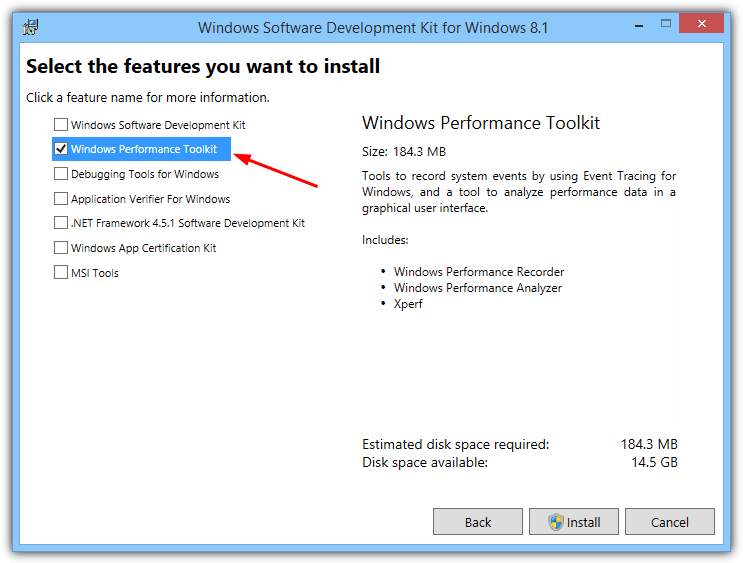
After you download the Windows SDK for Windows 8.1, run the installer and at the options screen select only the “Windows Performance Toolkit” and continue with the install.
Windows Software Development Kit (SDK) for Windows 7
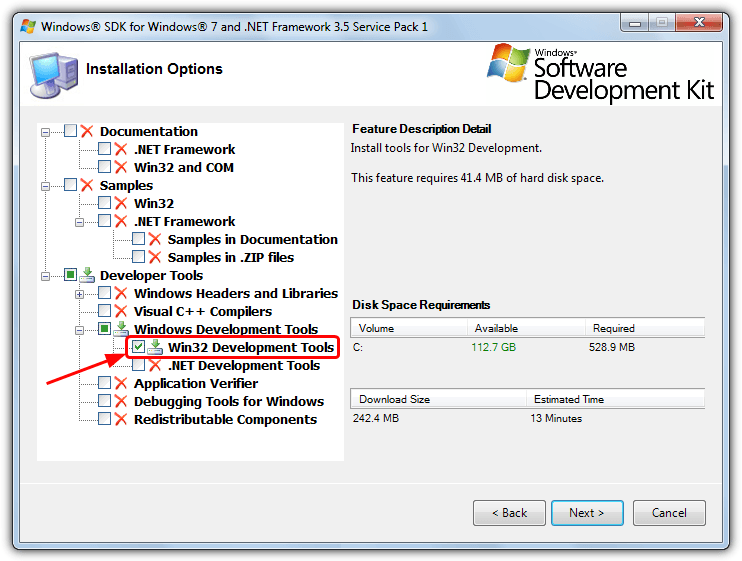
To get the Microsoft Performance Toolkit for Windows 7, Vista and XP, you can download the Windows 7 SDK installer and during installation only select the “Win32 Development Tools” from the list of programs, then continue to install the Development Tools.
After installation, go to C:\Program Files\Microsoft SDKs\Windows\v7.0\bin and look for the following files:
wpt_x64.msi – To be used on 64-bit Windows Vista/7/Server 2008
wpt_x86.msi – To be used on 32-bit XP/Vista/7/Server 2008
Install the version that matches the architecture of your operating system. For convenience we have uploaded the 32-bit and 64-bit installers for WPT so you can use them without downloading the Win32 Development Tools.
Download wpt_x86.msi for Windows 7 32 bit
Download wpt_x64.msi for Windows 7 64 bit
WPT and Windows XP
The SDK for Windows 7 as a whole is compatible with XP, but the Performance Toolkit is only partly compatible and requires extra steps in order to collect the trace data. XP is able to create the boot trace but it cannot interpret and display the results, for that you will need a computer with Vista or Windows 7 and WPT installed.
You also need Vista or 7 to create a trace because a number of important files do not get installed when you install WPT in XP. Copy the folder “\Program Files\Microsoft Windows Performance Toolkit” from a Vista or 7 computer to Program Files in XP. If you don’t currently have a Vista or 7 computer to hand, download the zipped Microsoft Windows Performance Toolkit folder below and extract to XP’s Program Files.
Download Windows_Performance_Toolkit.zip
Once you have traced the boot, copy the contents of C:\WPT to a Vista or 7 computer and double click the .etl file. An MSDN article on XP compatibility with Xperf is available for further reading.
Running Windows Performance Toolkit Commands
To start a trace after installing WPT, open Command Prompt as an administrator and use one of these commands:
- Boot trace:
xbootmgr -trace boot -traceFlags BASE+CSWITCH+DRIVERS+POWER -resultPath C:\WPT - Shutdown trace:
xbootmgr -trace shutdown -noPrepReboot -traceFlags BASE+CSWITCH+DRIVERS+POWER -resultPath C:\WPT - Standby+Resume:
xbootmgr -trace standby -traceFlags BASE+CSWITCH+DRIVERS+POWER -resultPath C:\WPT - Hibernate+Resume:
xbootmgr -trace hibernate -traceFlags BASE+CSWITCH+DRIVERS+POWER -resultPath C:\WPT
The results are saved to the folder you specify, and the Performance Analyzer will automatically open. If not, open the .etl file manually.
Using WPT to Improve Boot Times
To optimize boot speed, use the following command:-trace boot -prepSystem -verboseReadyBoot
This will restart your PC multiple times and should speed up boot times. Avoid using this on SSDs, as defragmentation doesn’t improve performance there.
Other Windows Boot Analysis Tools
While the Windows Performance Toolkit is detailed and powerful, there are simpler tools available for analyzing boot performance:
WinBootInfo
WinBootInfo is a shareware tool that logs driver, service, and executable load times along with CPU and I/O activity. Although no longer sold or updated since the company behind it disappeared in 2009, a fully functional 30-day trial remains available for Windows 7, 8.1, XP, and Vista.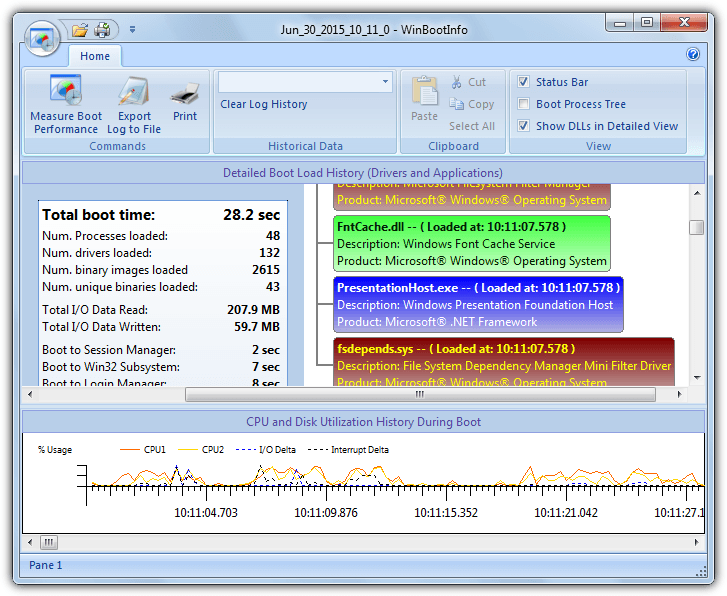
Download WinBootInfo (trial)
BootLog XP
BootLog XP is an easy-to-read tool for Windows XP users that provides clear boot process logs. Although last updated in 2009, its 30-day trial is sufficient for collecting essential boot data if you find Bootvis too complex.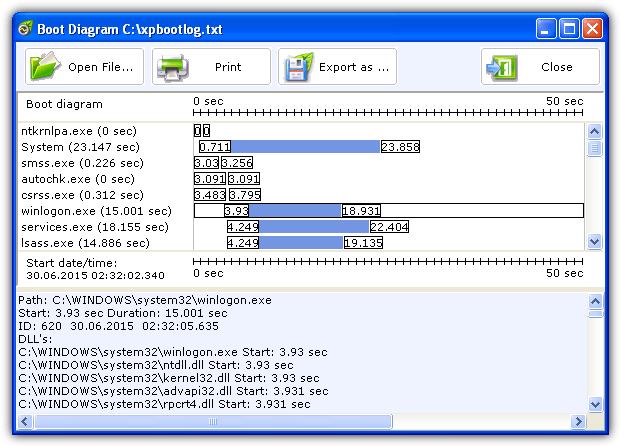
Download BootLog XP
Soluto
Originally a dedicated startup monitor, Soluto now offers a boot time viewer within its suite, although it has shifted focus to smartphone management and diagnostics. After installing and creating an account, simply reboot your computer to log boot times. Although not as detailed as WPT, its user-friendly interface displays boot times for startup executables. Be aware, however, that Soluto may slow down boot times while installed.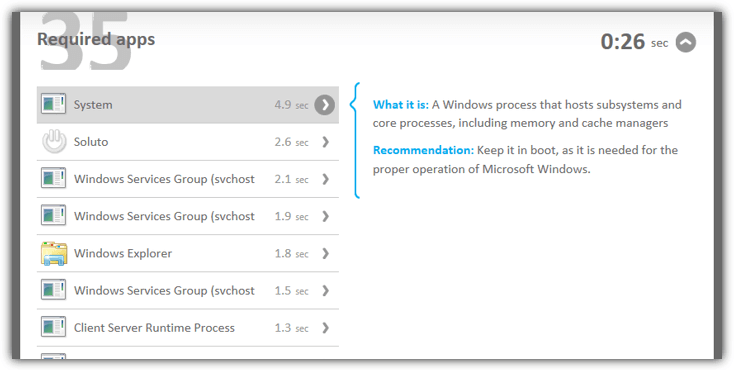
Visit Soluto Boot Time
Conclusion: Boost Your Windows Performance
Analyzing and improving your Windows startup performance doesn’t have to be complex. Whether you’re using the advanced Windows Performance Toolkit or simpler tools like WinBootInfo, BootLog XP, or Soluto, there are various options to suit your needs. However, for lasting improvements, consider tackling common performance bottlenecks directly.
For instance, removing unnecessary startup entries can make a noticeable difference in boot times. If you’re looking to optimize your startup further, learn how to remove unnecessary startup entries to boot Windows faster. Similarly, if you’re dealing with a virus or spyware affecting your system’s performance, it’s crucial to effectively remove Trojan viruses and spyware from Windows startup.
Additionally, cleaning out unused and temporary files can free up system resources and improve speed. Running Windows faster by removing unused and temporary files is a great step toward a smoother experience. If you’re keen to dive deeper into Windows performance analysis, check out how the Microsoft Windows Performance Toolkit can give you detailed insights into your system’s performance.
By integrating these strategies, you’ll be well on your way to a faster, more efficient Windows experience!


User forum
9 messages