Windows Features CMD: How to Turn Windows Features On or Off via Command Line
- Quickly enable/disable Windows features via Control Panel.
- Use DISM for advanced feature management.
- PowerShell offers flexible control (Windows 8.1+).
- Automate changes with commands & scripts.
Multiple ways for enabling and disabling Windows features
You can enable or disable Windows features using Control Panel, DISM, or PowerShell. Control Panel is the easiest method, while DISM and PowerShell provide advanced options, especially for automation.
These tools help customize Windows by adding or removing optional components like Hyper-V, IIS, or .NET Framework.
Check the steps below to learn how to do it properly.
Accessing Windows Features via Control Panel
You can view available Windows features by navigating to Control Panel ? Programs and Features and selecting “Turn Windows features on or off” or by typing OptionalFeatures into the Start menu. This interface displays features such as .NET Framework, Internet Explorer, Hyper-V, Telnet, Windows Media Player, and more.
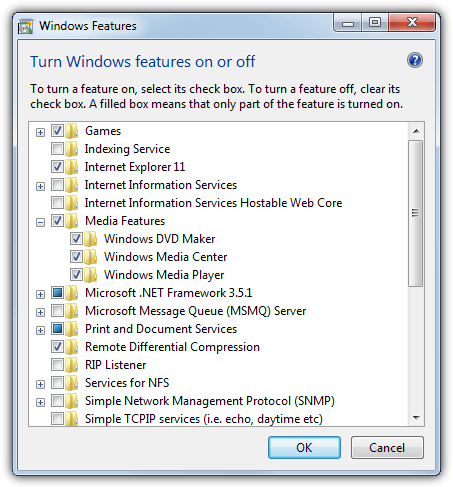
If a feature is needed, simply check the box and click OK to install it; unchecking removes the feature. Fewer installed features can help reduce potential issues.
Managing Windows Features via Command Prompt (DISM)
Overview of DISM
DISM (Deployment Image Servicing and Management) is a command-line tool available in Windows 7, 8.1, and 10. It lets you view, enable, or disable Windows features and is also used for driver or update injections into WIM images.
- Step 1: Open a Command Prompt with administrative privileges (type cmd, then press Ctrl+Shift+Enter).
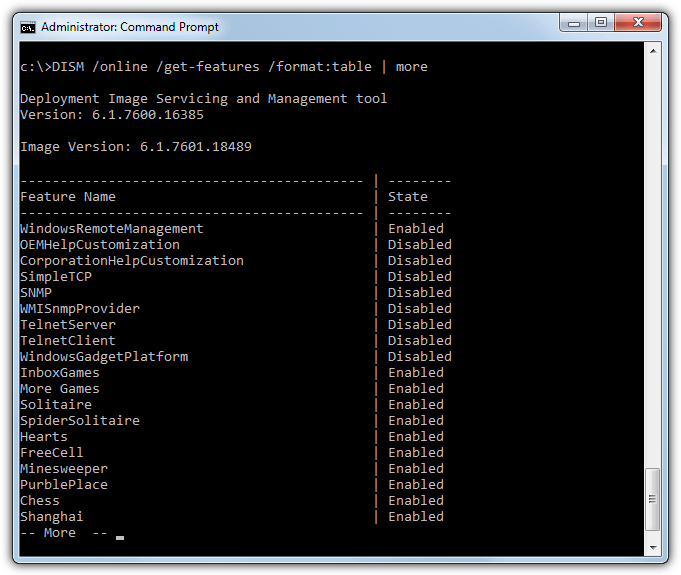
- Step 2: List all available features with:bashCopyEdit
DISM /online /get-features /format:table | moreThis command displays a paginated, table-formatted list of features.
Filtering and Detailed Information
To filter the list to only show enabled or disabled features, modify the command:
bashCopyEditDISM /online /get-features /format:table | find "Enabled" | more
DISM /online /get-features /format:table | find "Disabled" | more
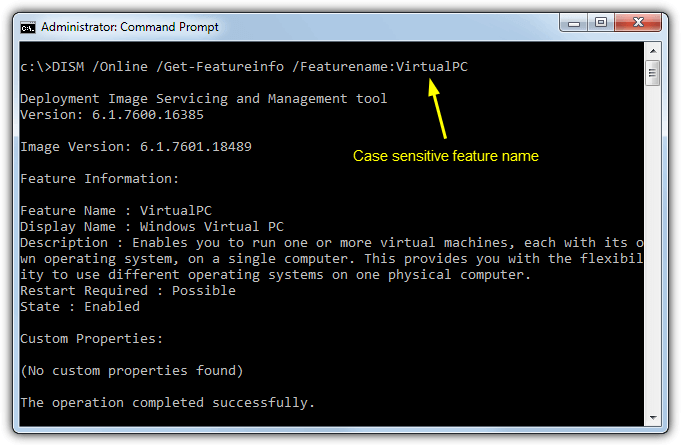
For detailed information about a specific feature:
bashCopyEditDISM /online /get-featureinfo /featurename:[feature name]
Replace [feature name] with the exact, case-sensitive name as displayed.
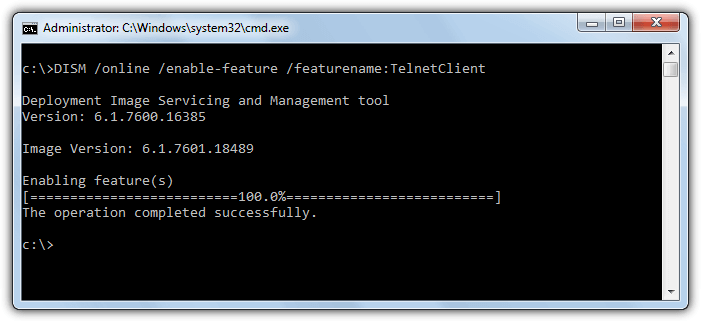
Enabling and Disabling Features with DISM
Enable or disable features using these commands:
bashCopyEditDISM /online /enable-feature /featurename:[feature name]
DISM /online /disable-feature /featurename:[feature name]
You can append multiple /FeatureName:[feature name] arguments on the same line to modify several features at once. For more technical details, refer to the Microsoft Technet reference.
Managing Windows Features via PowerShell
PowerShell Optional Features in Windows 8.1 and 10
PowerShell provides integrated cmdlets to manage Windows features. Run PowerShell as an administrator for these commands to work.
- View Features:arduinoCopyEdit
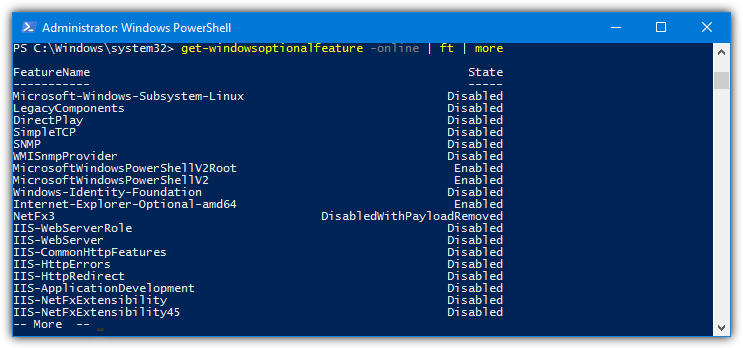
get-windowsoptionalfeature -online | ft | moreThe -online parameter targets the local system; ft formats the output as a table.
- Filter by State:sqlCopyEdit
get-windowsoptionalfeature -online | where state -like disabled* | ft | more get-windowsoptionalfeature -online | where state -like enabled* | ft | more - Detailed Information:pgsqlCopyEdit
get-windowsoptionalfeature -online -featurename [feature name]Wildcards (e.g.,*media*) work for listing multiple related features. - Enable/Disable Features:pgsqlCopyEdit
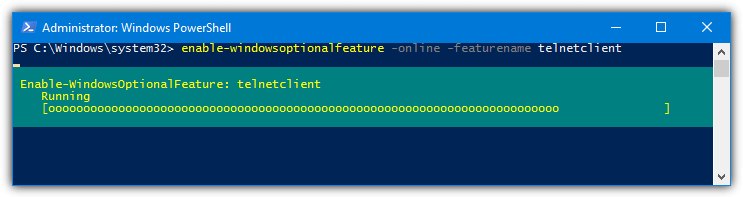
enable-windowsoptionalfeature -online -featureName [feature name] -all disable-windowsoptionalfeature -online -featureName [feature name]The -all flag automatically installs any prerequisite features.
Example: To enable all Hyper-V features without rebooting:
pgsqlCopyEditget-windowsoptionalfeature -online -featurename *hyper-v* | enable-windowsoptionalfeature -online -norestart
PowerShell Optional Features in Windows 7
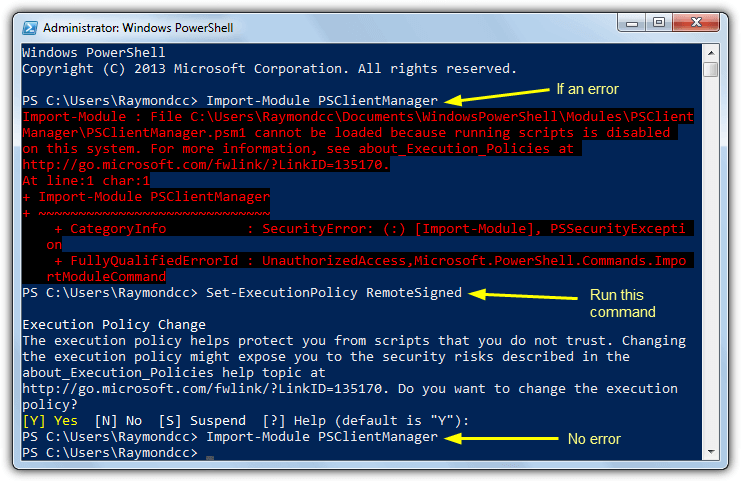
Windows 7’s PowerShell does not natively support modifying optional features. To add this capability, download and install the PSClientManager module from Codeplex.
- Download and Install PSClientManager:
Download PSClientManager - Run the Following Commands (if needed):mathematicaCopyEdit
Set-ExecutionPolicy RemoteSigned Import-Module PSClientManager - Managing Features:
- View Features:sqlCopyEdit
Get-ClientFeature | more - Filter Features:vbnetCopyEdit
Get-ClientFeature -name *string* Get-ClientFeature -state [disabled/enabled] | more - Enable/Disable Features:pgsqlCopyEdit
Add-ClientFeature -Name [feature name] Remove-ClientFeature -Name [feature name]
- View Features:sqlCopyEdit
Note: Feature names are case and space sensitive in PSClientManager. Some commands like Get-ClientFeatureInfo may not work reliably.
Conclusion
Managing Windows features can be done easily through the Control Panel for basic needs.
For advanced users, DISM and PowerShell offer powerful command-line options to view, enable, and disable features—ideal for automation or remote administration.
Learn how to detect non-Windows services, or explore how to enable and access disabled buttons and checkboxes.
For task management tips, read about permanently setting process priority in Task Manager or batch terminating system services and processes.
If quicker file operations interest you, check out this collection of portable file managers.

Improve this guide

User forum
10 messages